
Bivasoul Feature
Order Management: Optimizing the Order Management Process for Print‑On‑Demand
Nov
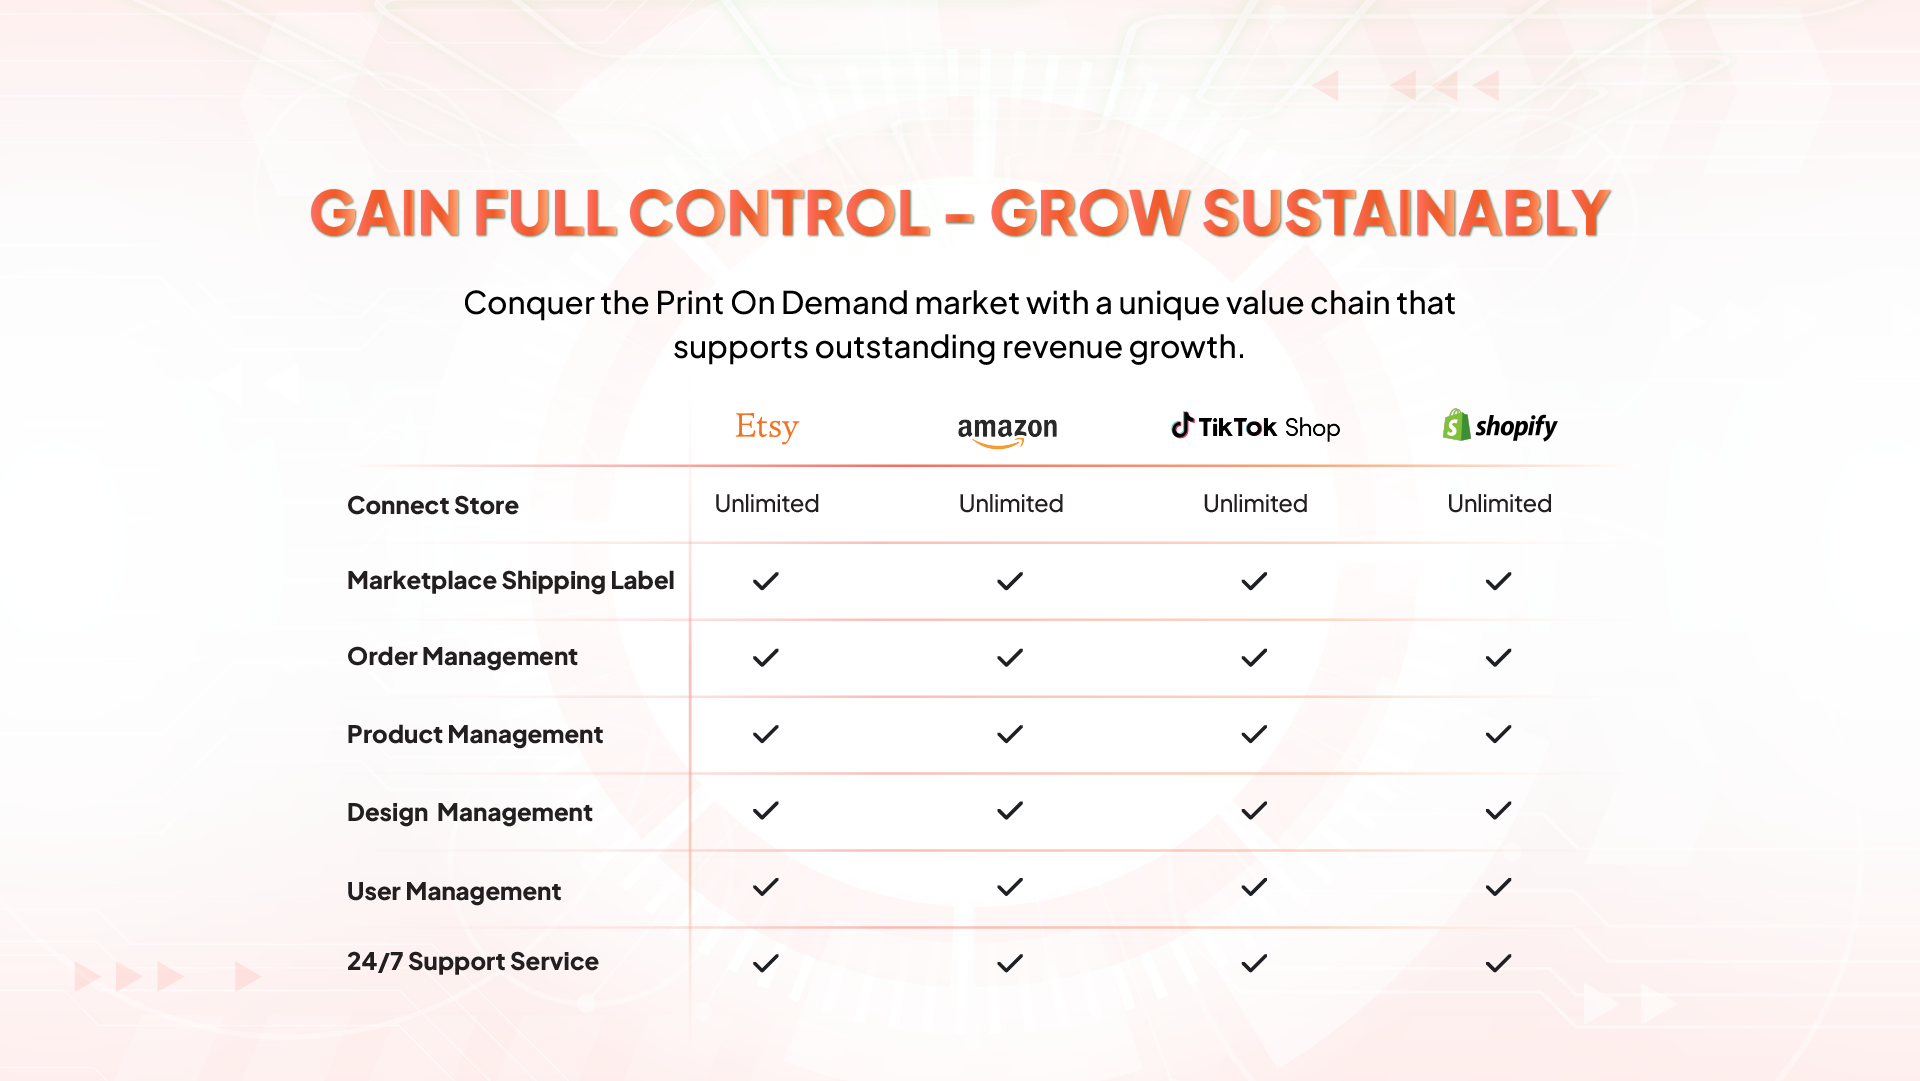
Order Management is a feature in Bivasoul that connects POD merchants (sellers) with top print‑providers (suppliers), enabling a more diverse product catalog and flexible supplier options aligned with sellers’ budget and business goals.
Connect Store
Connect Store: Guideline Here
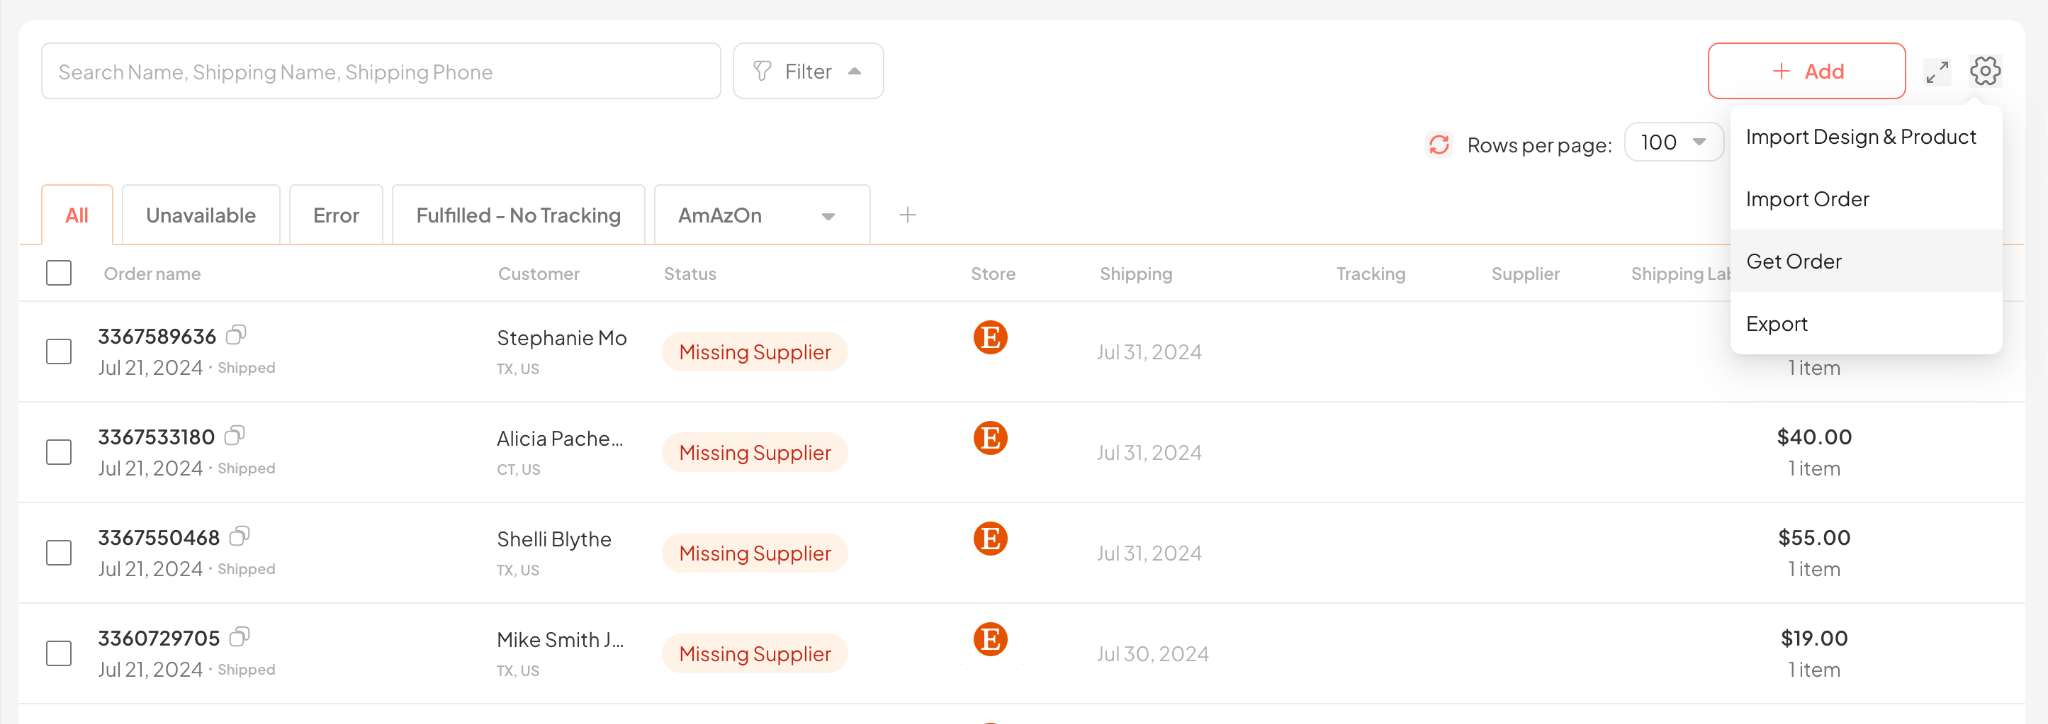
1. Get Order
“Get Order” is a function that helps users retrieve orders into the system at the desired time.
Go to the Order section and select Get Order.
Select the store from which you want to retrieve orders.
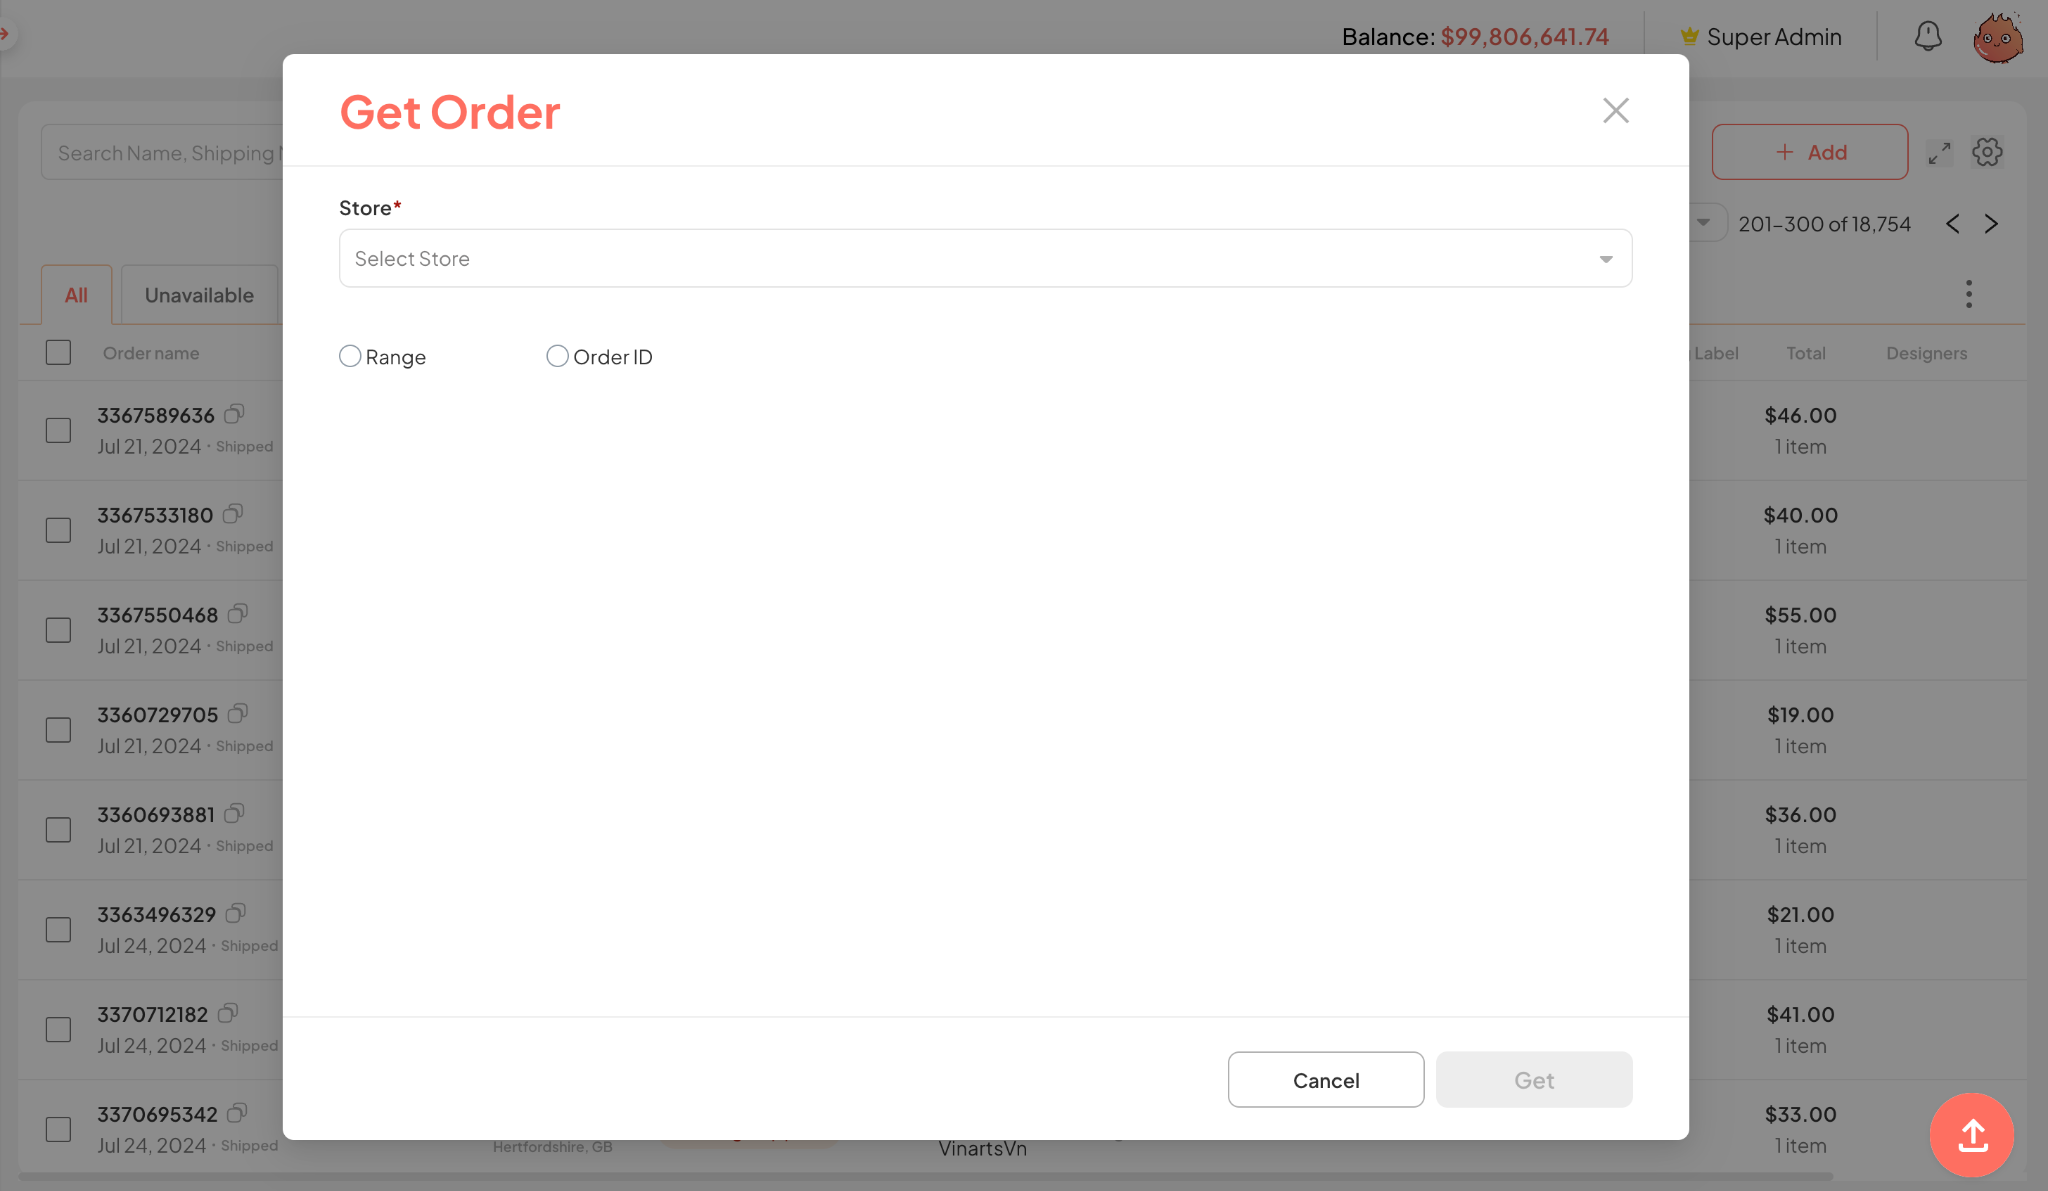
In Bivasoul, manual order retrieval (get order manual) can be done in 2 main ways:
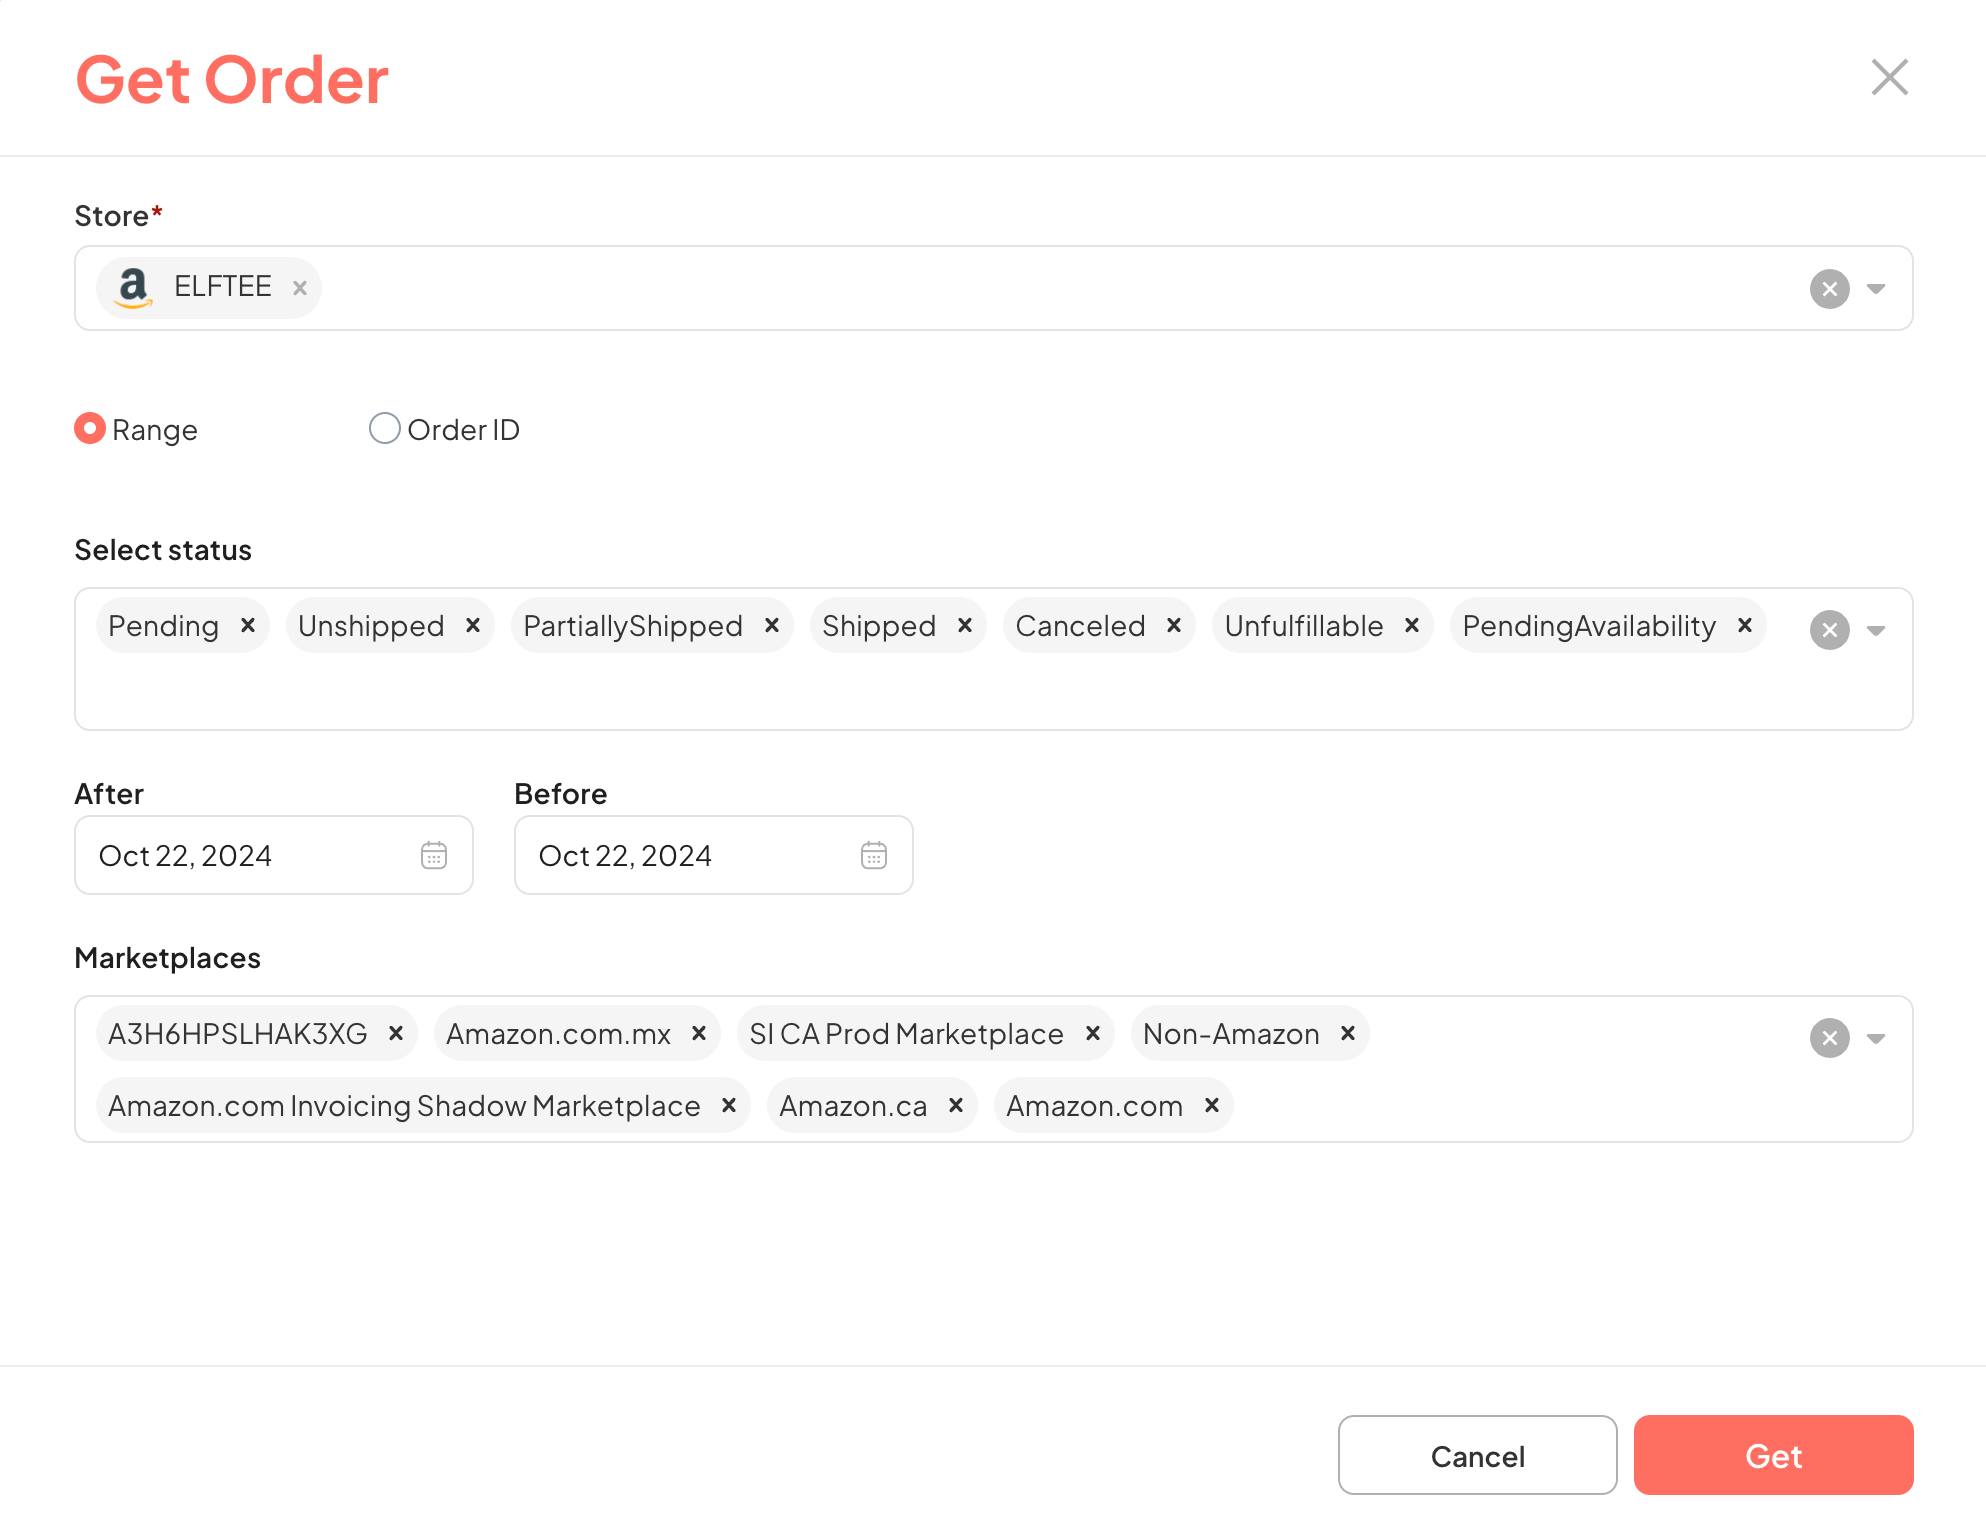
Method 1: Manual Order Retrieval by Time Range
- When to use: Retrieve orders within a specific time range.
- Purpose: Suitable for managing bulk orders, analyzing trends, or updating orders daily, weekly, or monthly.
- Automatically fills in the following fields by default:
- Select Store: Select the store to Get orders from.
- Select status: Select the status of the order to Get (should select all).
- Last Updated Date after, Last Updated Date before: Time range to Get orders.
- Marketplaces: Select the marketplace to Get orders from (can select all).
Click the Get button, and the retrieved orders will be in the Order section.
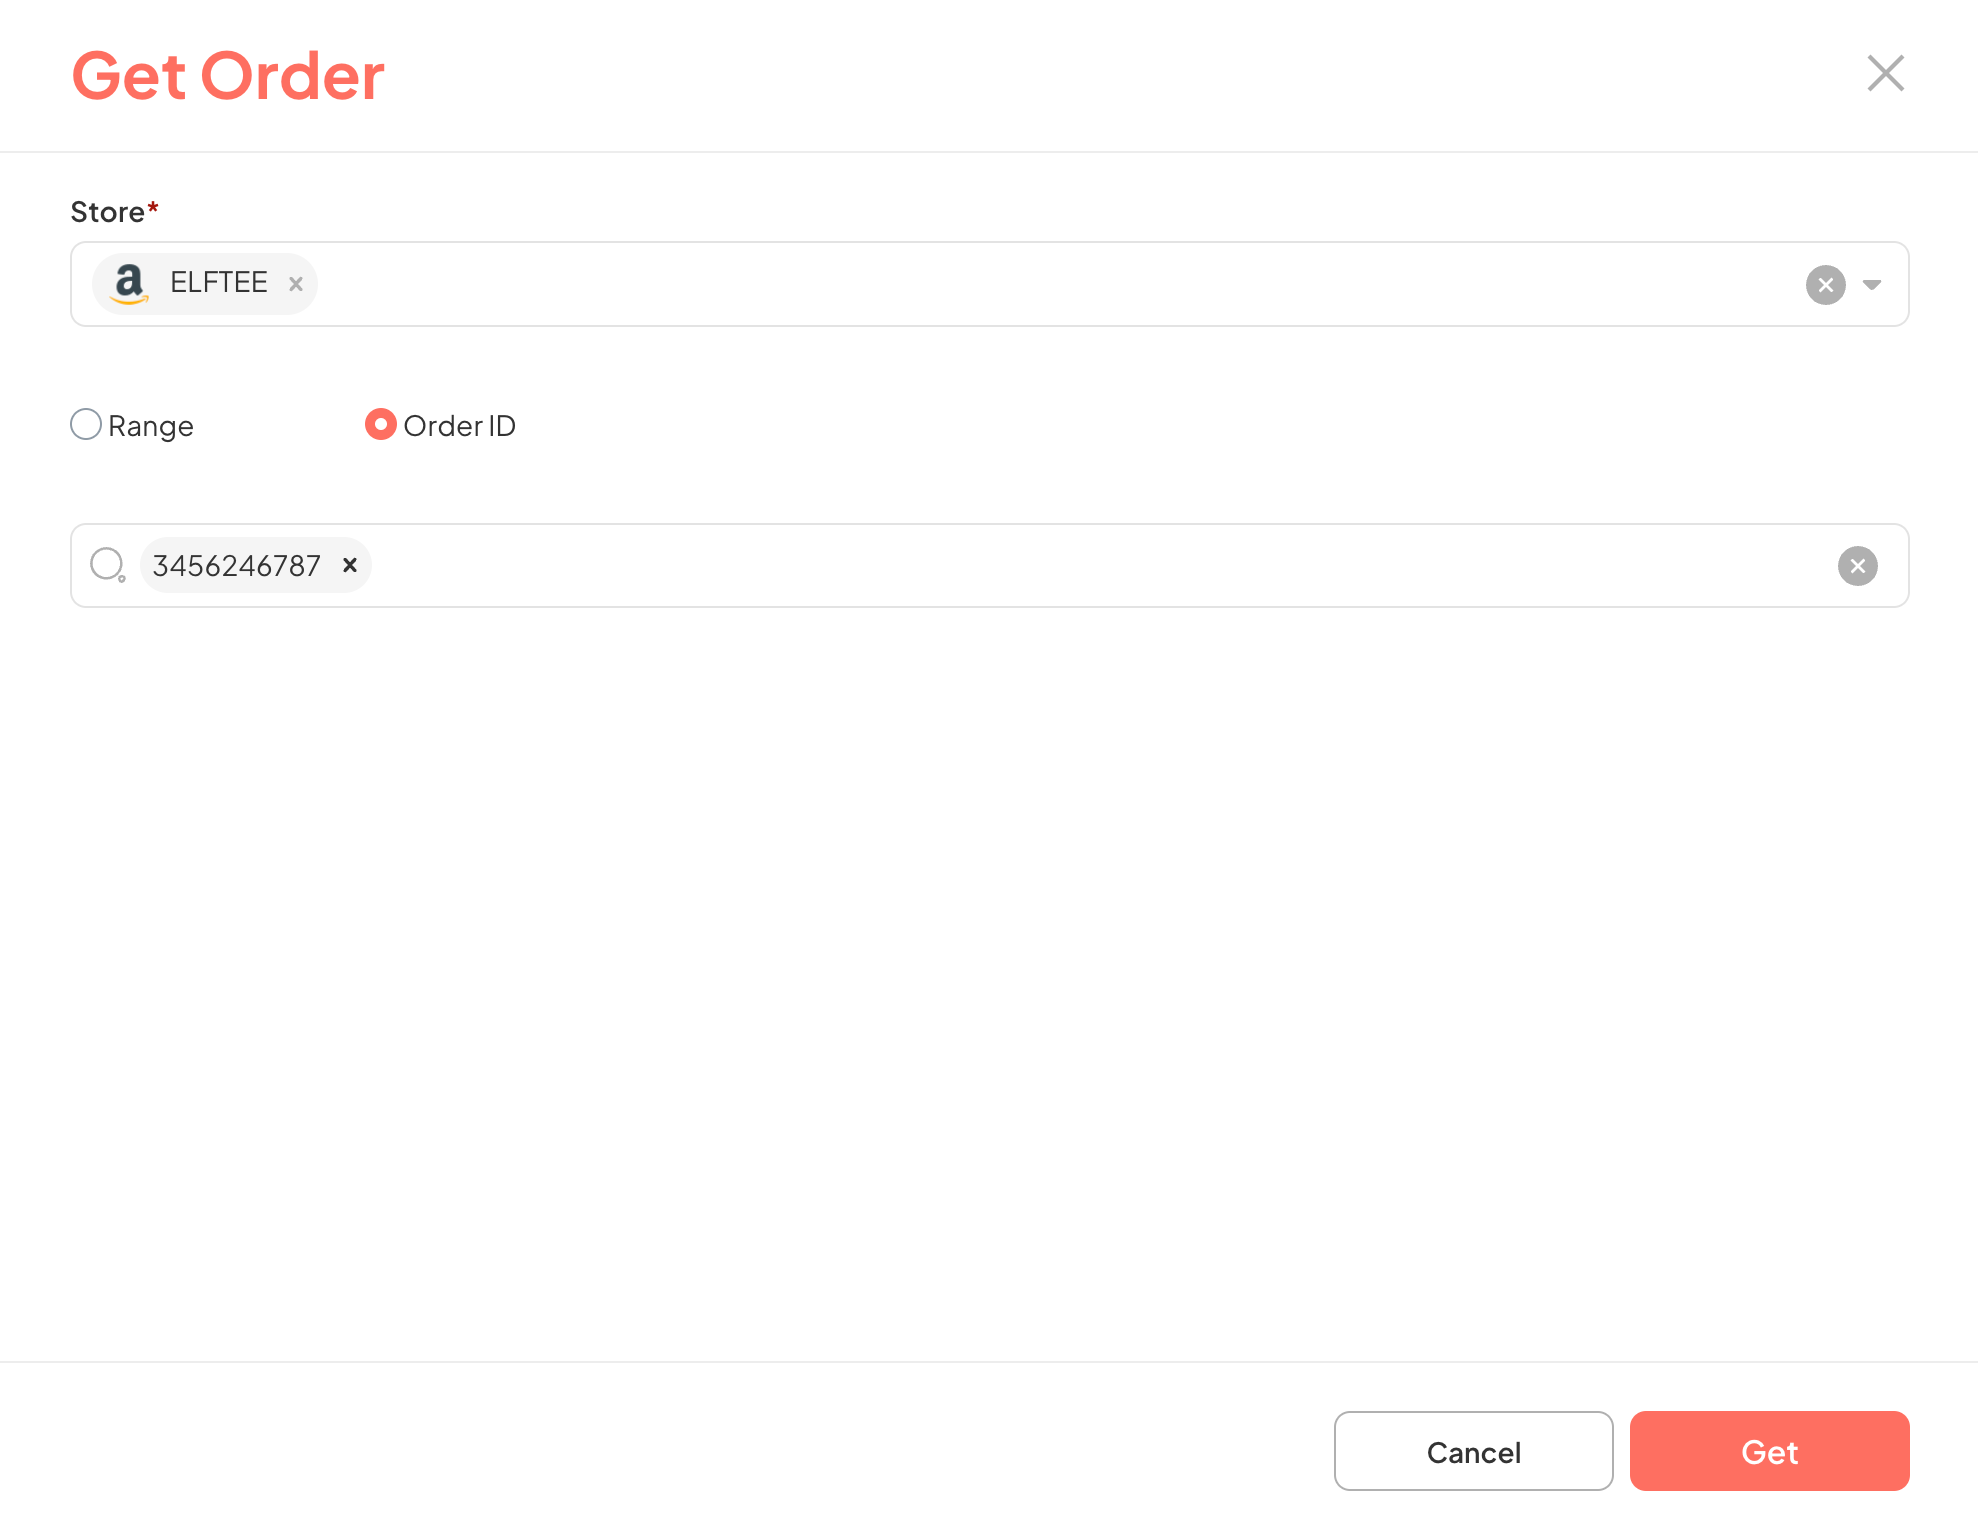
Method 2: Manual Order Retrieval by Order ID
- When to use: Retrieve a specific order by ID.
- Purpose: Troubleshooting, verifying orders, or checking details of a specific order.
Enter the Order ID in the search bar:
- Order ID: Specific order code.
Click the Get button, and the retrieved orders will be in the Order section.
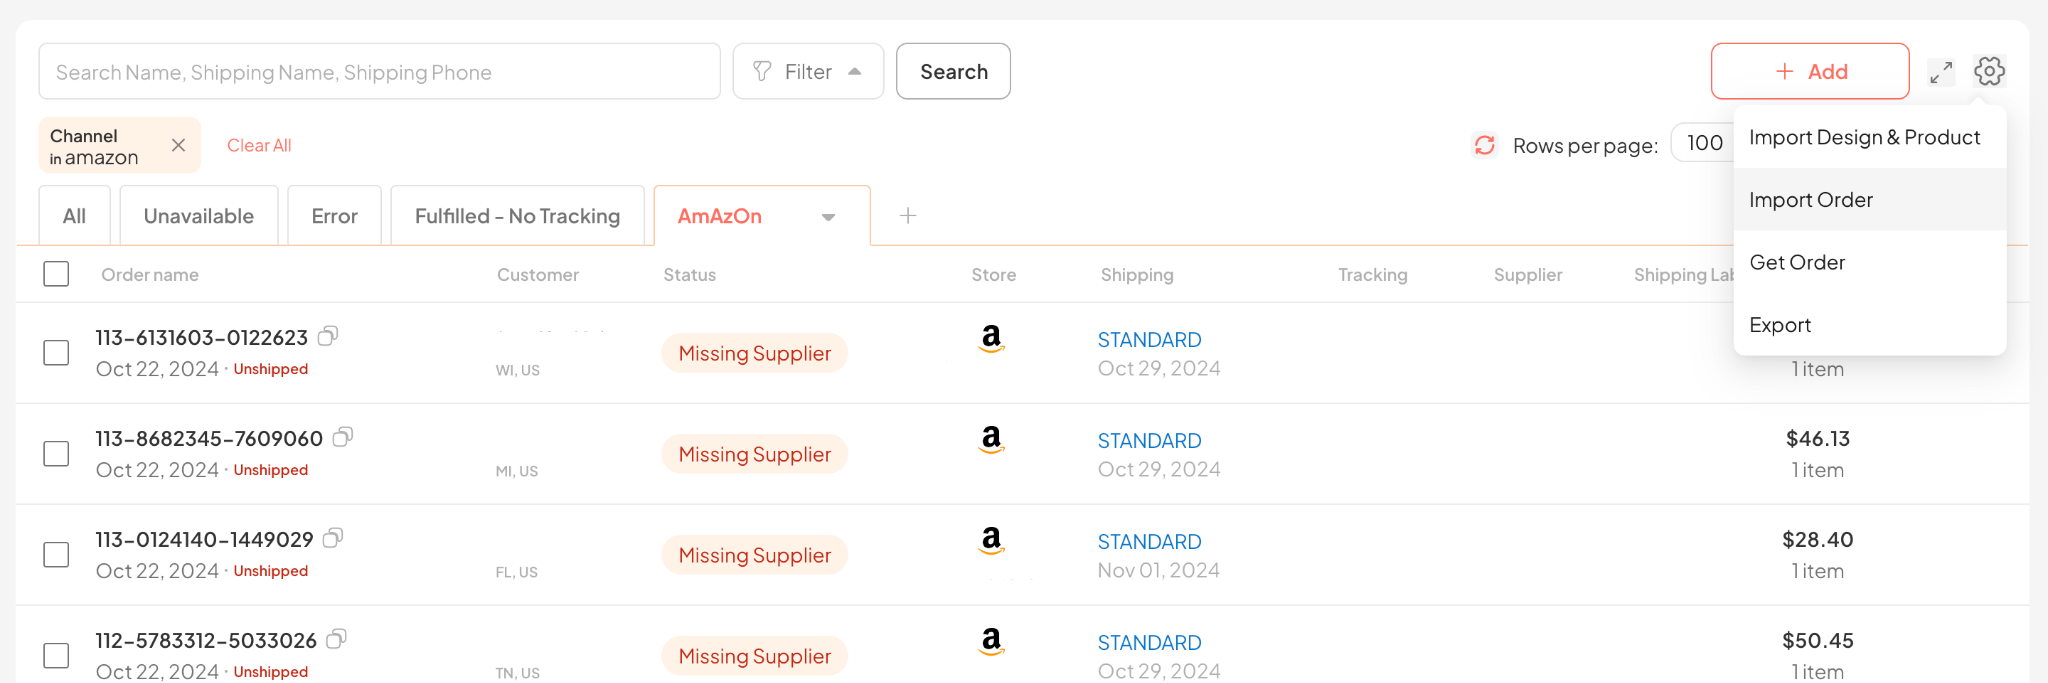
2. How to Import Orders into the System
Step 1: Click the Setting icon in the top right corner of the screen – Select Import Order
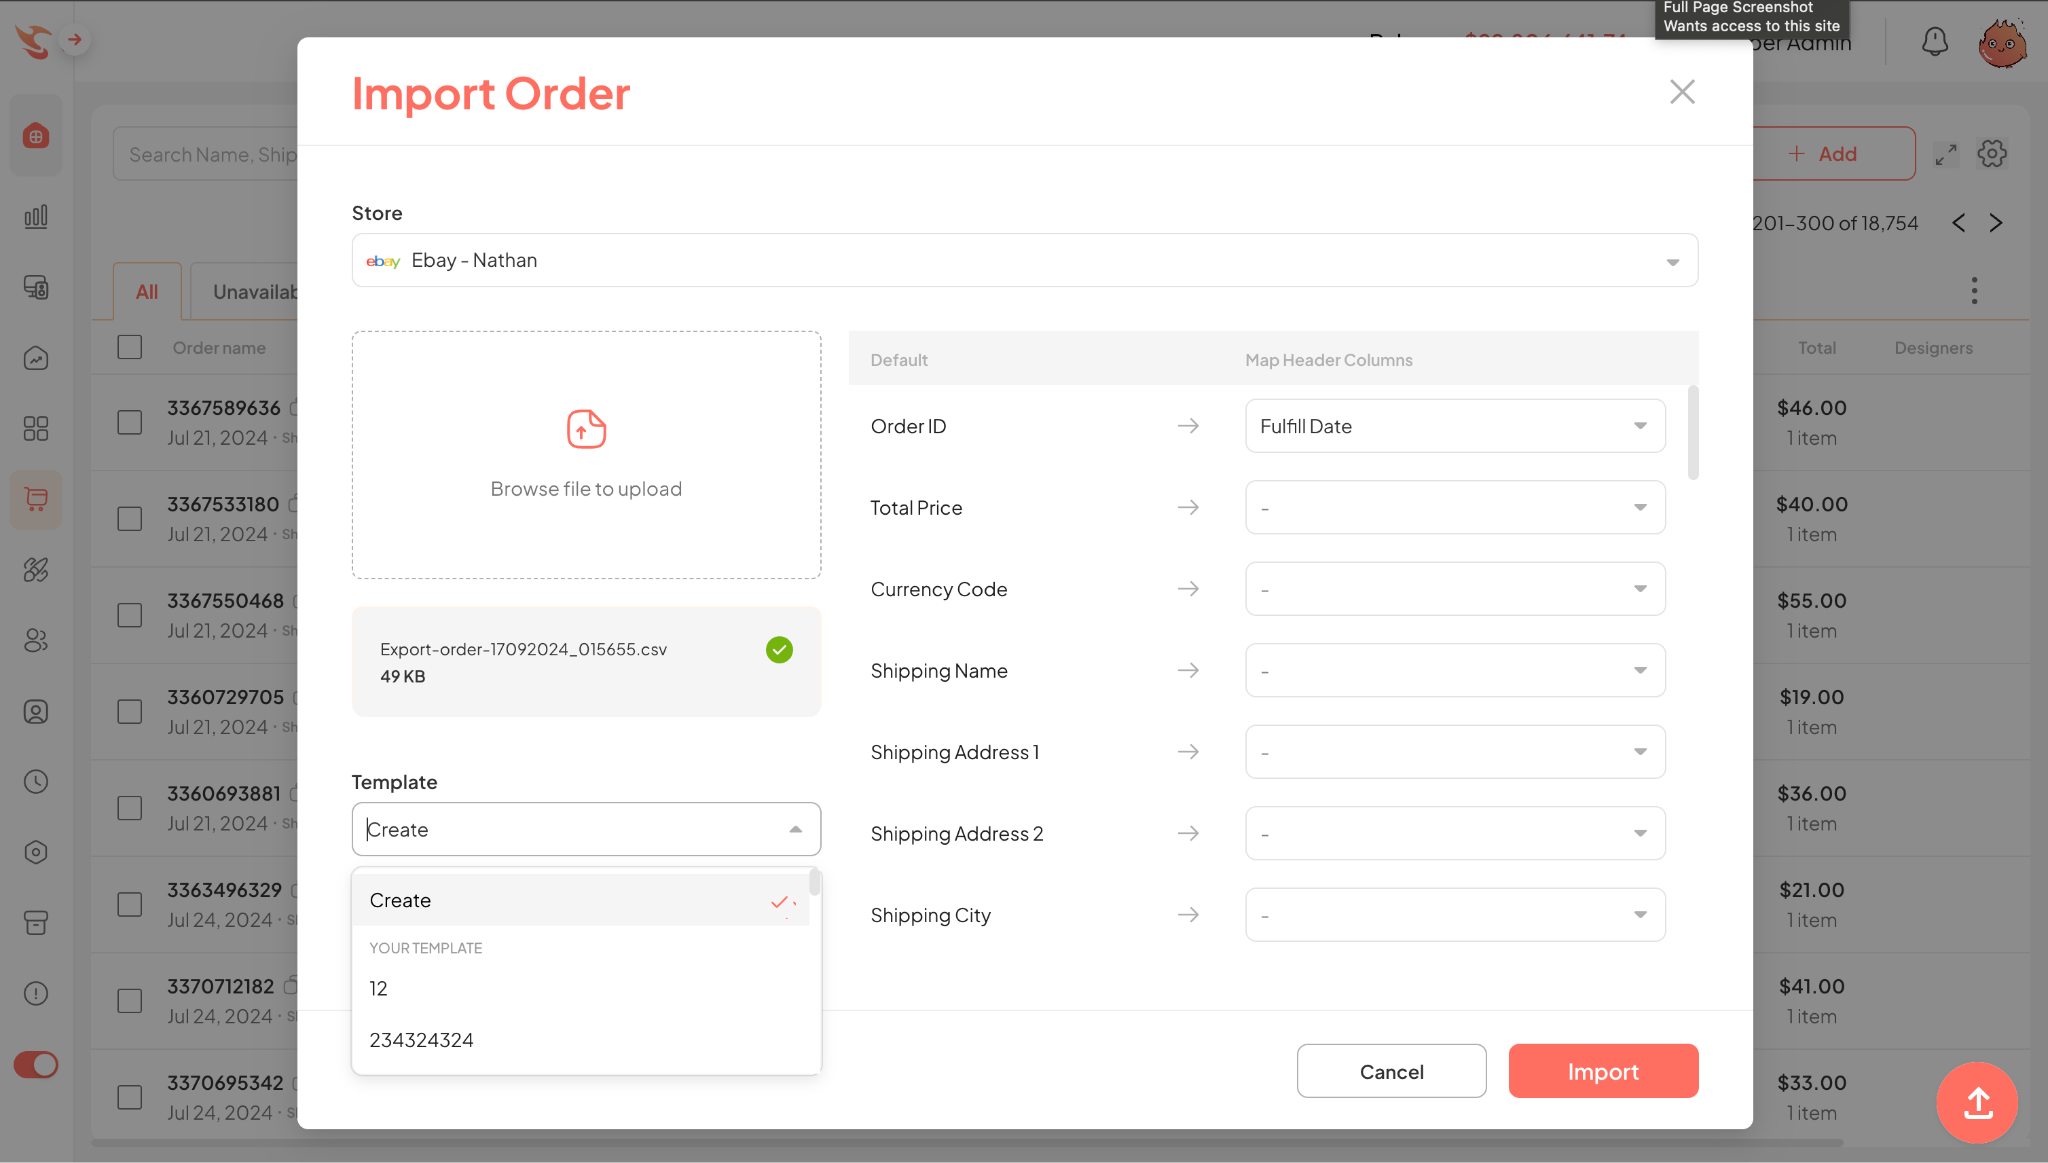
Step 2: Upload CSV File to the system:
- Upload a CSV file containing Order information (can use CSV files exported from eBay, Etsy, Amazon, or other marketplaces).
- Select the store you want to import orders to.
- Select Template to import the CSV file. You can arrange and merge the default fields of the file to suit your personal criteria.
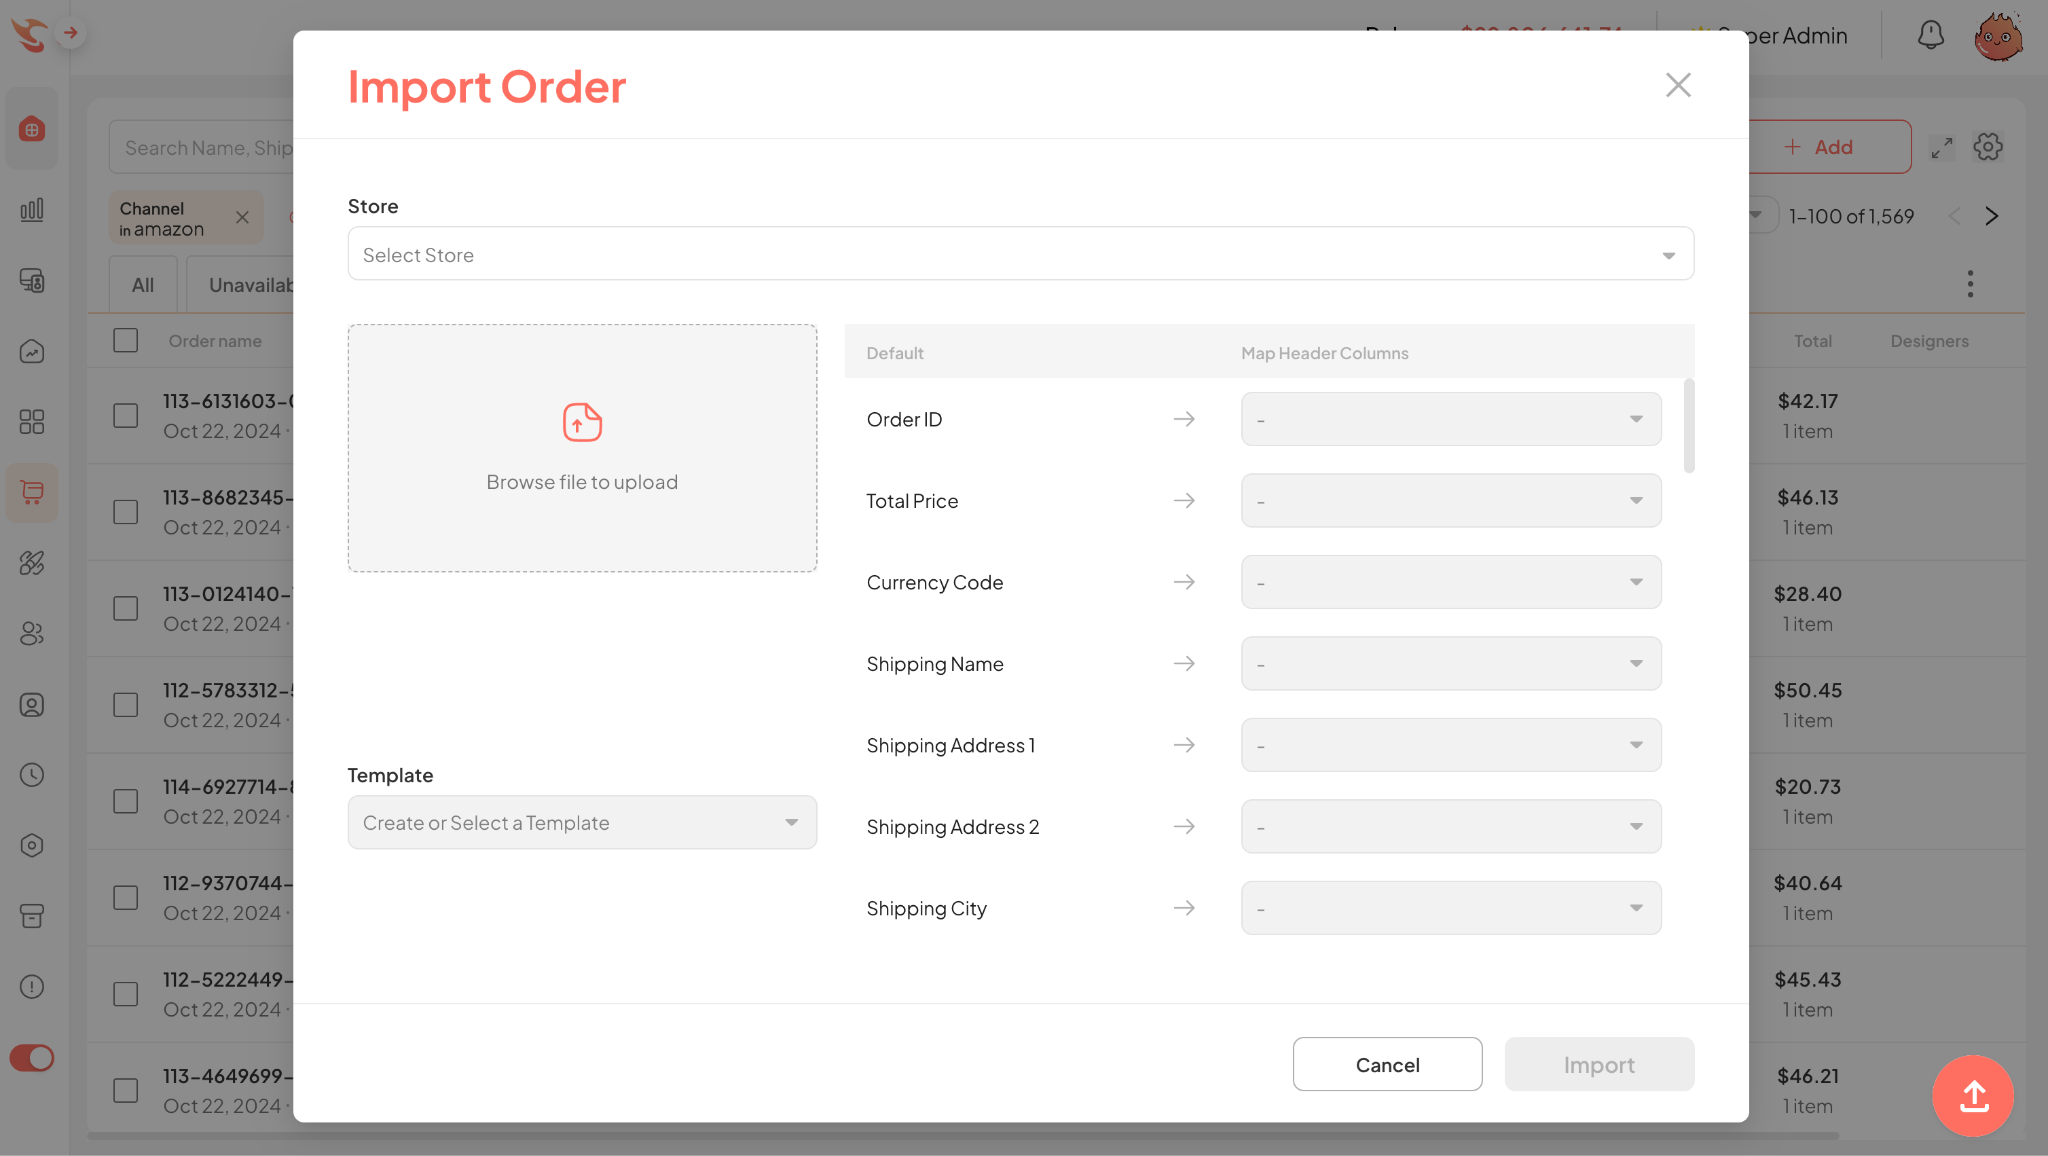
The system will display default headers to map order information columns by store.
Select an existing template to automatically adjust the necessary fields. Then, click “Import”. You can create your own template to import data without using an existing template.
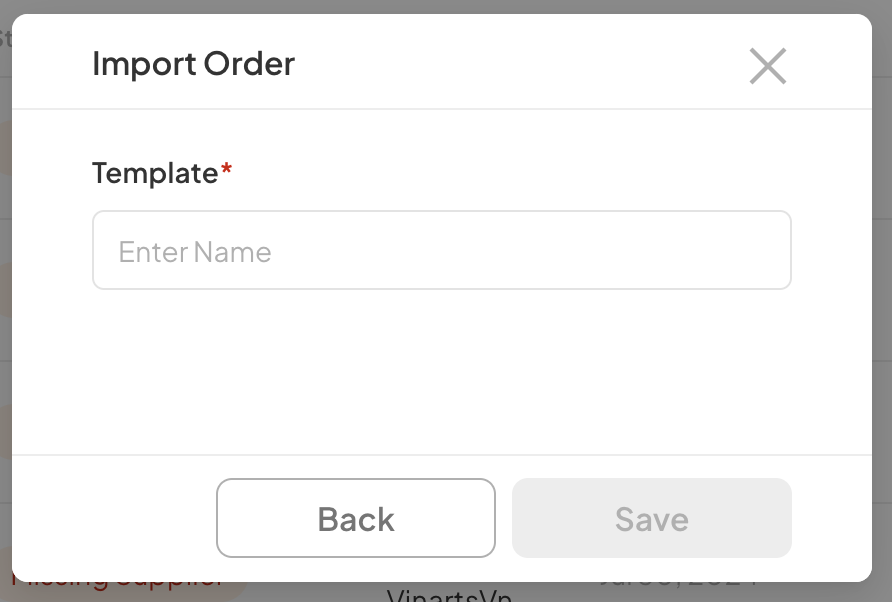
Drag fields from the CSV file to the corresponding fields in the system, then click “Import”.
Name the template and click Save.
⚠️ Note: When importing orders for the first time, you can create your own template.
For subsequent imports, just select the created template, and the system will automatically fill in the fields as set without needing to readjust.
3. Filter Order and How to Save Filter Order
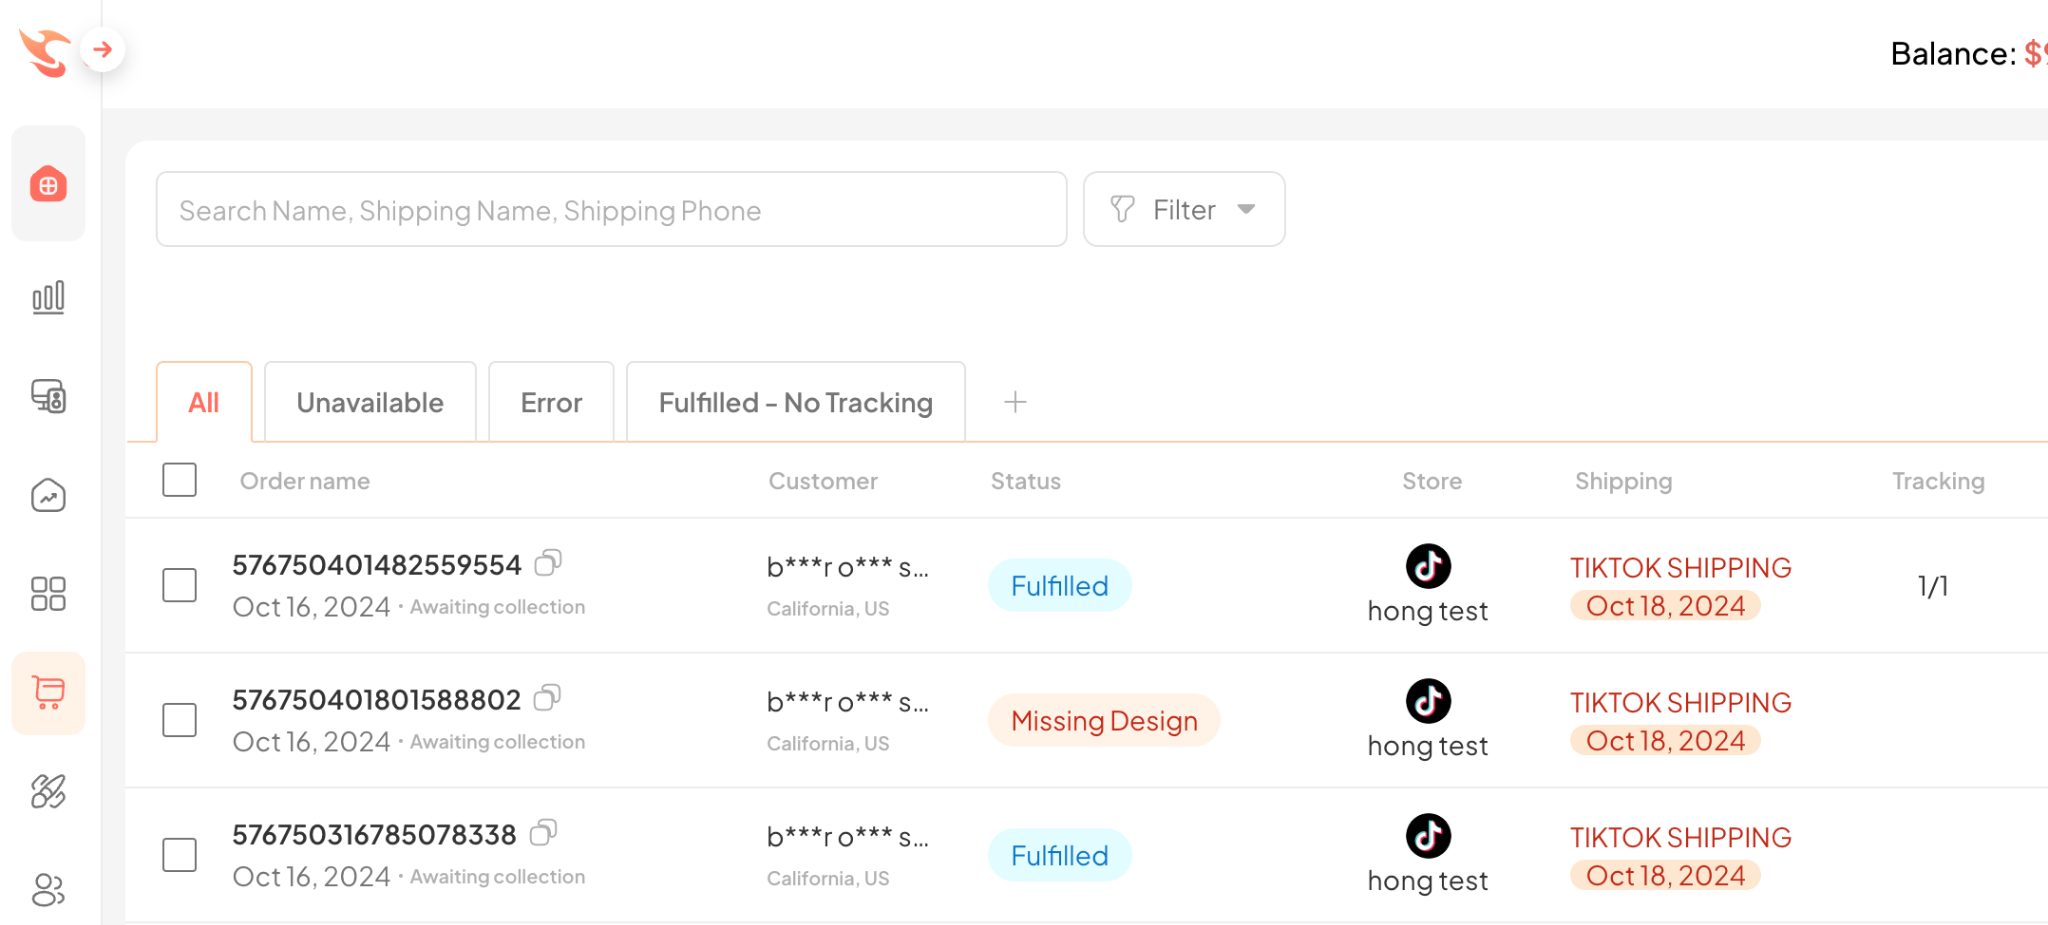
Step 1: Go to the Order section
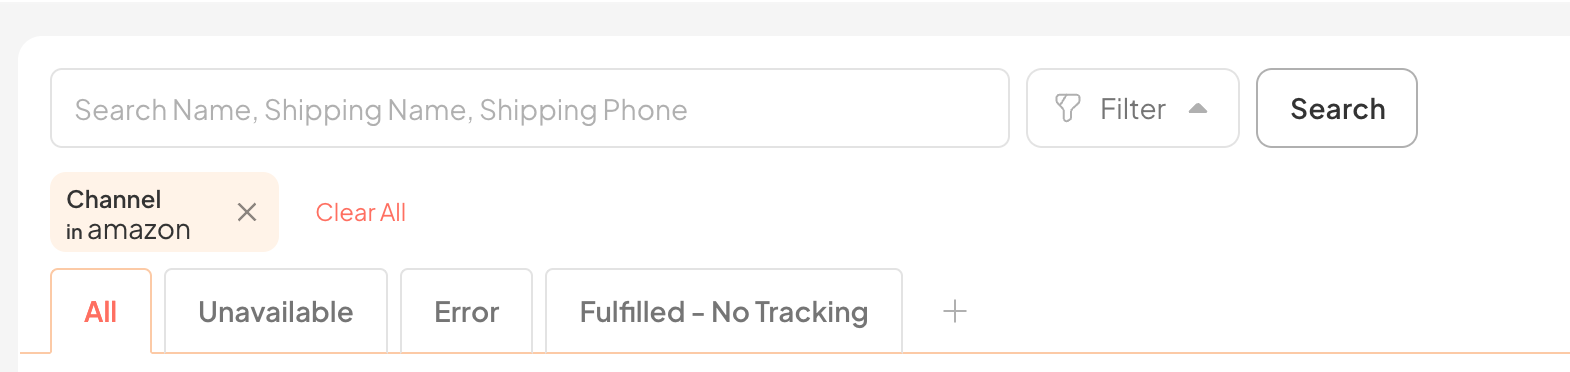
You can search by Name, Shipping Name, Shipping Phone
Step 2: Select Filter. Click the [+] button, then select the value you want to filter to find that order.
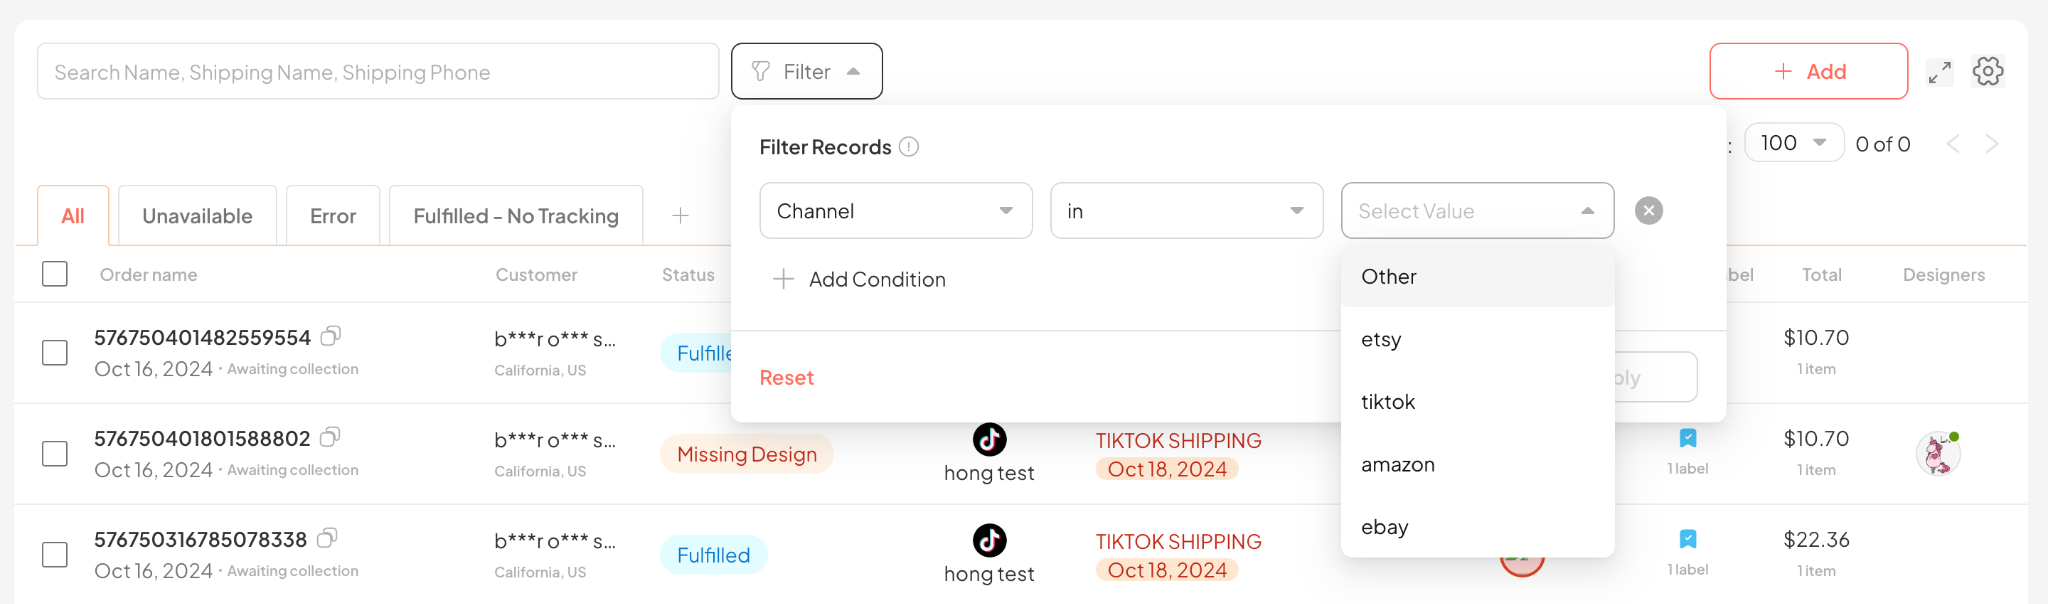
Step 3: After you click Apply

and click Search

Step 4: To filter the desired fields, click the Search button.
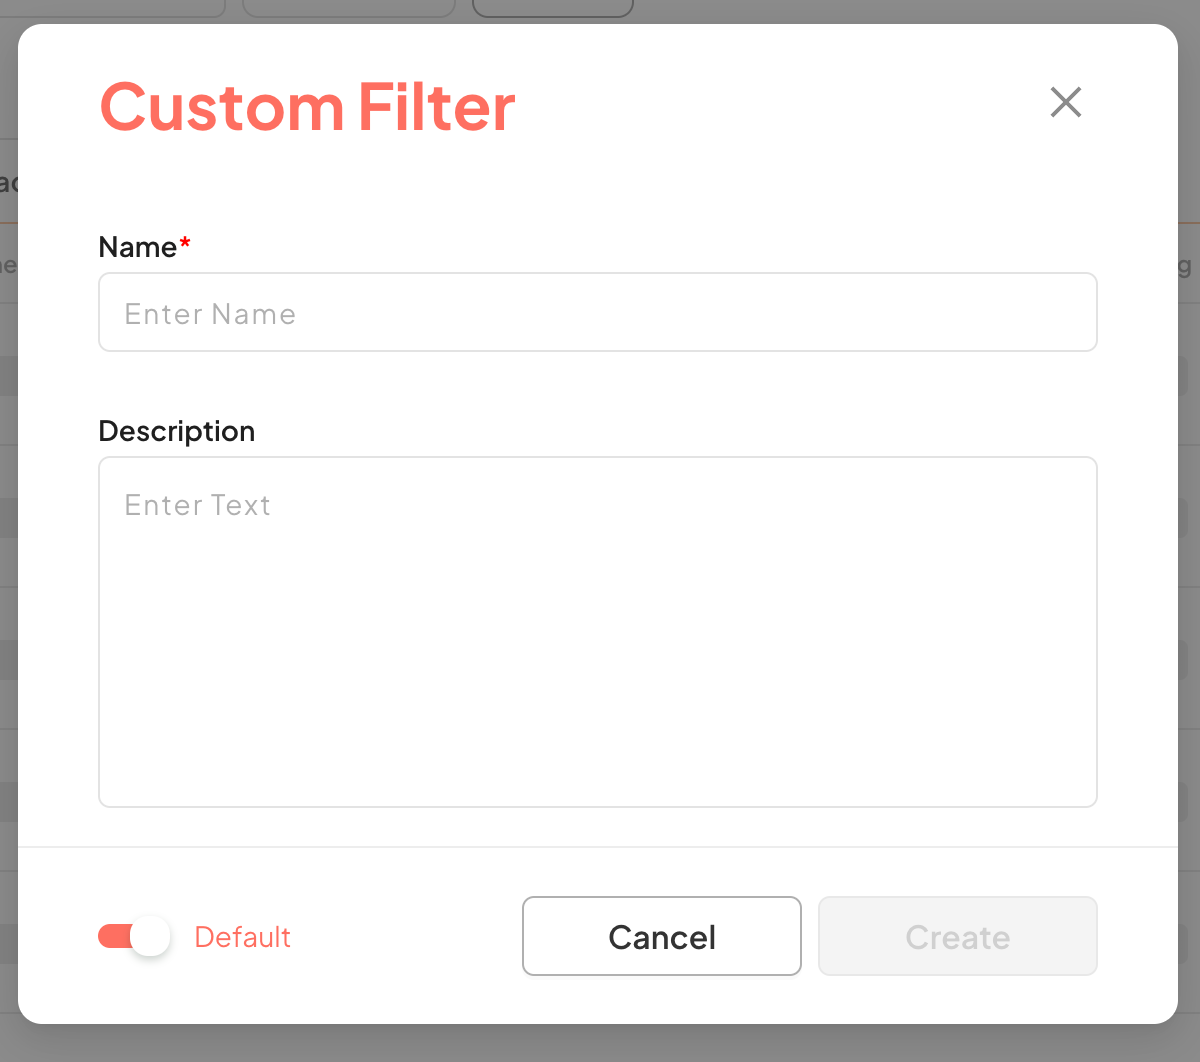
You select [+] to Custom Filter, a new dialog box will open to save the filtered filters.
Step 5: Enter information into the fields, then select Create to save the Filter
- Name: Name of the Filter
- Description: Description of the Filter
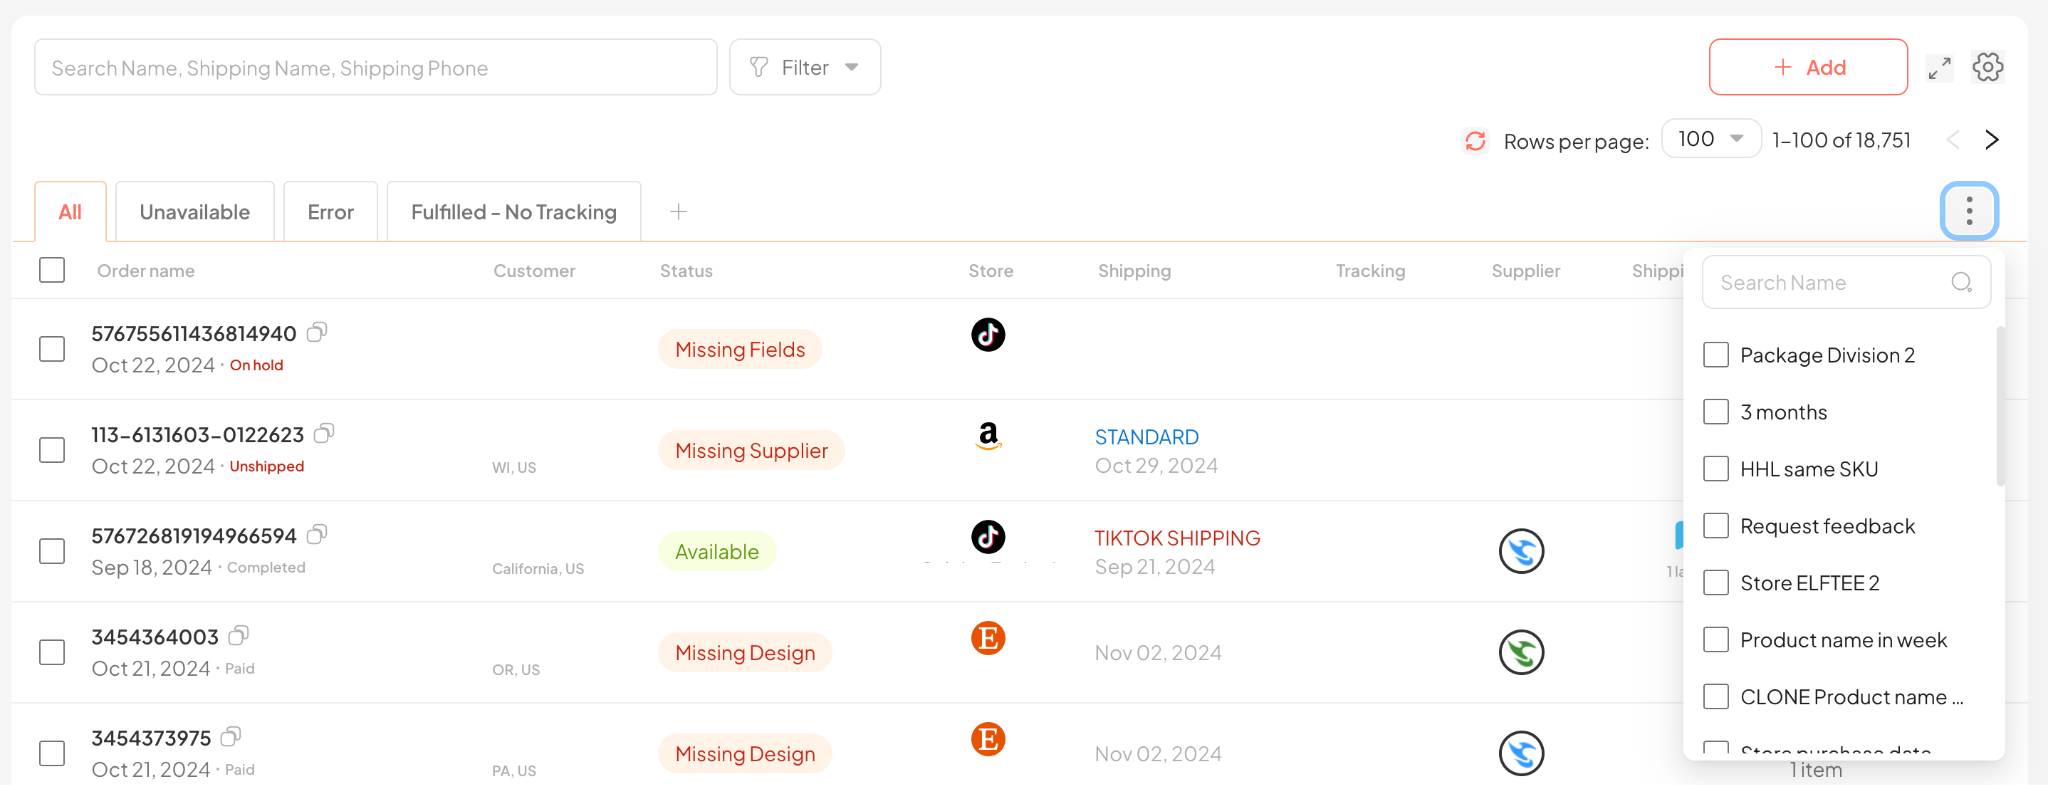
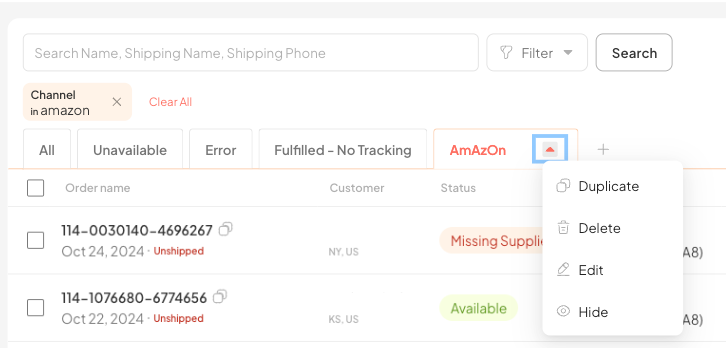
- Default: For users to use when they want to display the saved Filter on the screen and can turn off that button to hide less frequently used Preset Filters. For hidden Filters, users can search using the “3 dots” button Search the Filter in the top right corner of the screen.
Step 6: After performing the above steps, the order filters will be displayed as shown in the image below.
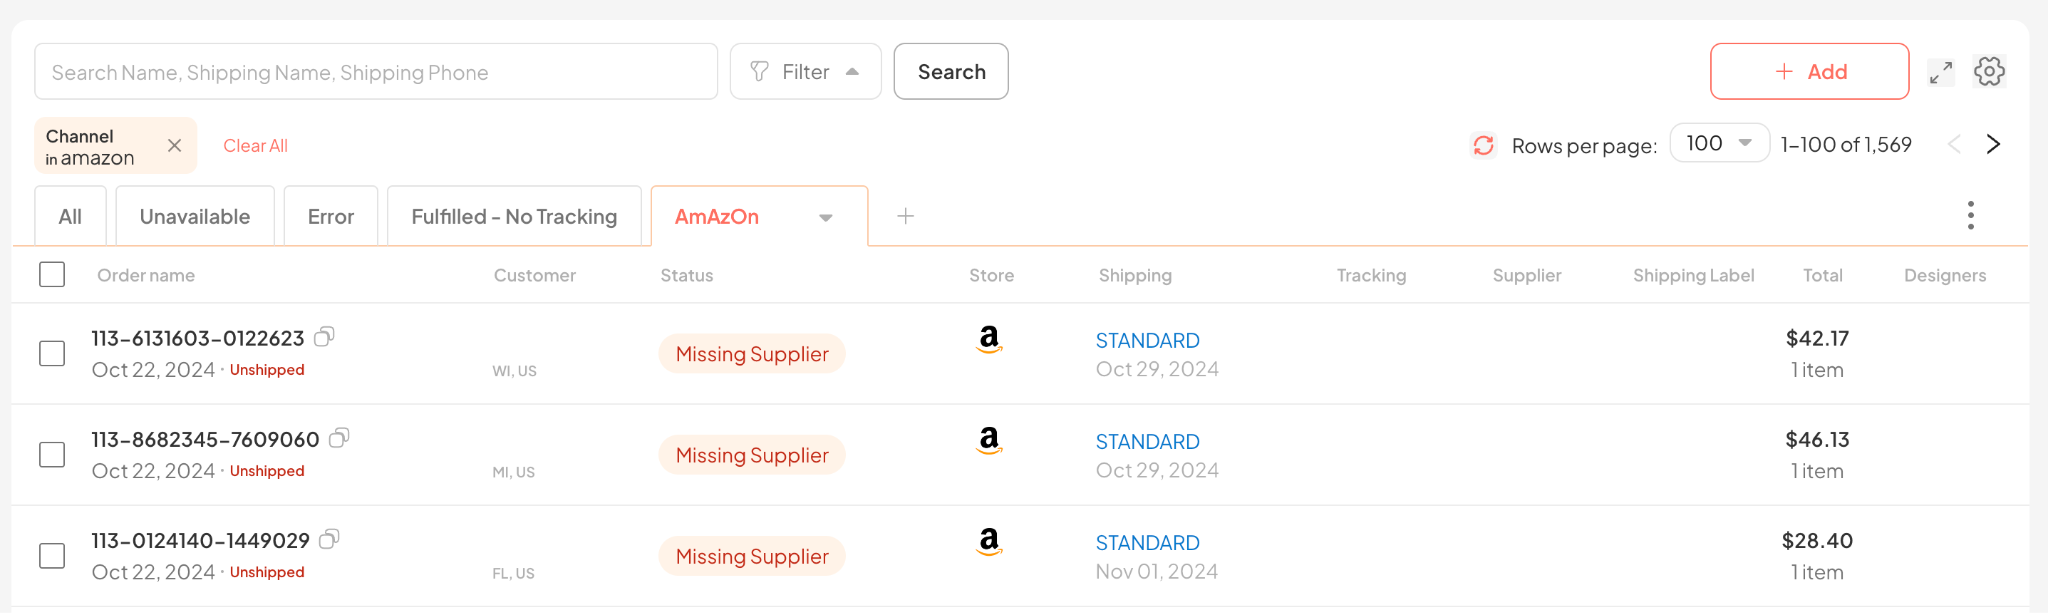
In addition, click Edit to change the Filter name and add more search values.
4. Order Statuses and How to Fulfill Orders
After you have started bringing orders into the system, you need to review the status of those orders to complete the information if necessary. Orders after being retrieved or Imported into the system can have the following statuses that you need to pay attention to:
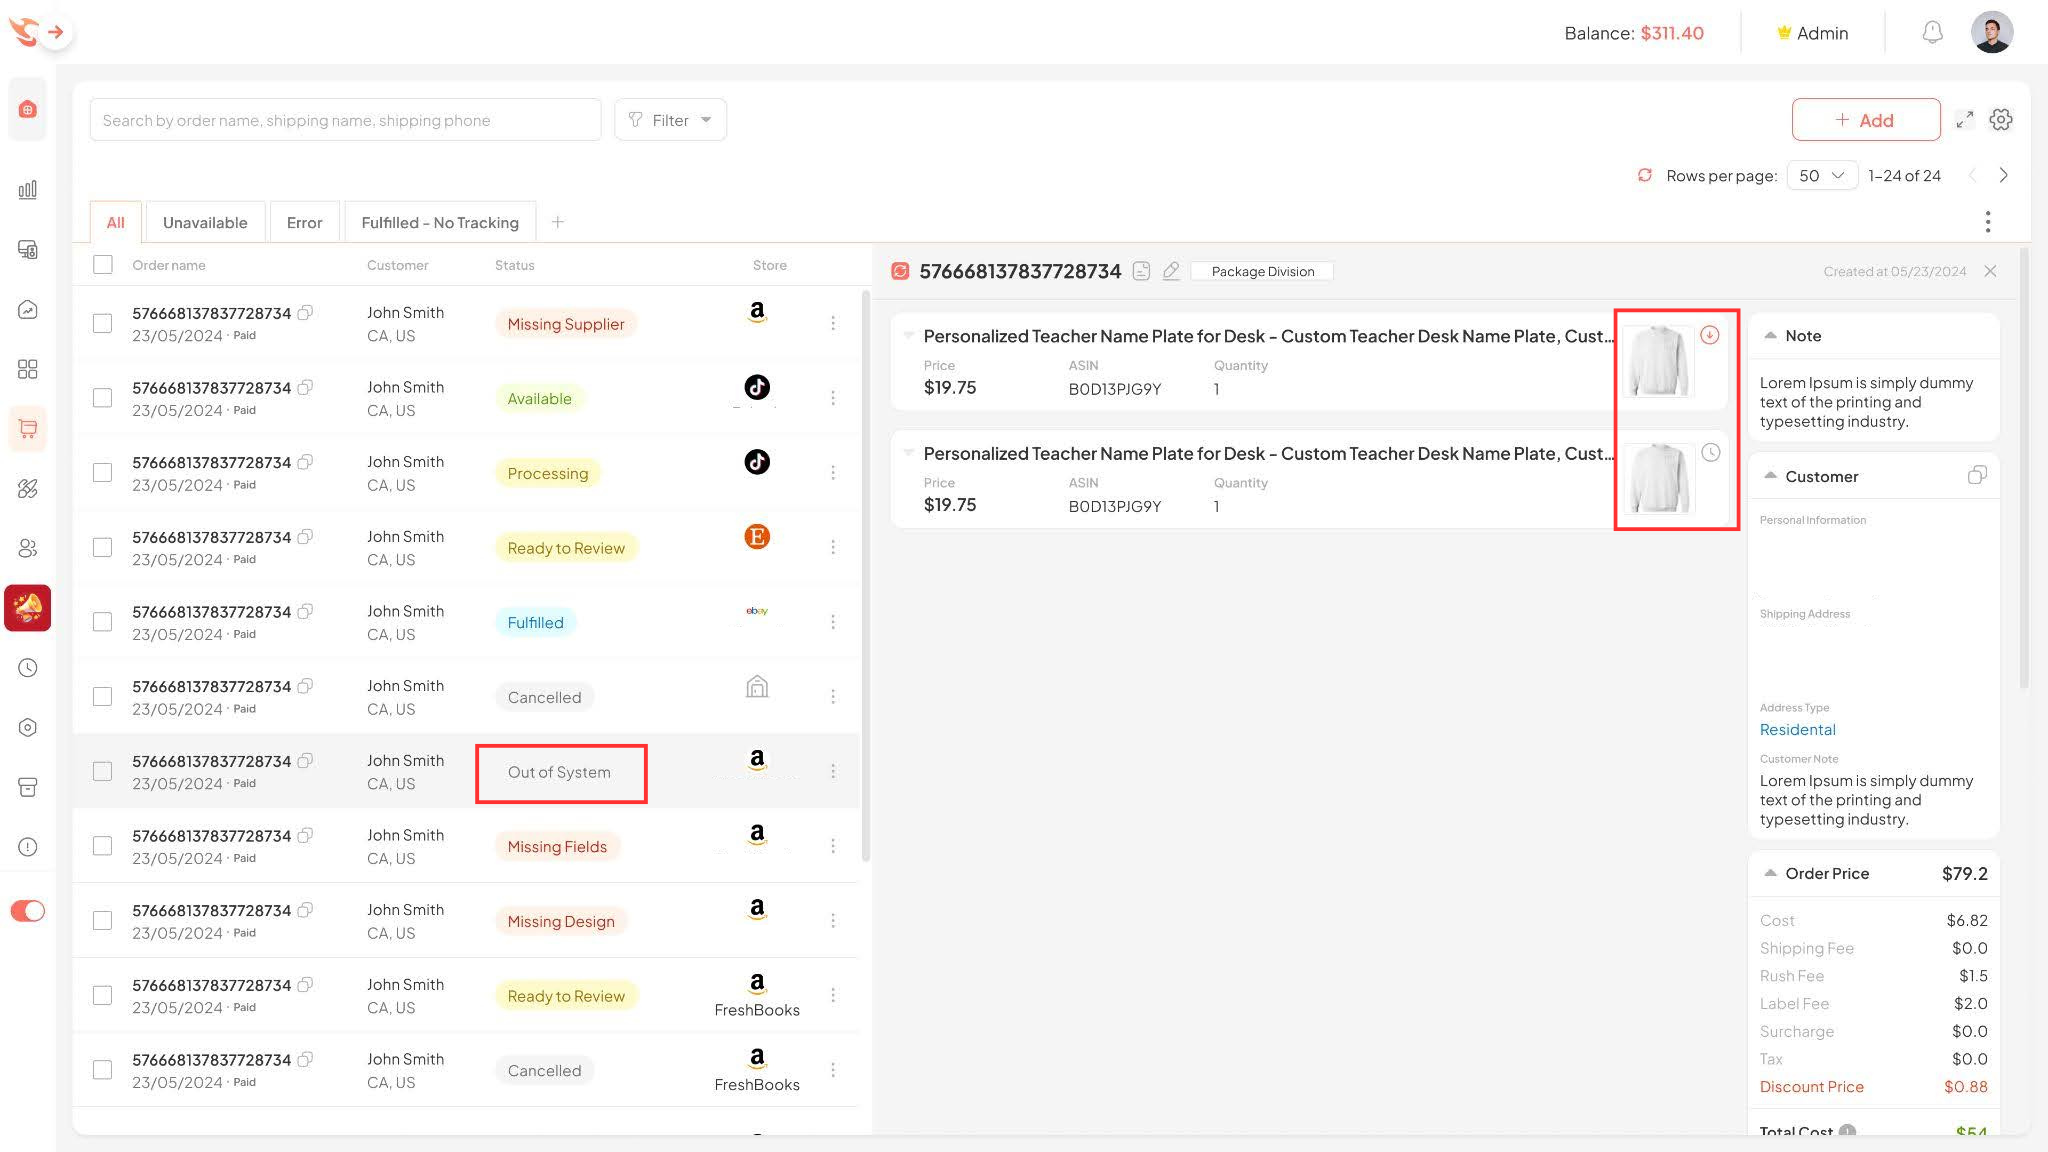
4.1. Out Of System
This is the status of an order when it is retrieved into the system but the Product was not created from the system. You need to get the Product to have information to fulfill the order:

Method 1: Click to open order details at the button in the bottom left of the order.
Then, you can Get Product Manual by clicking the Get product icon.
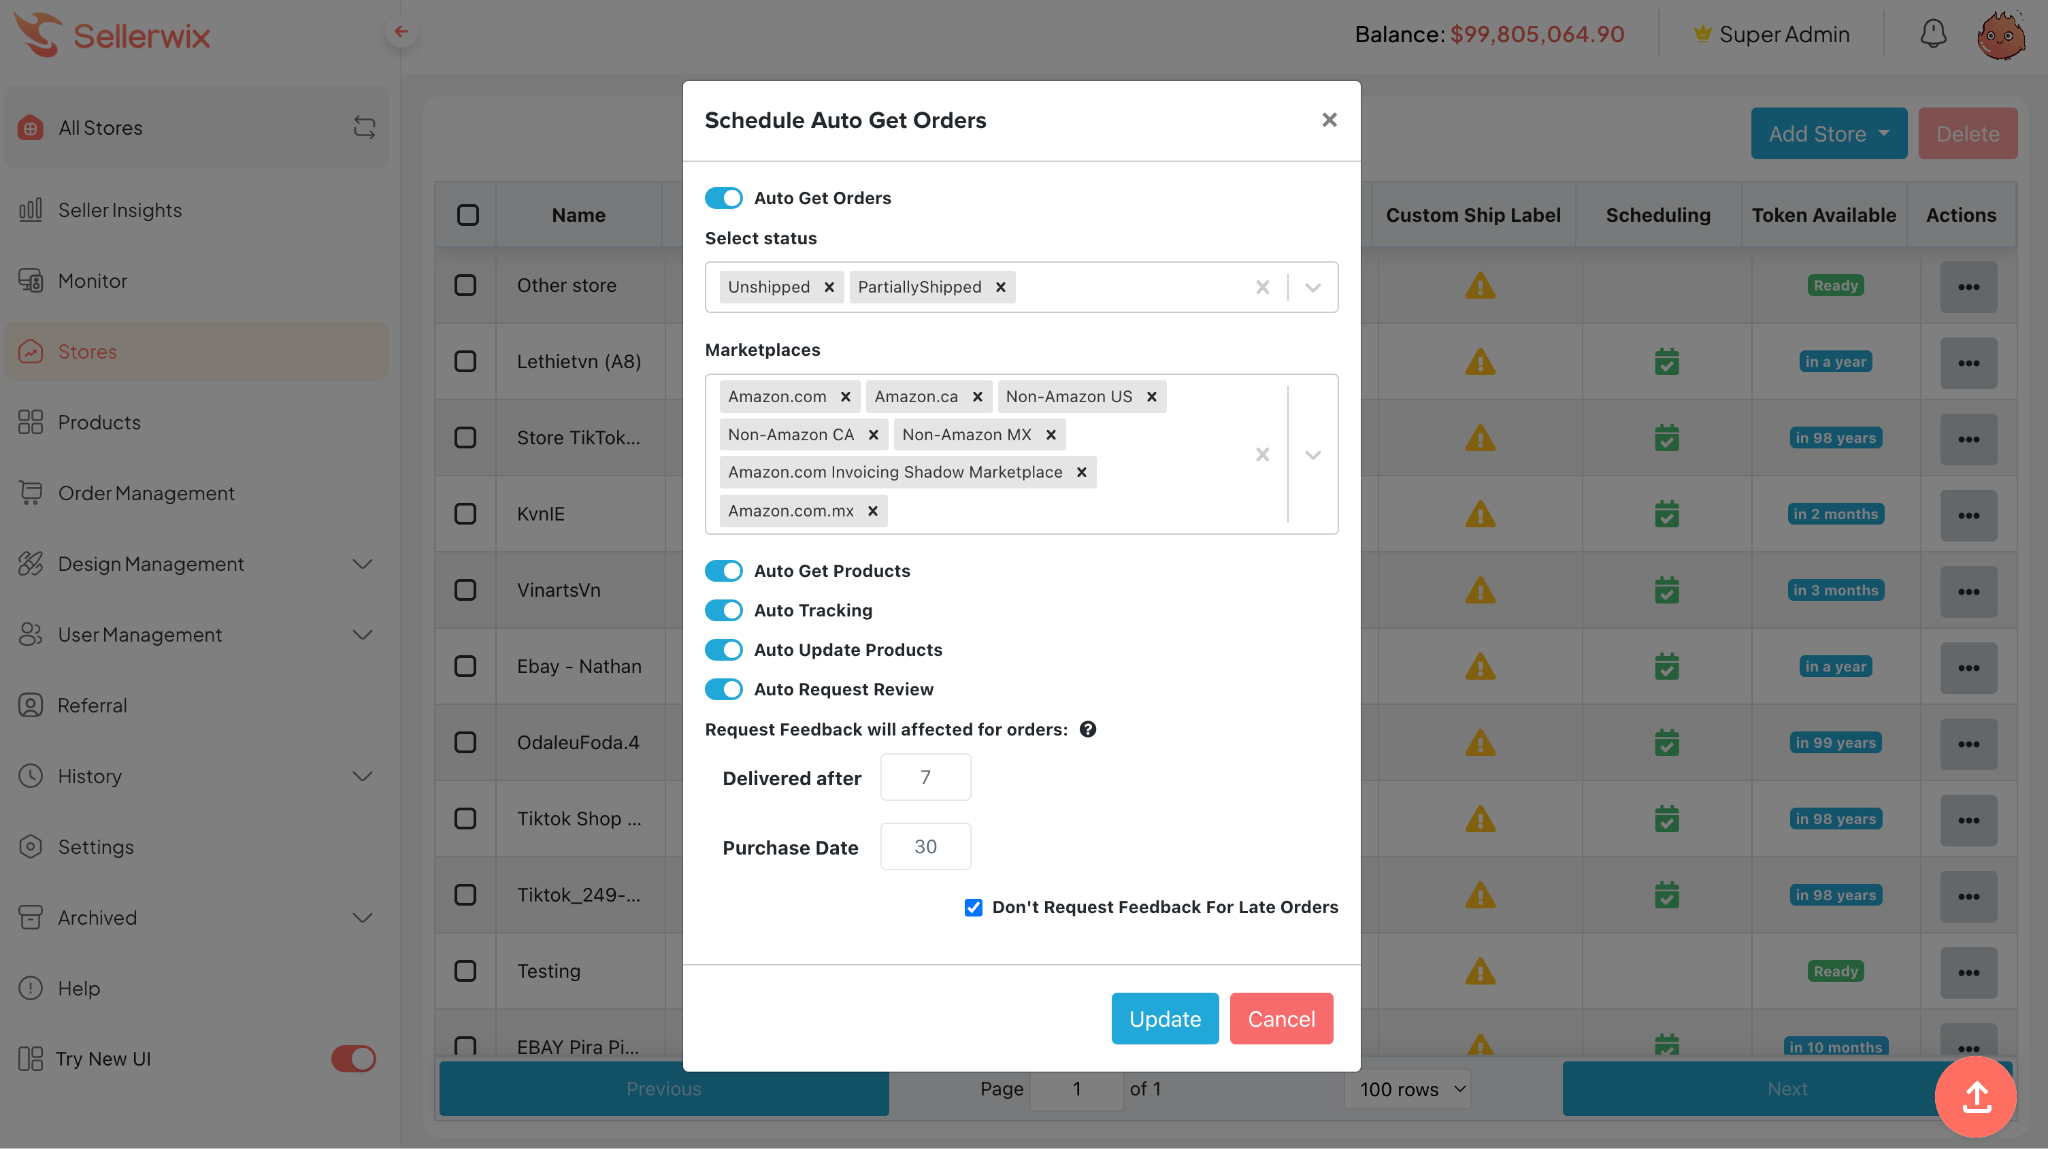
Method 2: Go to the Stores section, in the Scheduling column, click the Schedule Auto Get Orders icon.
Then check the Auto Get Products section to ensure Products are automatically retrieved into the system.
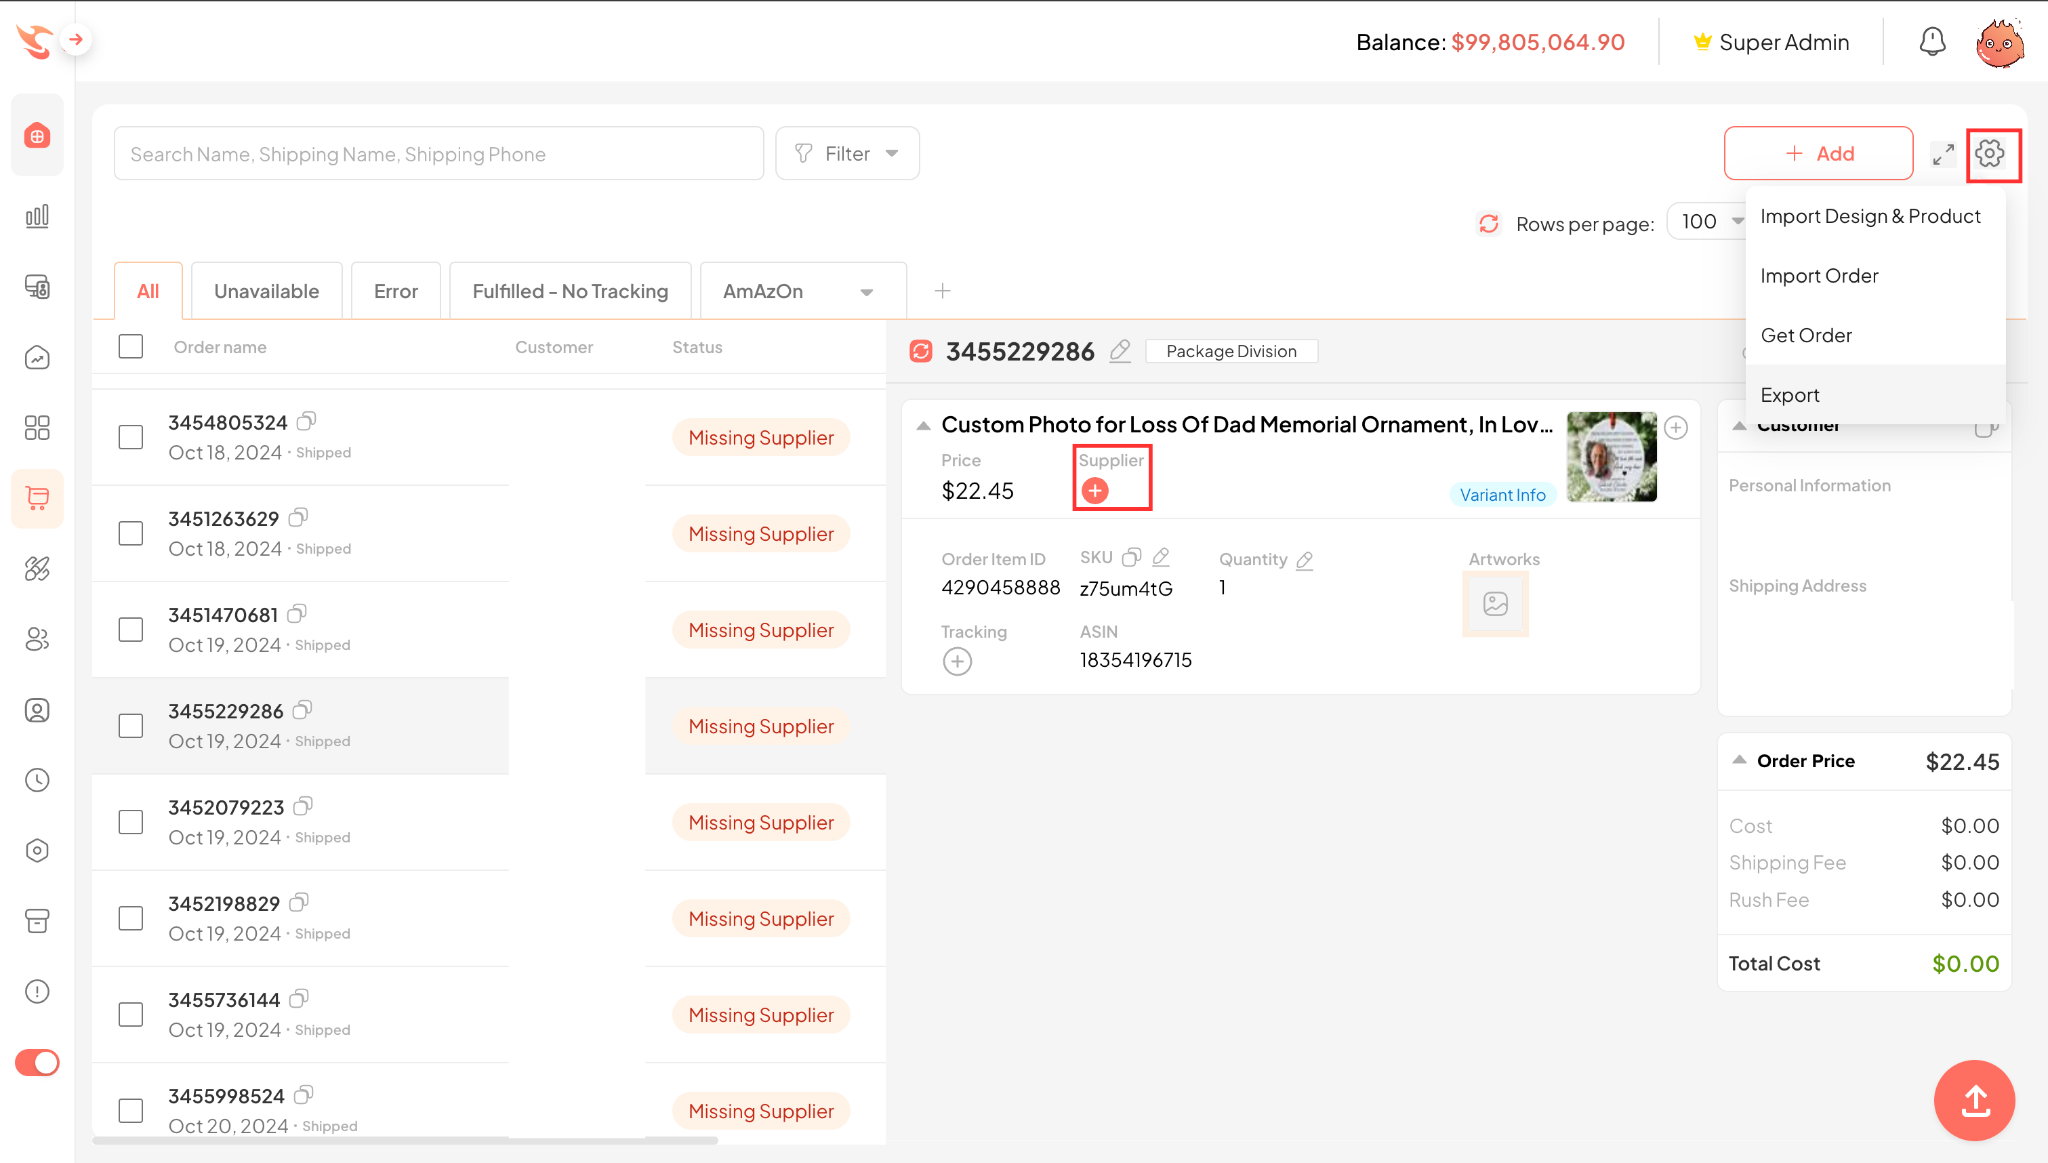
4.2. Missing Supplier
This status occurs when you have not selected a supplier for the order.
To fulfill the order, you need to fully select the blank product information.
- Step 1: Click the shopping cart icon to update.
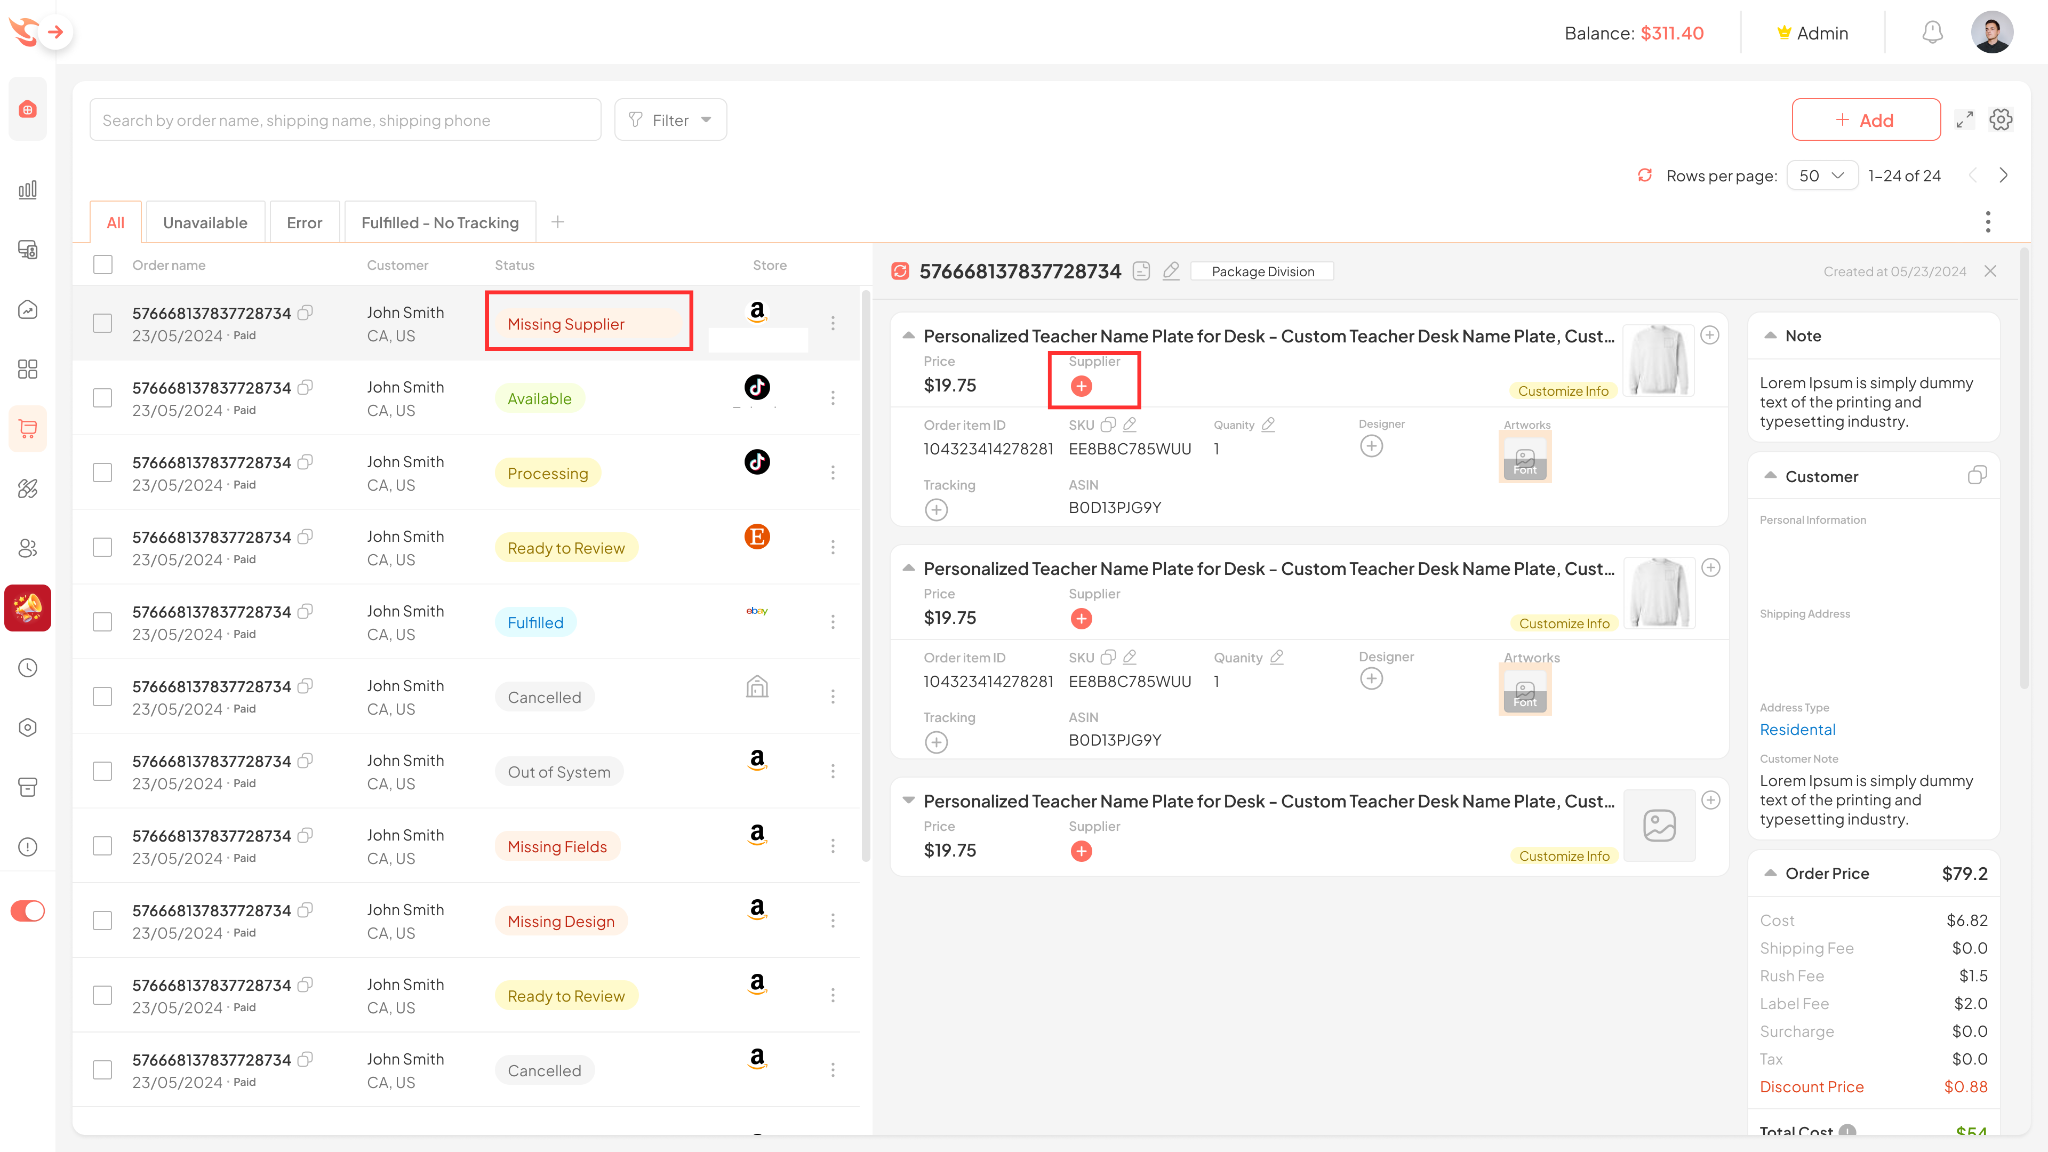
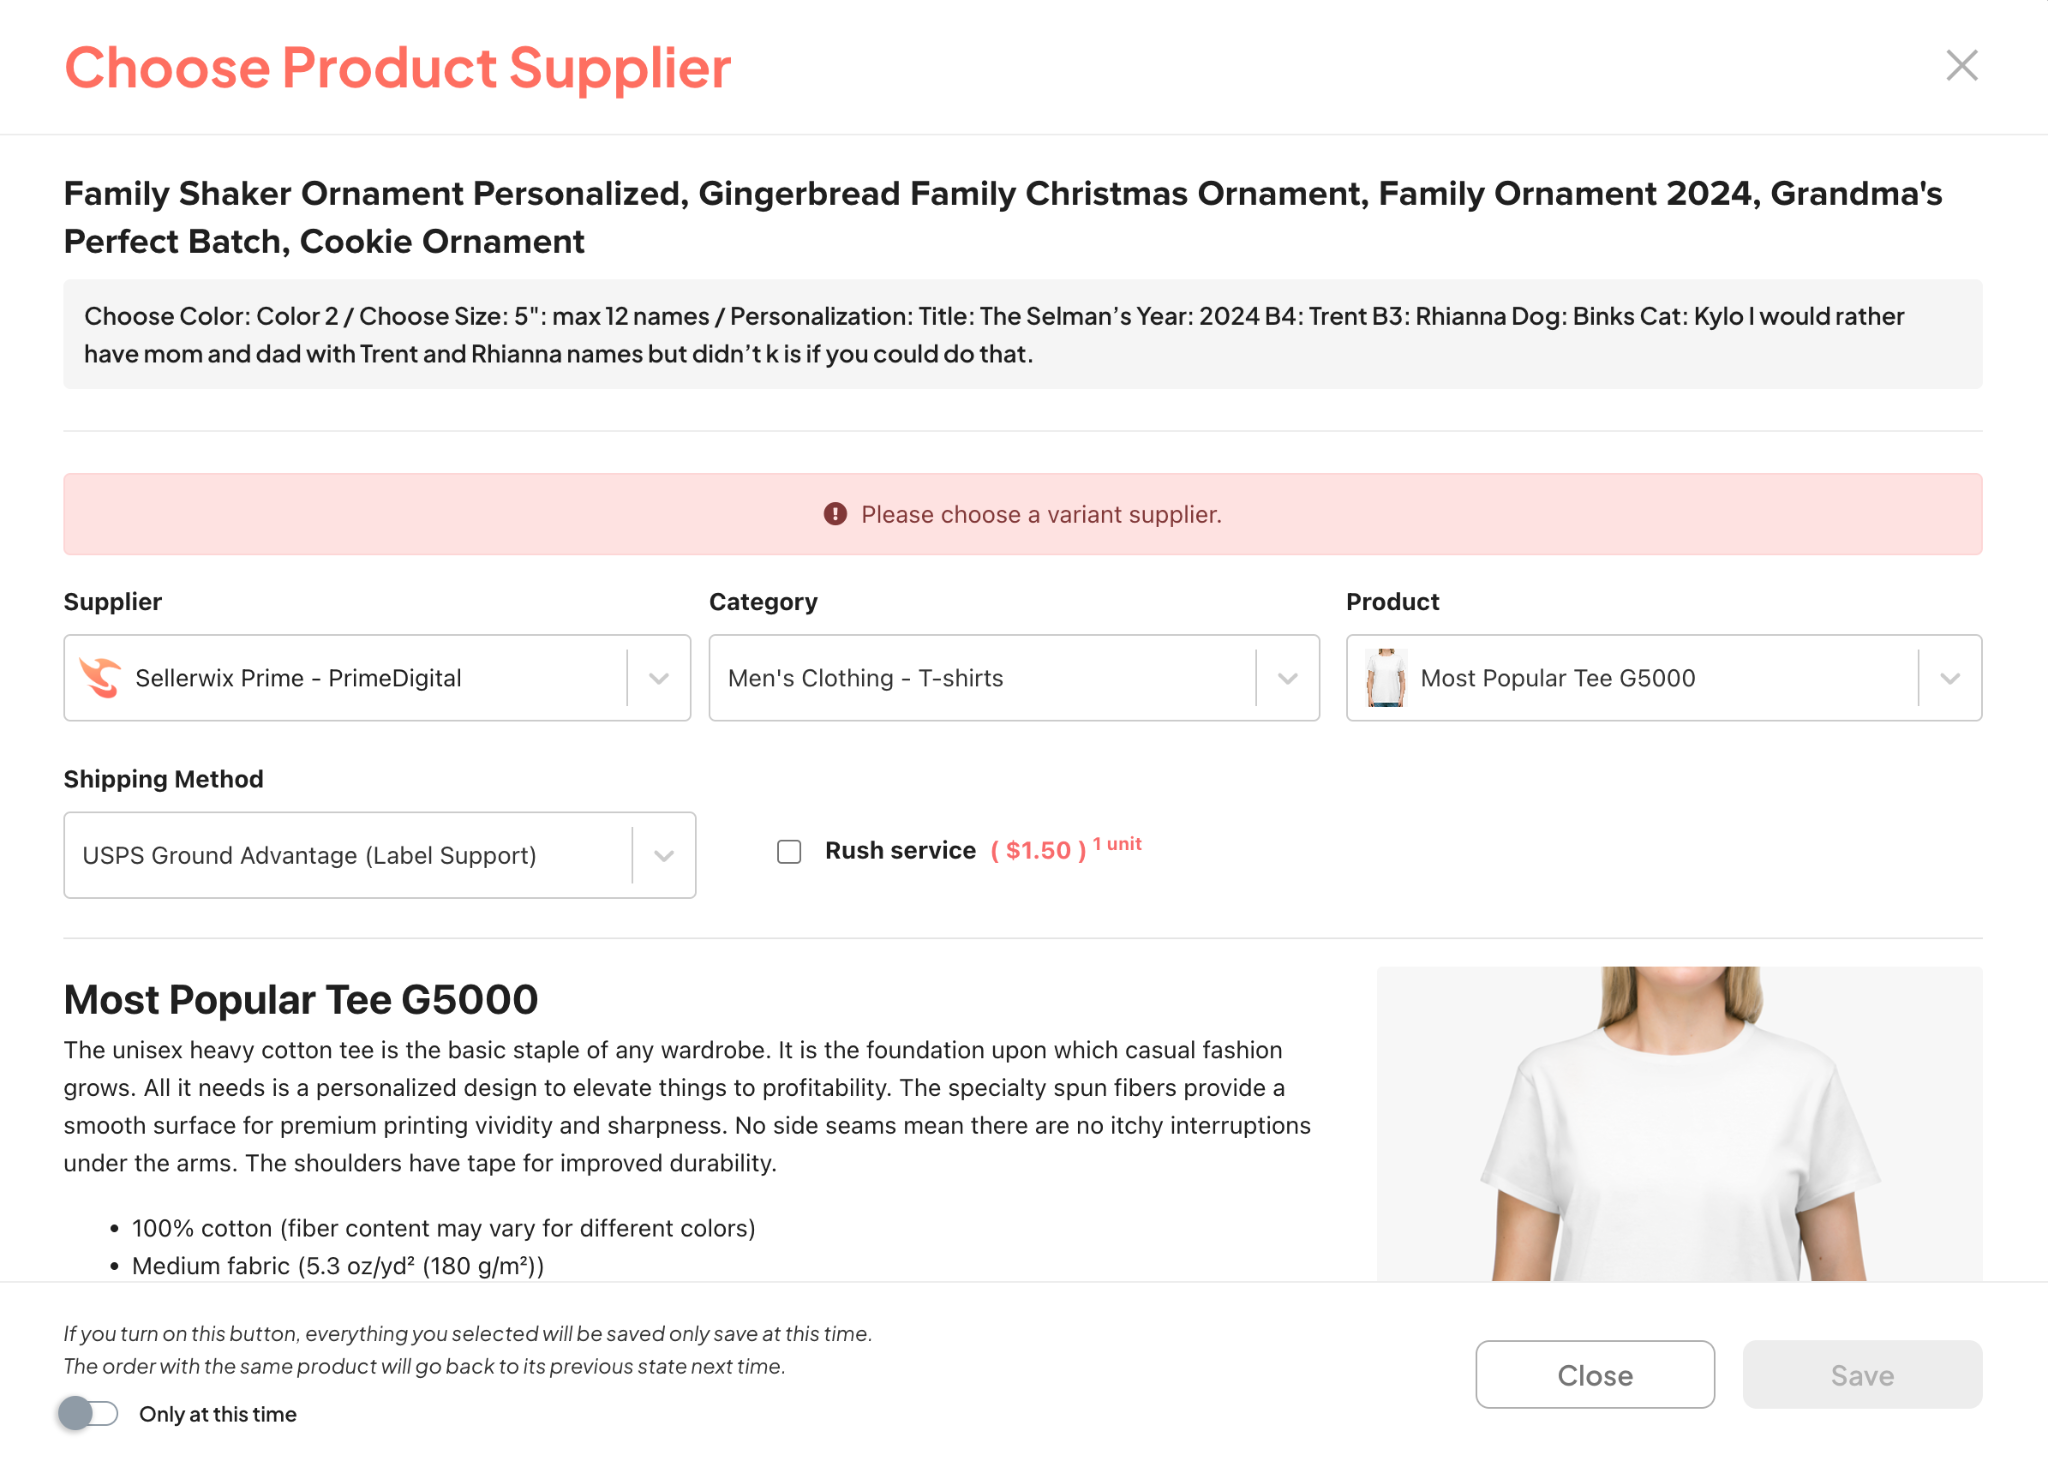
- Step 2: Then select information fields such as Supplier, Category, and Product and you can change the Shipping Method if you do not want to choose the default shipping method.
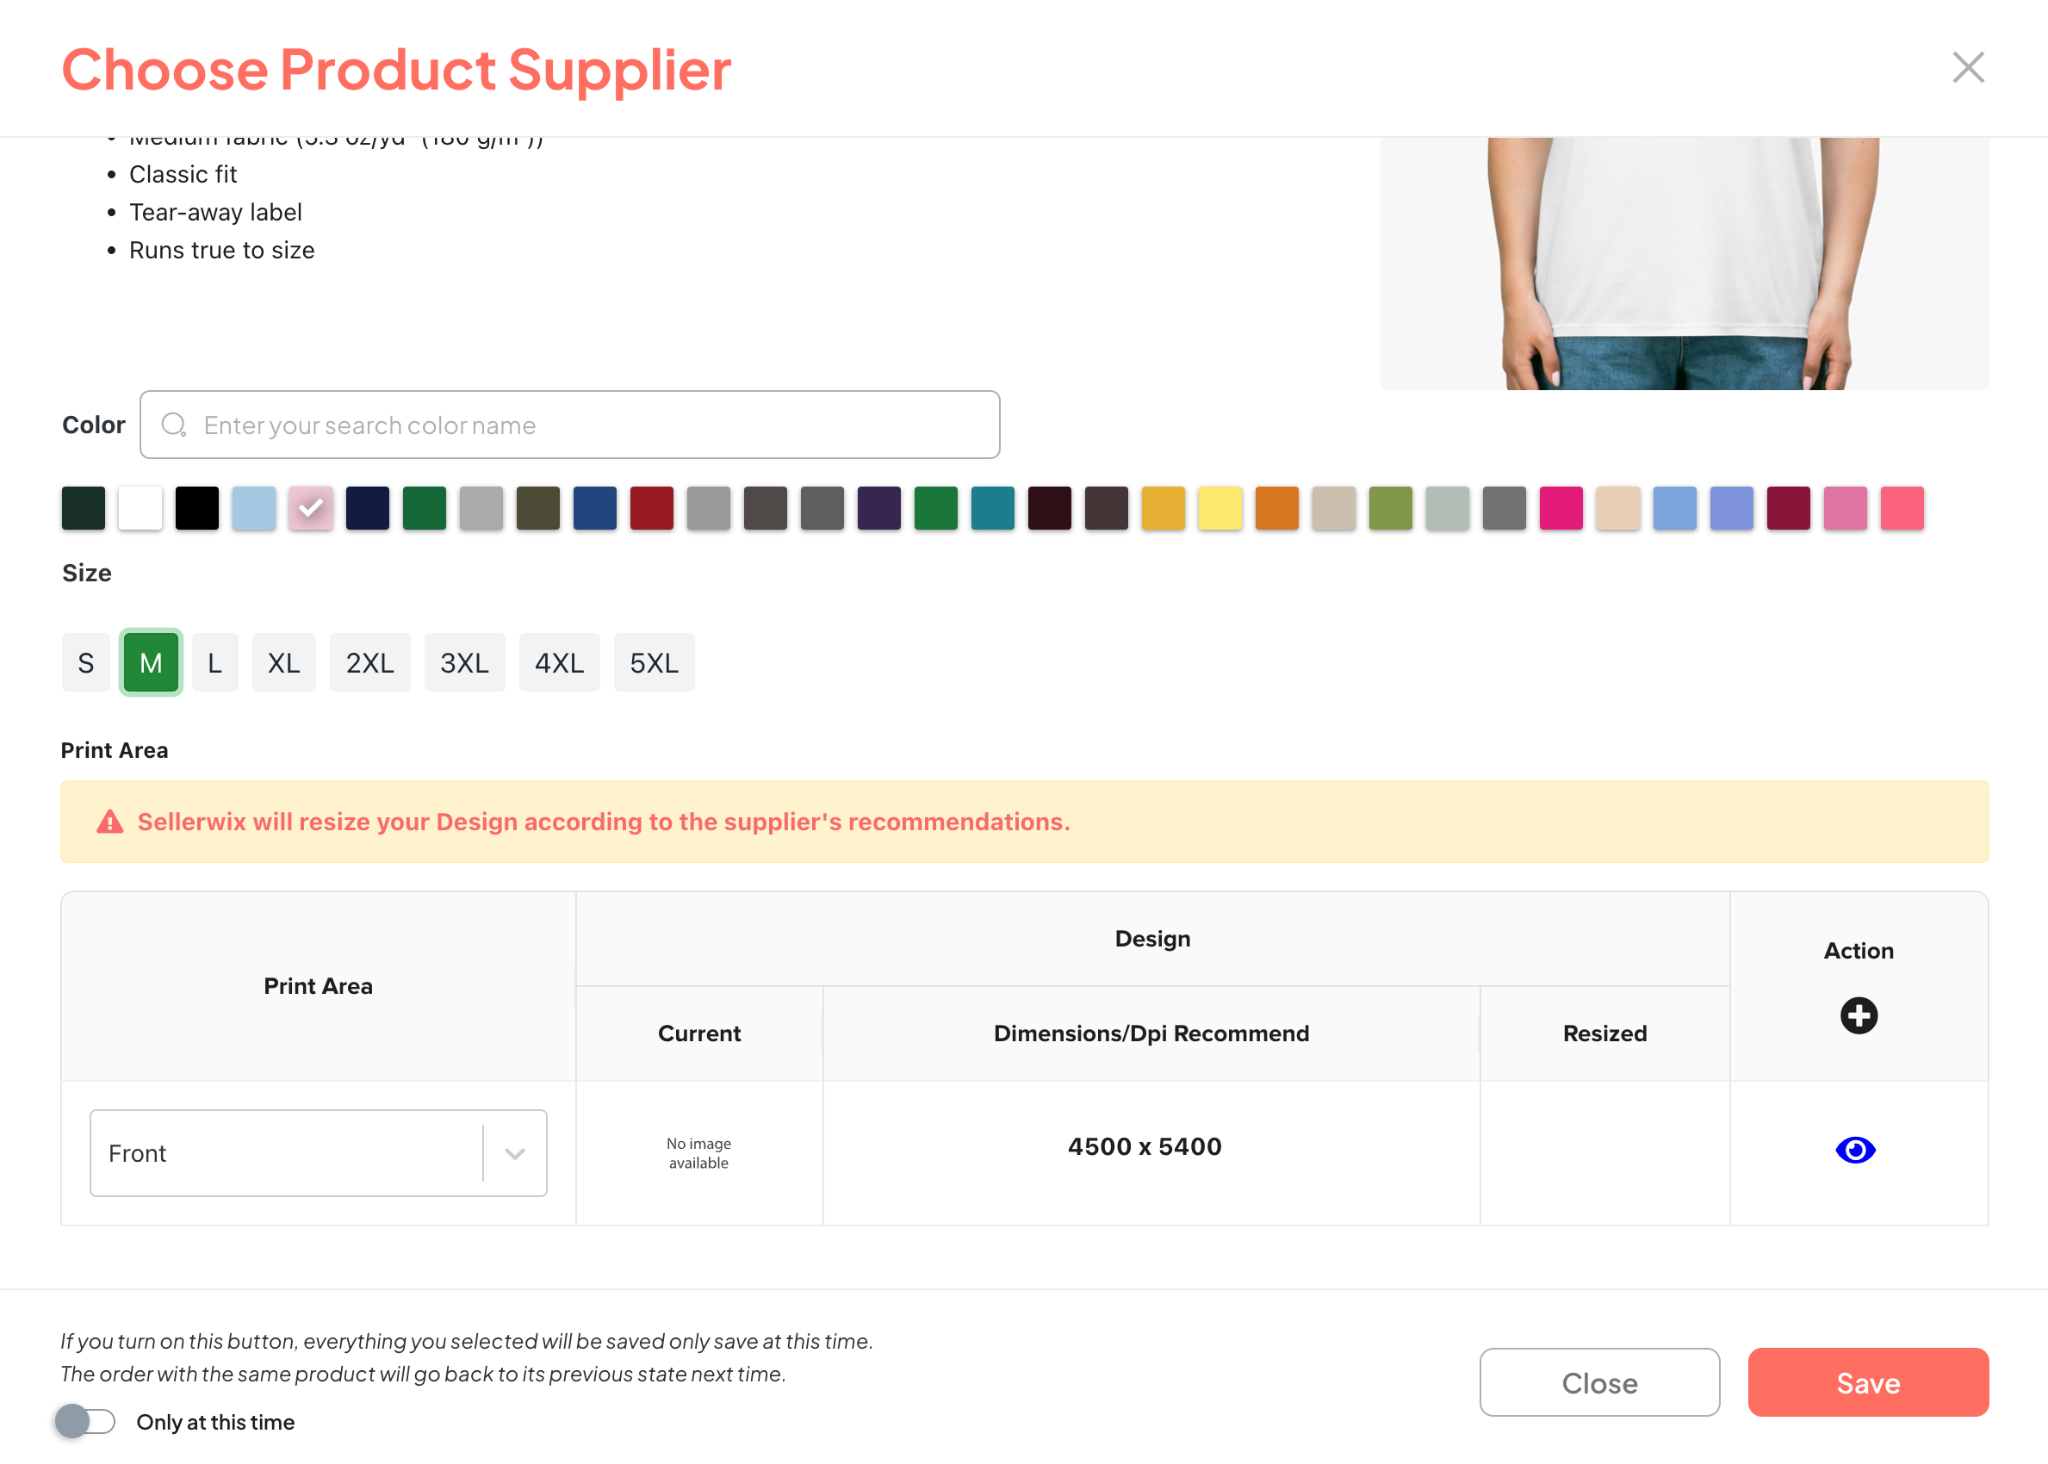
Step 3: Update additional information about Size, Color, Print Area, etc., and click Save to complete the supplier selection step.
The “Only at this time” feature
- When this feature is enabled, Supplier and Design are only set for that order; other orders with the same SKU will not be synchronized.
- When this feature is disabled, the Supplier and Design added for this SKU will be saved. In subsequent times, you will not need to re-select Design and Supplier, as the system has already recognized the Design and Supplier that the user fulfilled previously.
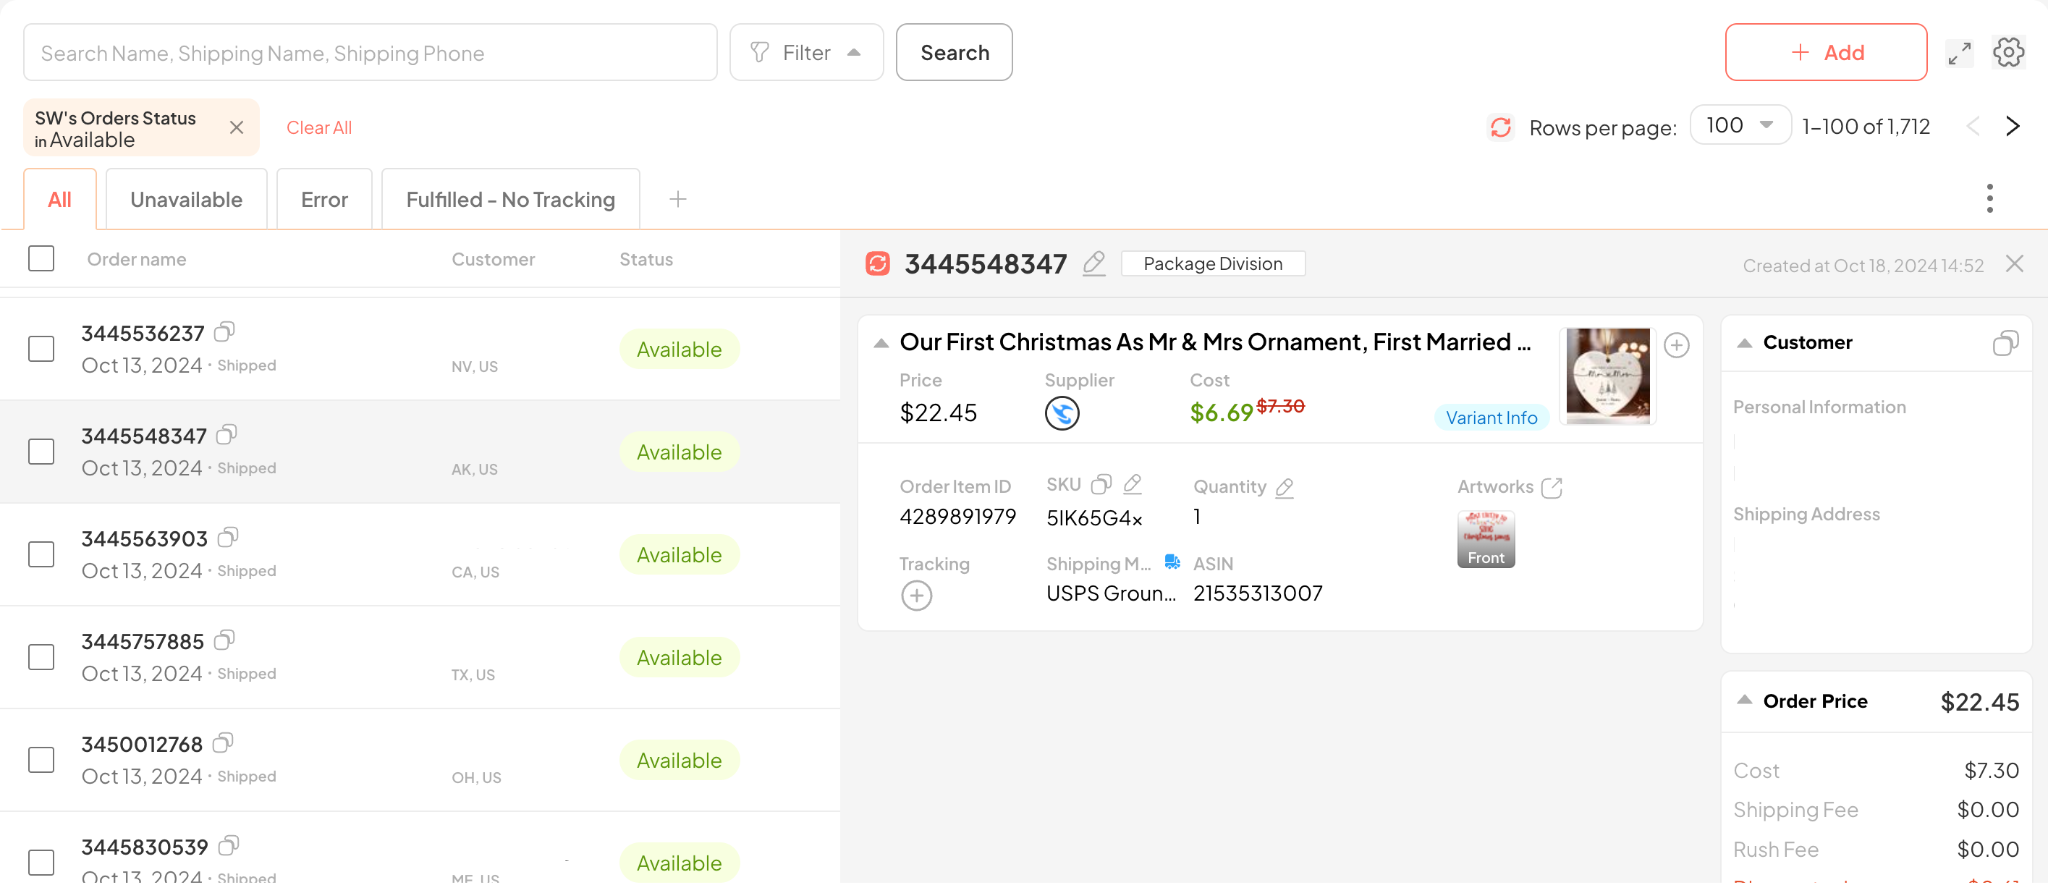
After completing the information update, including uploading the design for the product, the order status will be updated to “Available” as shown below:
4.3. Missing Fields
When an order is in Missing Fields status, it means that the order is missing required information. This status can be changed by following these steps:
- Step 1: Check the Product status and then click the pencil icon to Edit Shipping Address.
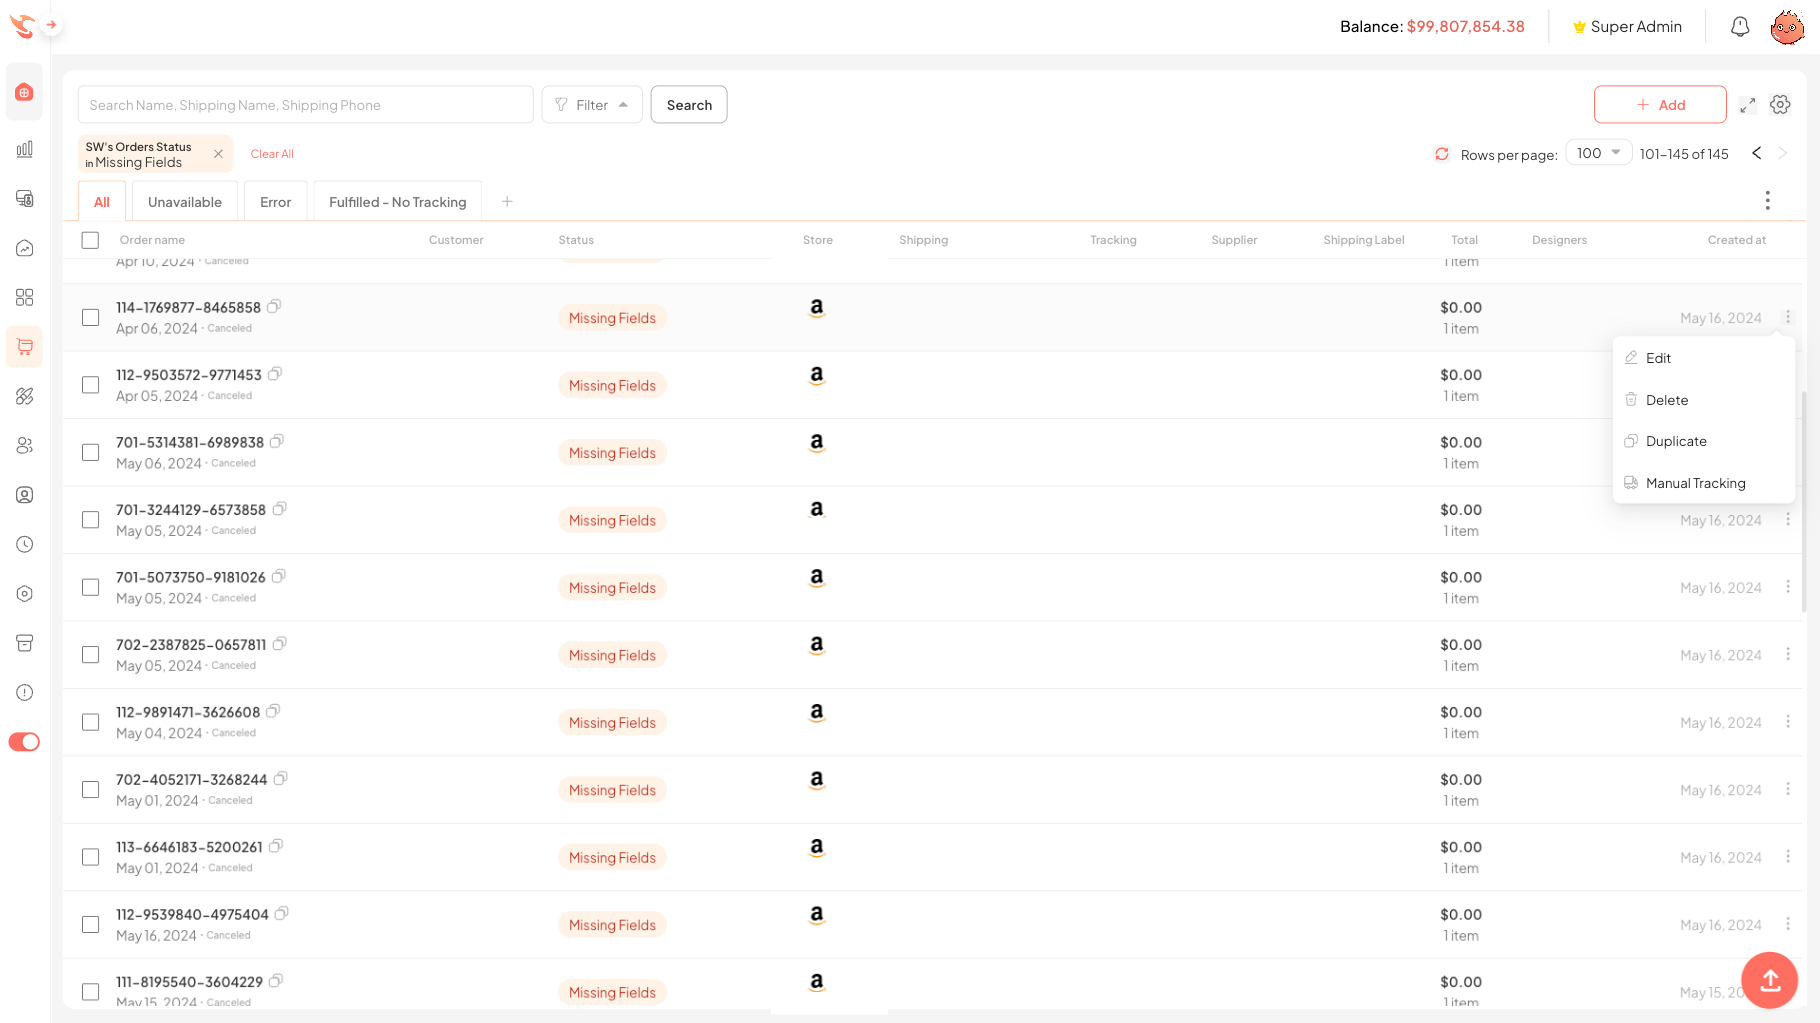
⚠️Note: The Duplicate Order feature can be applied to all Orders.
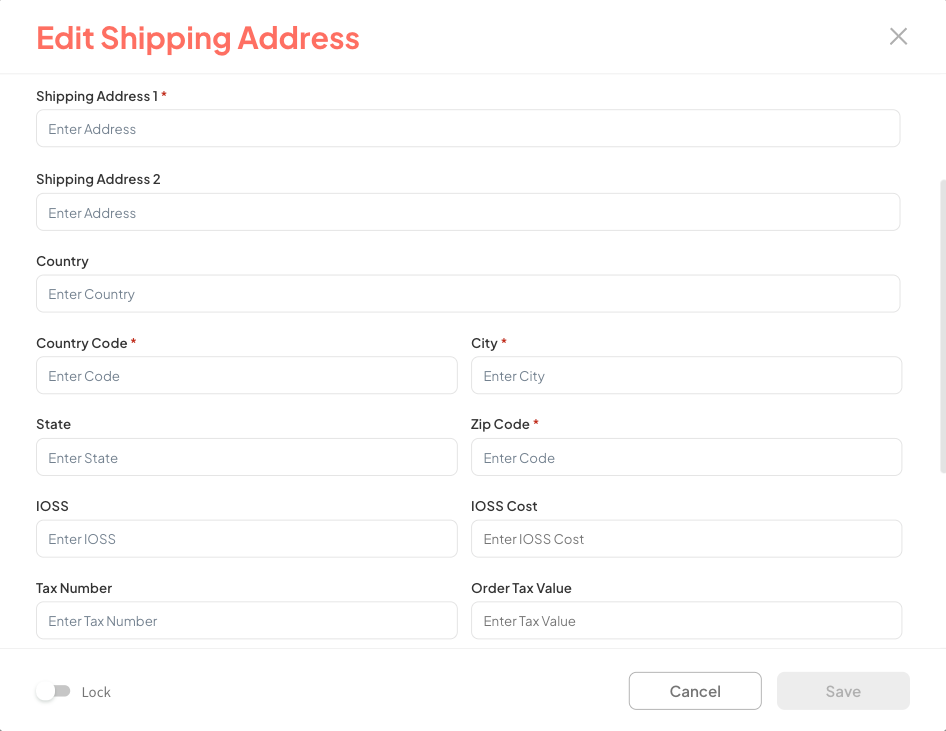
- Step 2: Proceed to fill in the missing information in the fields (these fields will be highlighted in red).
- Step 3: Select the Update icon at the bottom of the dialog box to complete the information addition.
4.4. Varying Shipping
This status occurs when 1 order has 2 items fulfilled by the same Supplier, but the 2 Shipping Methods are different.
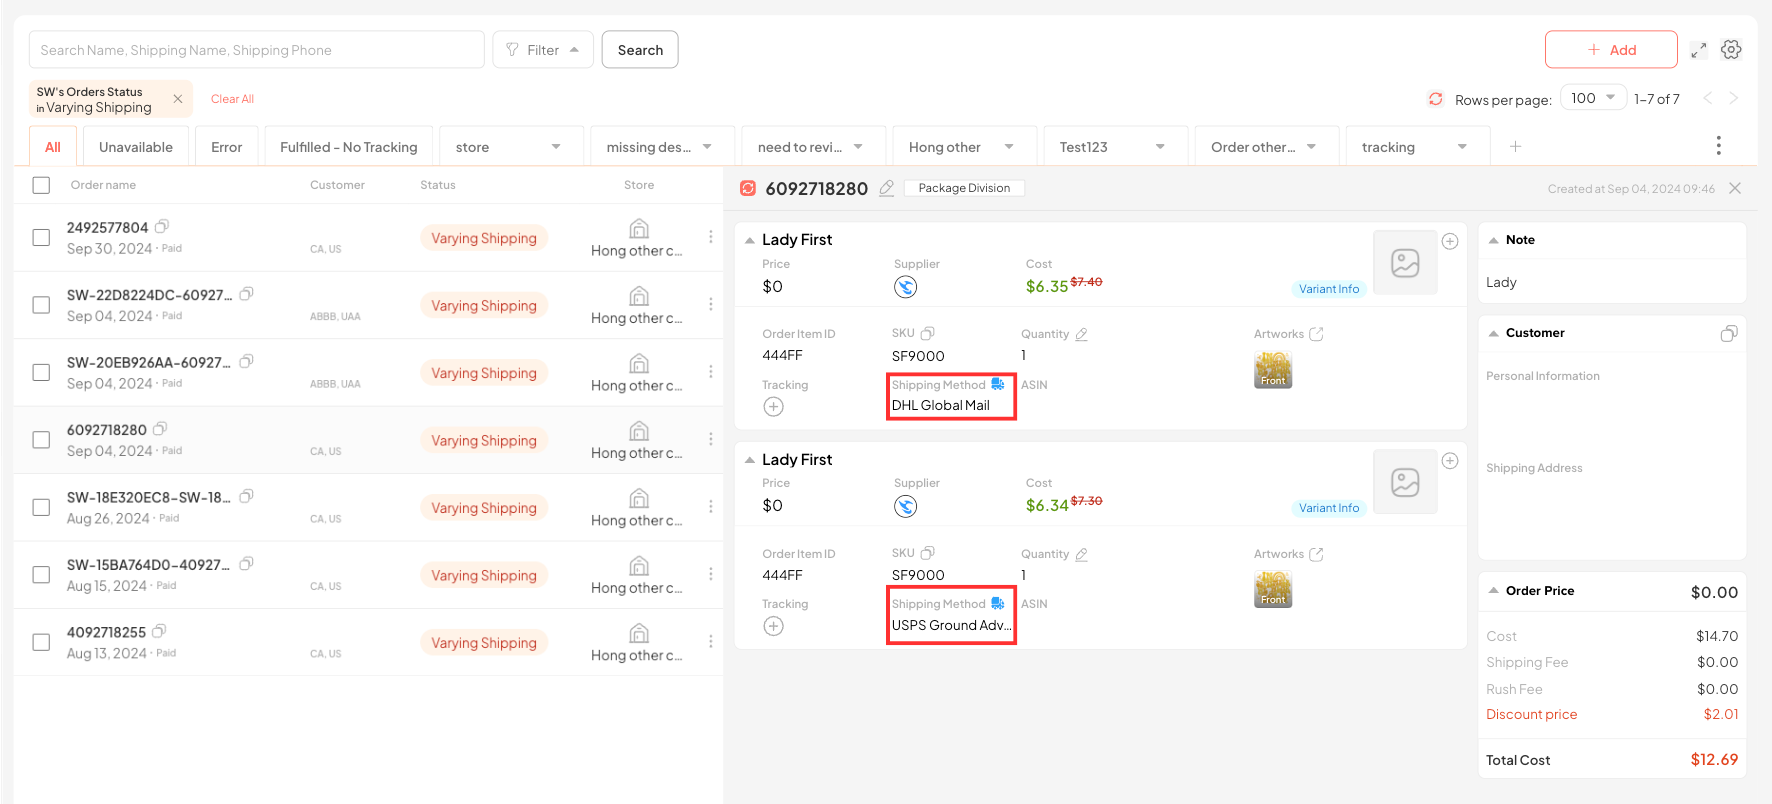
You can click the Supplier icon highlighted in red in the image to update the same Shipping Method for the items.

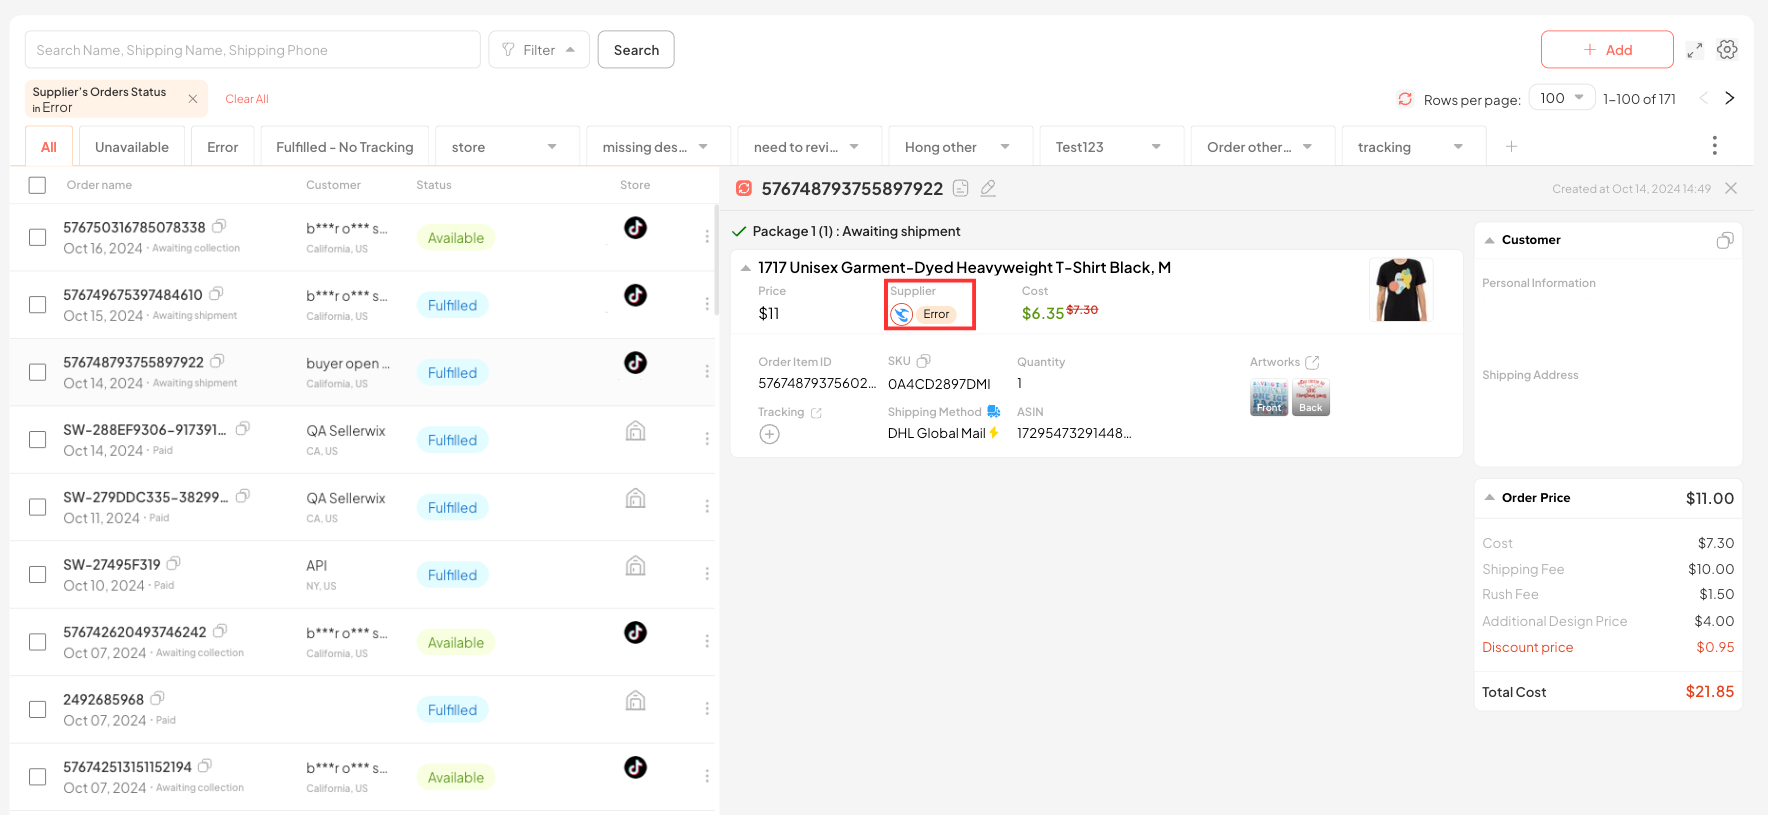
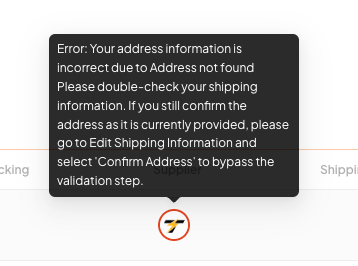
4.5.Error
This status occurs when an order has errors such as an incorrect address, incorrect design dimension, etc. Depending on the reported error, you can Edit Shipping Address, modify the information accordingly.
Hover over the Supplier logo for more detailed information.
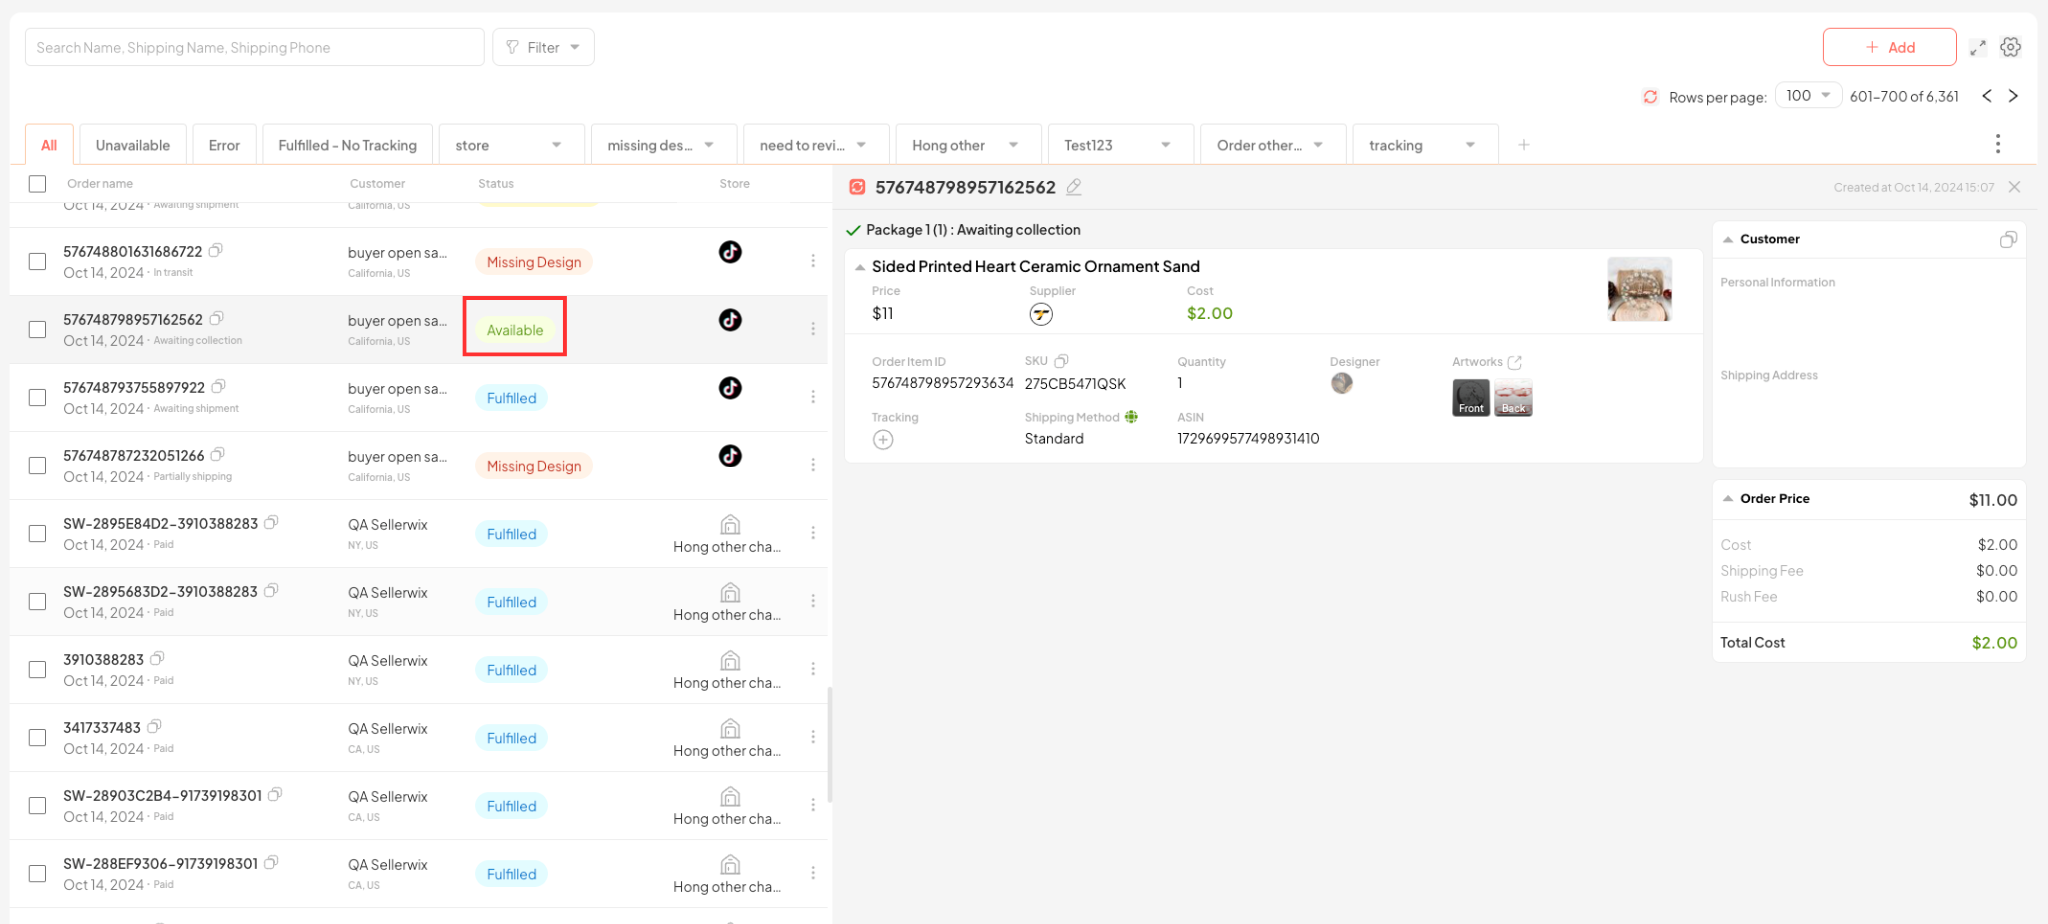
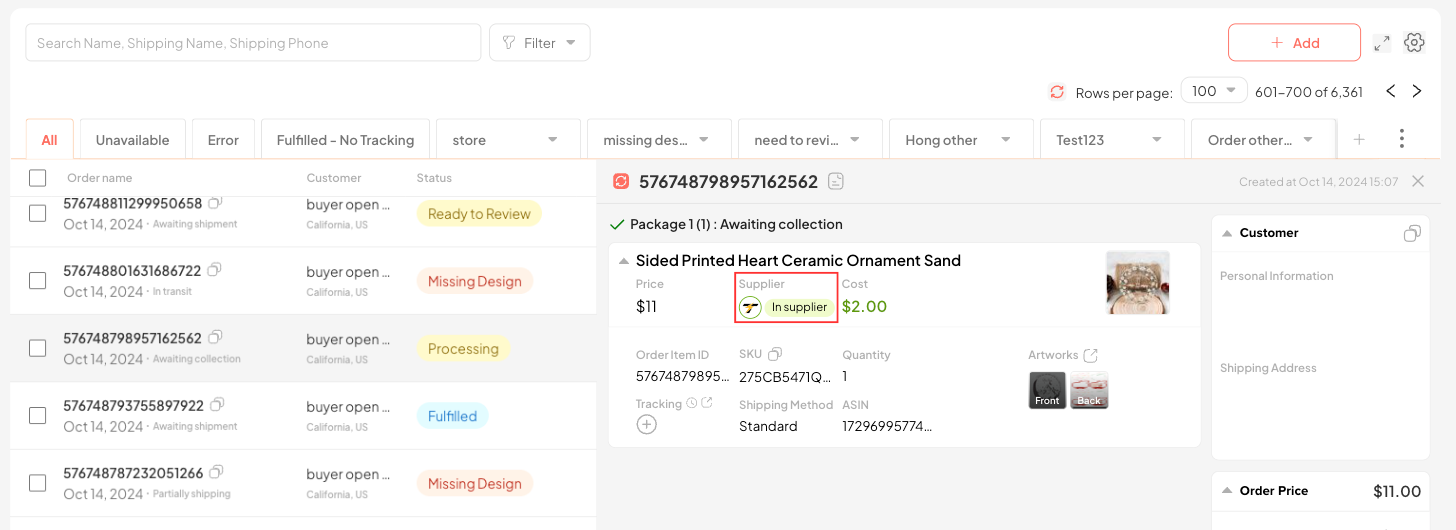
4.6. Available
This status indicates that the order meets the requirements and is ready to be fulfilled.
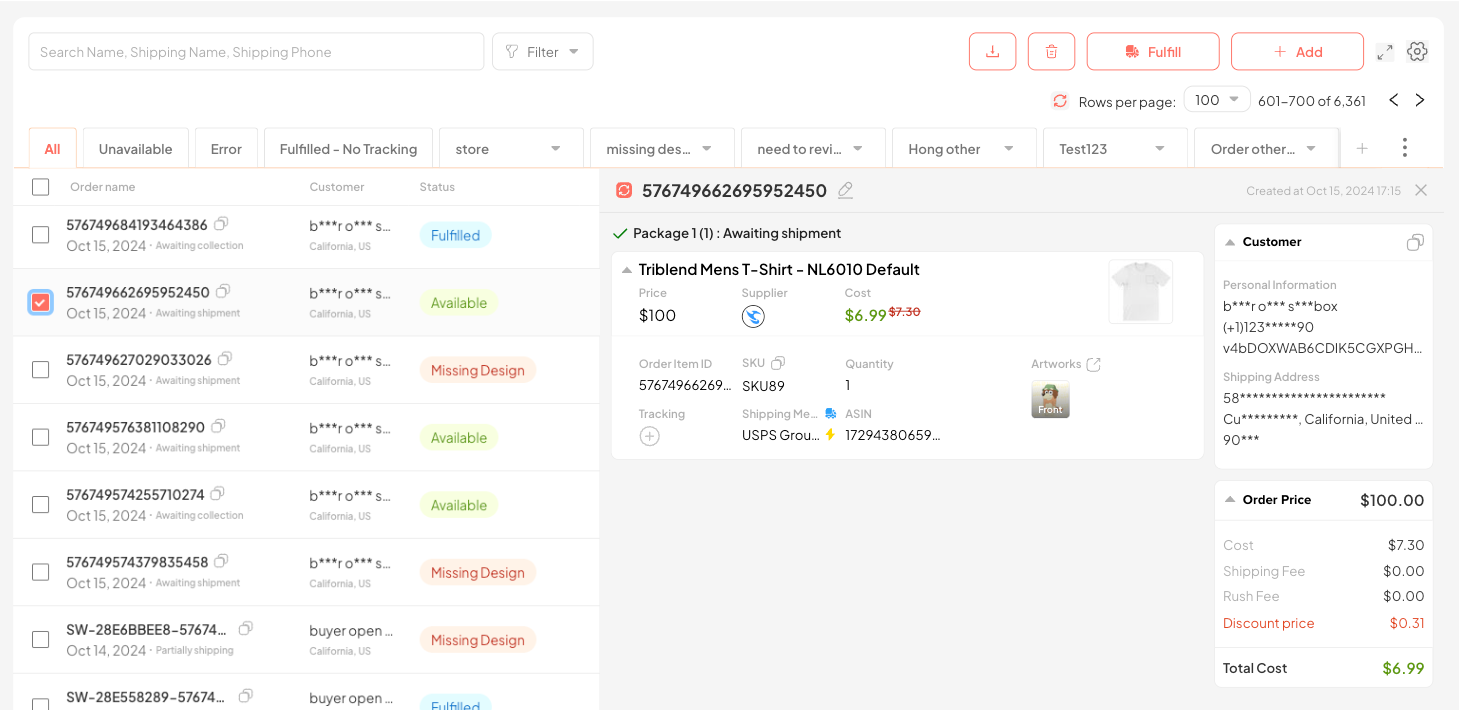
4.7. FulFill
When the Order meets the requirements and is ready to be fulfilled (Order is in Available status).
At this point, you can click the checkbox for the orders and click the Fulfill button, then confirm to fulfill.
Confirm fulfillment in the dialog box that appears after clicking Fulfill.
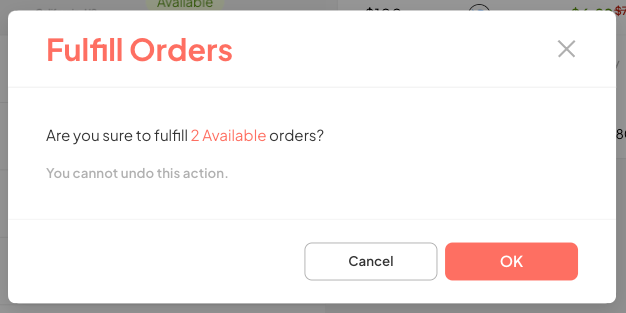
Orders will be in Processing status for a short period after confirming fulfillment.

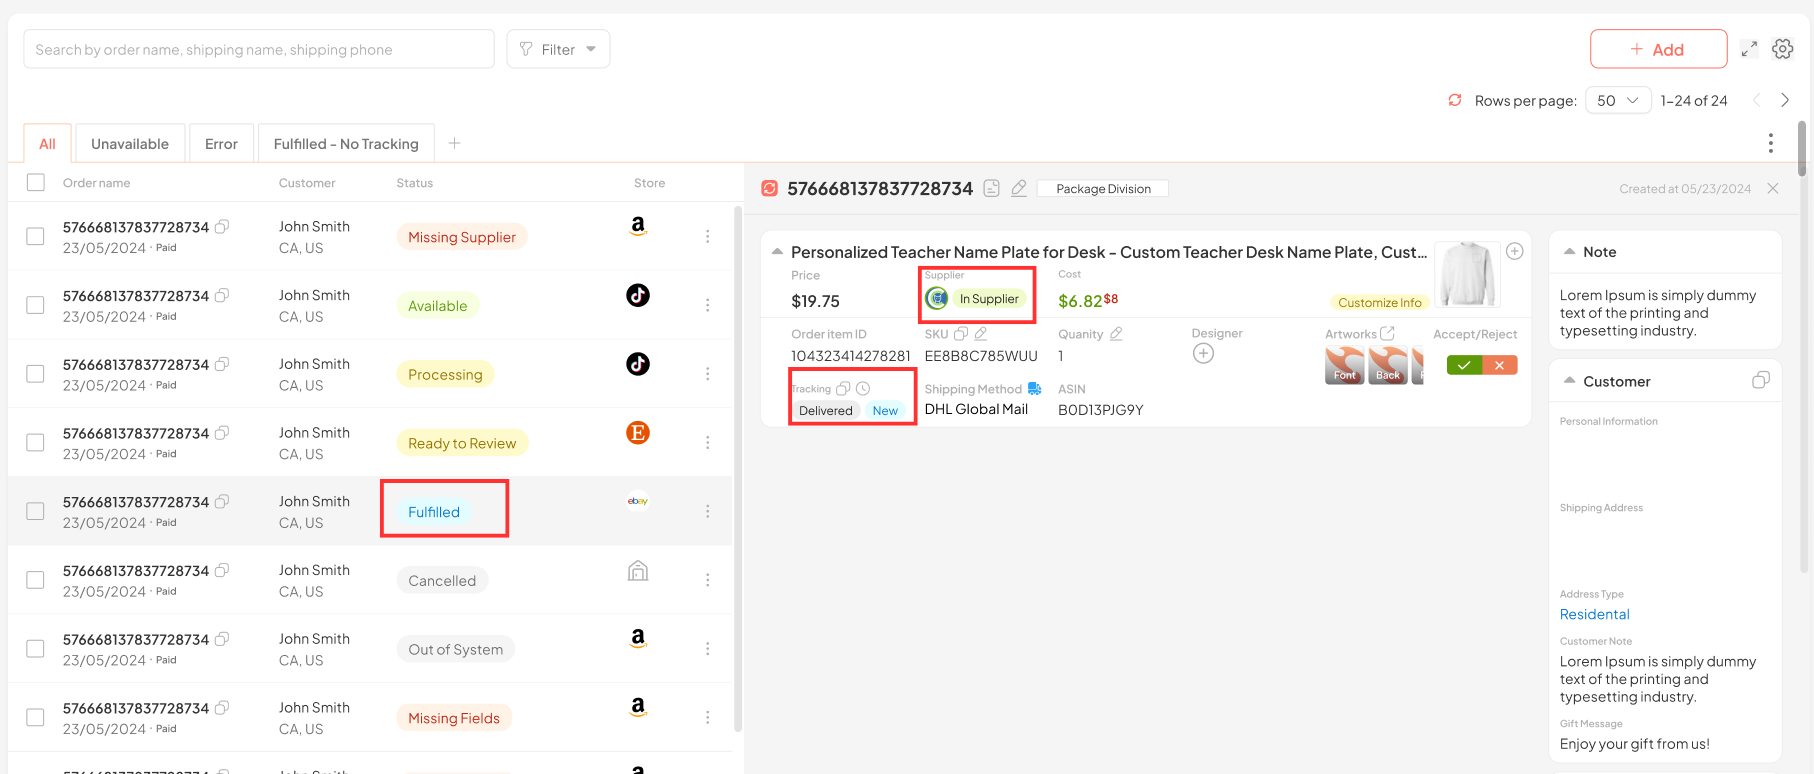
4.8. Order Fulfill Thành công
Order is produced and has a valid tracking, updated to the store.
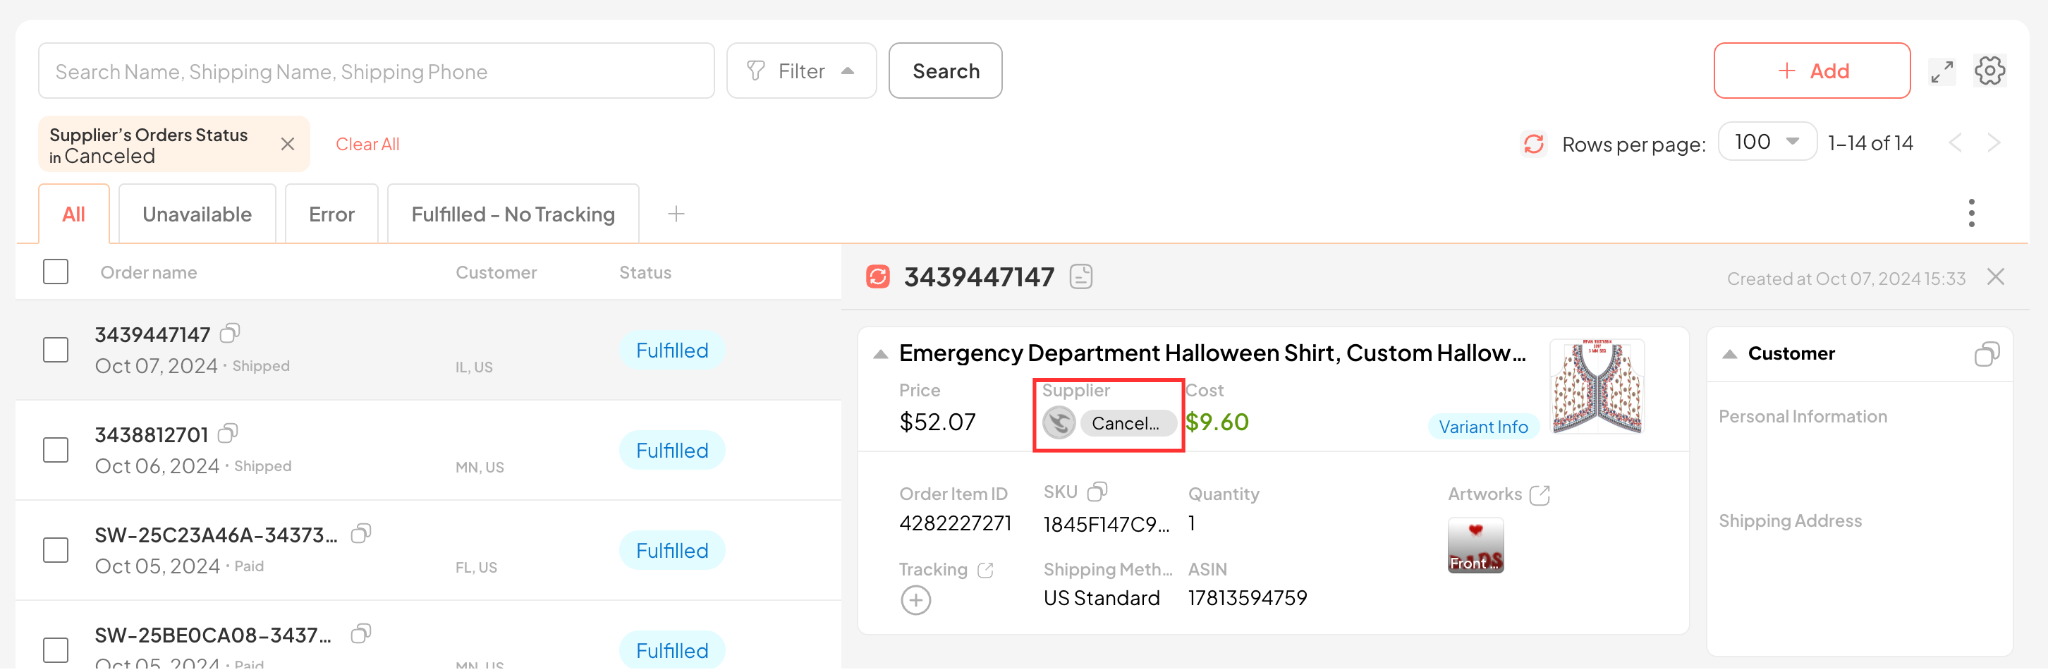
4.9. Canceled
This status occurs when the Order has been successfully canceled on the system.
Users can duplicate this order to edit and continue fulfilling.
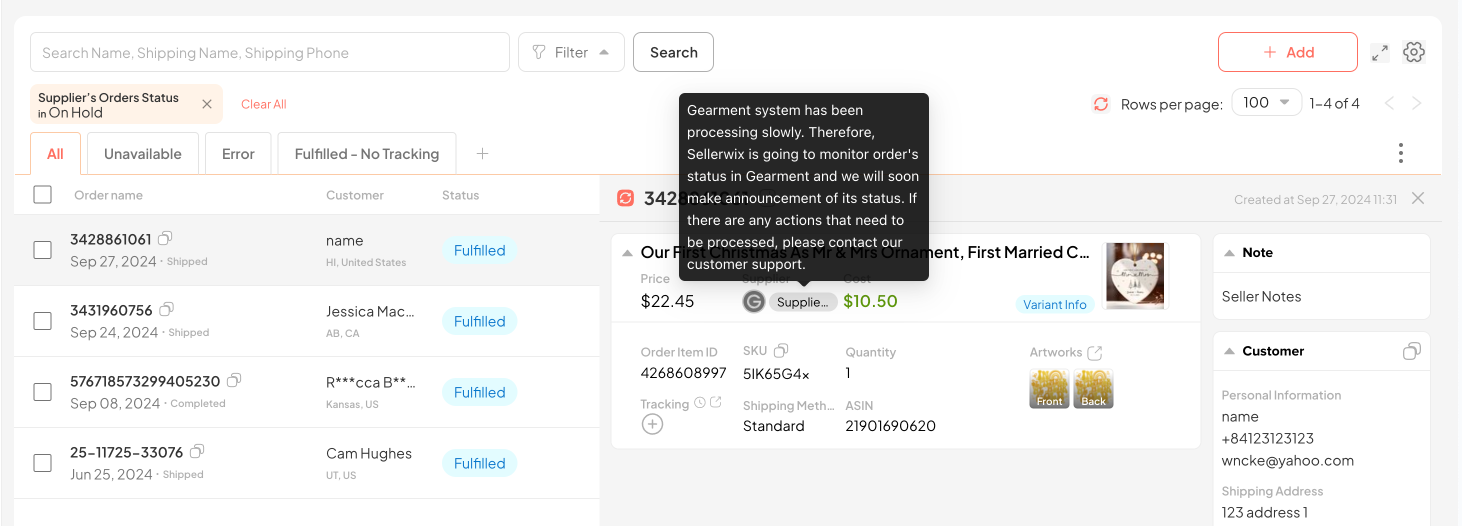
4.10. On Hold
This status occurs when Suppliers process orders slower than usual.
In this case, Bivasoul will proactively monitor the order status on the Supplier’s side on behalf of the user and notify the user if any errors occur.
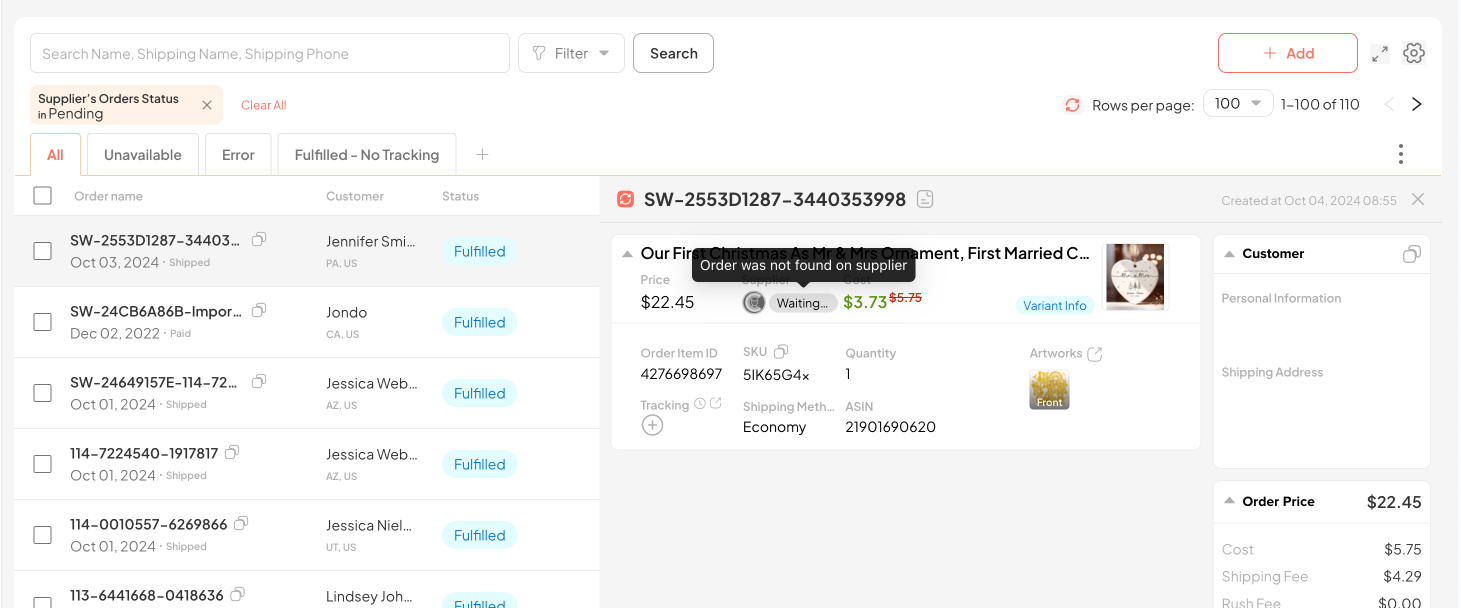
4.11. Pending
Pending is the status of an Order when the user has confirmed the order address is correct and has ticked the checkbox “I make sure that all information has been checked and verified by customer“, however, the Supplier still reports an address error when Fulfilling.
In this case, Bivasoul will proactively monitor the order status on the Supplier’s side on behalf of the user and notify the user if any errors occur.
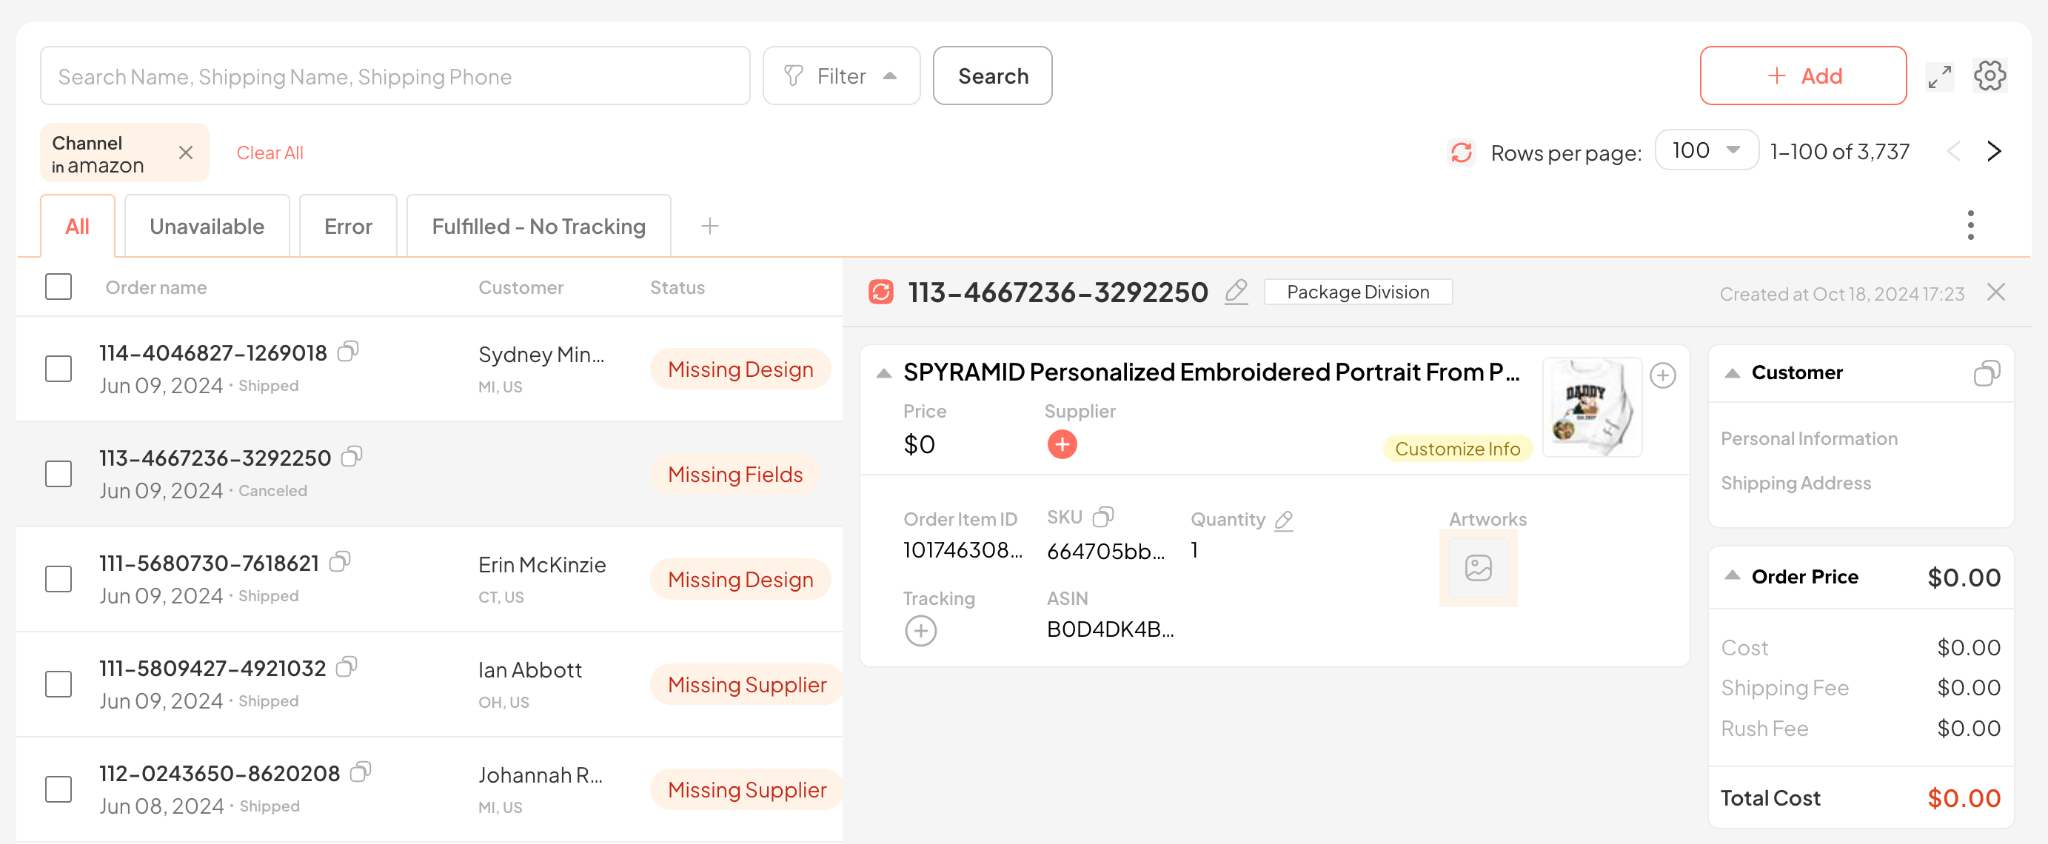
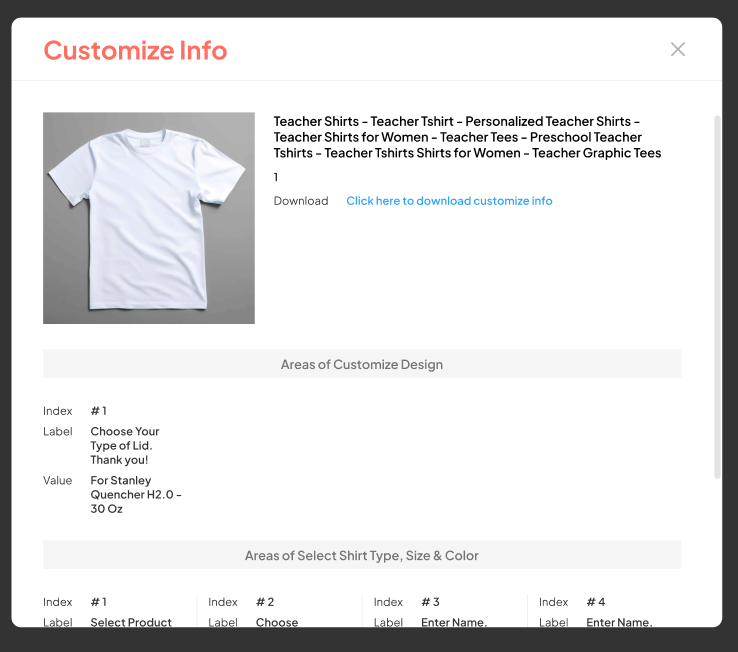
4.12. Customized Info
For Amazon personalized products, you can click the Customize Info icon to view the personalized order item information.
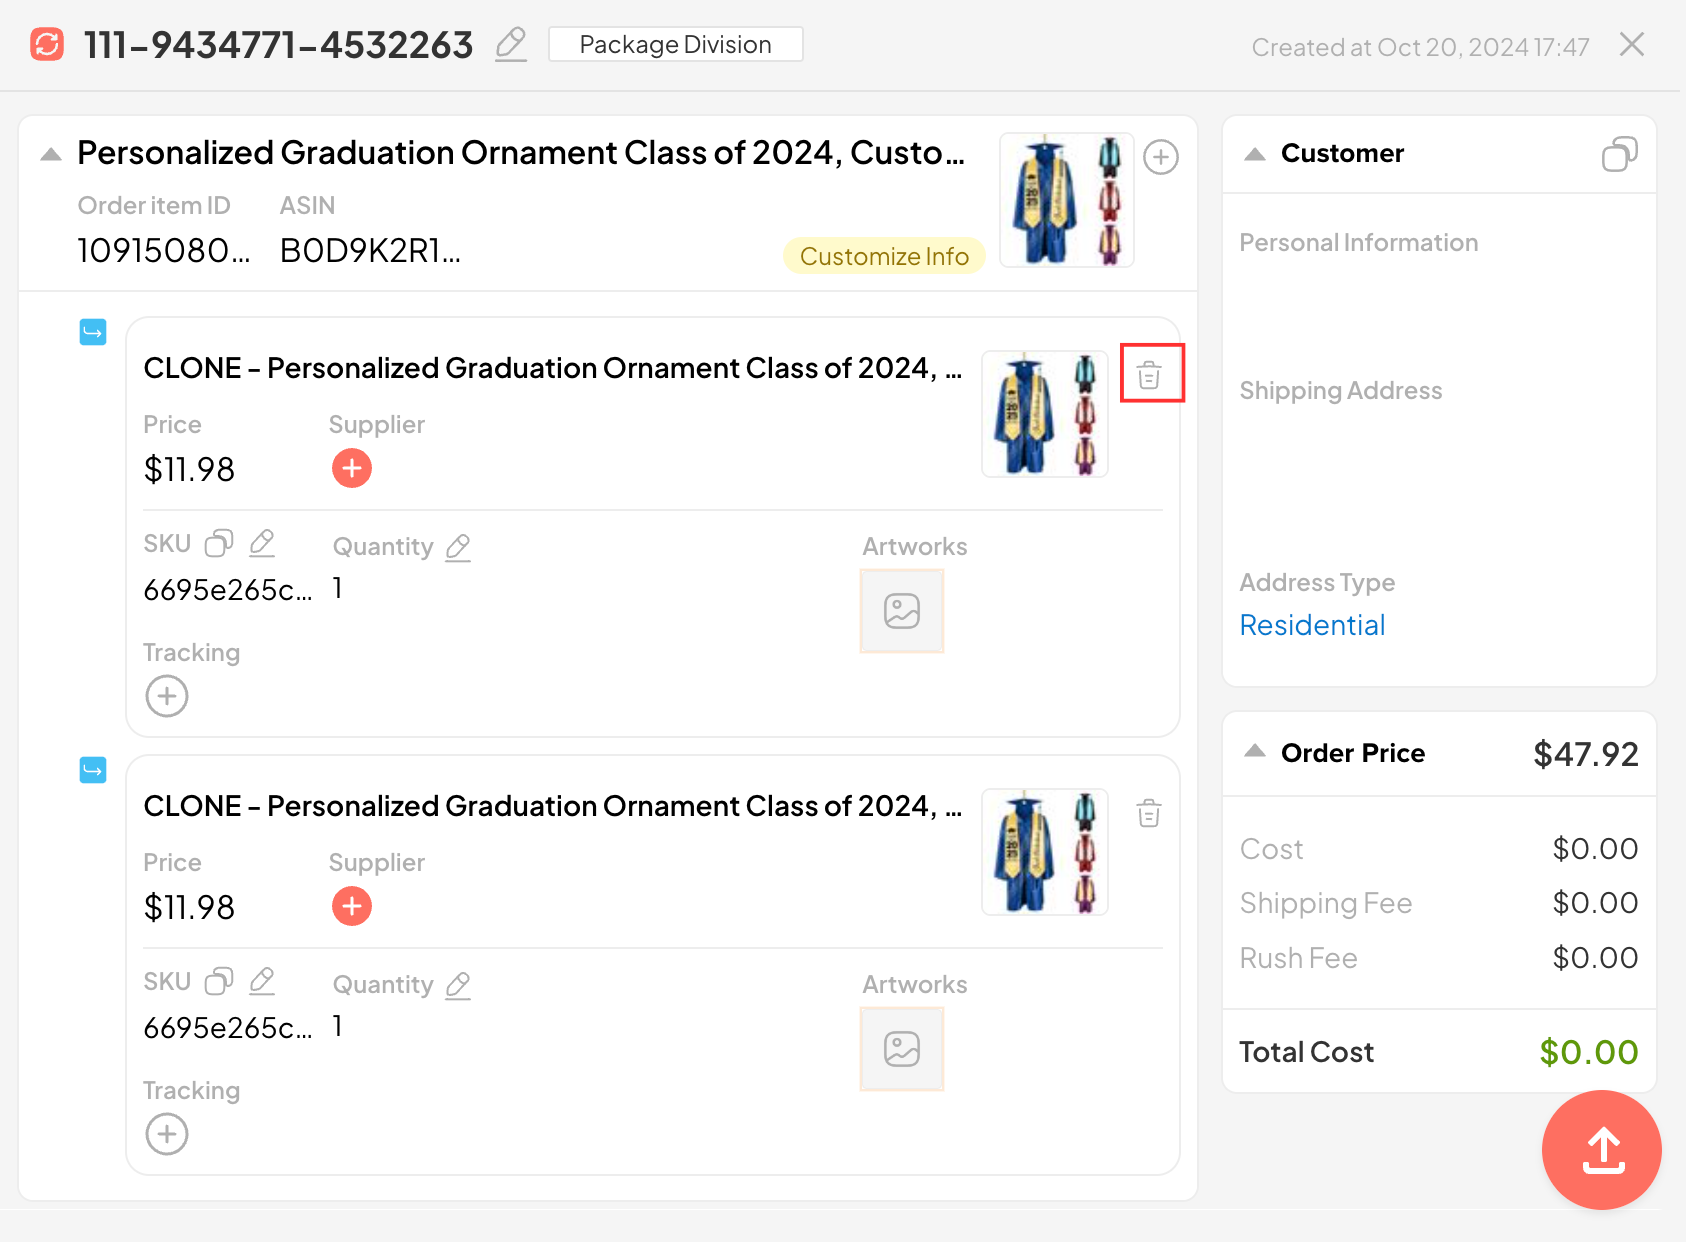
After custom orders are retrieved into the system, you can choose to add/delete items by clicking the icons below:
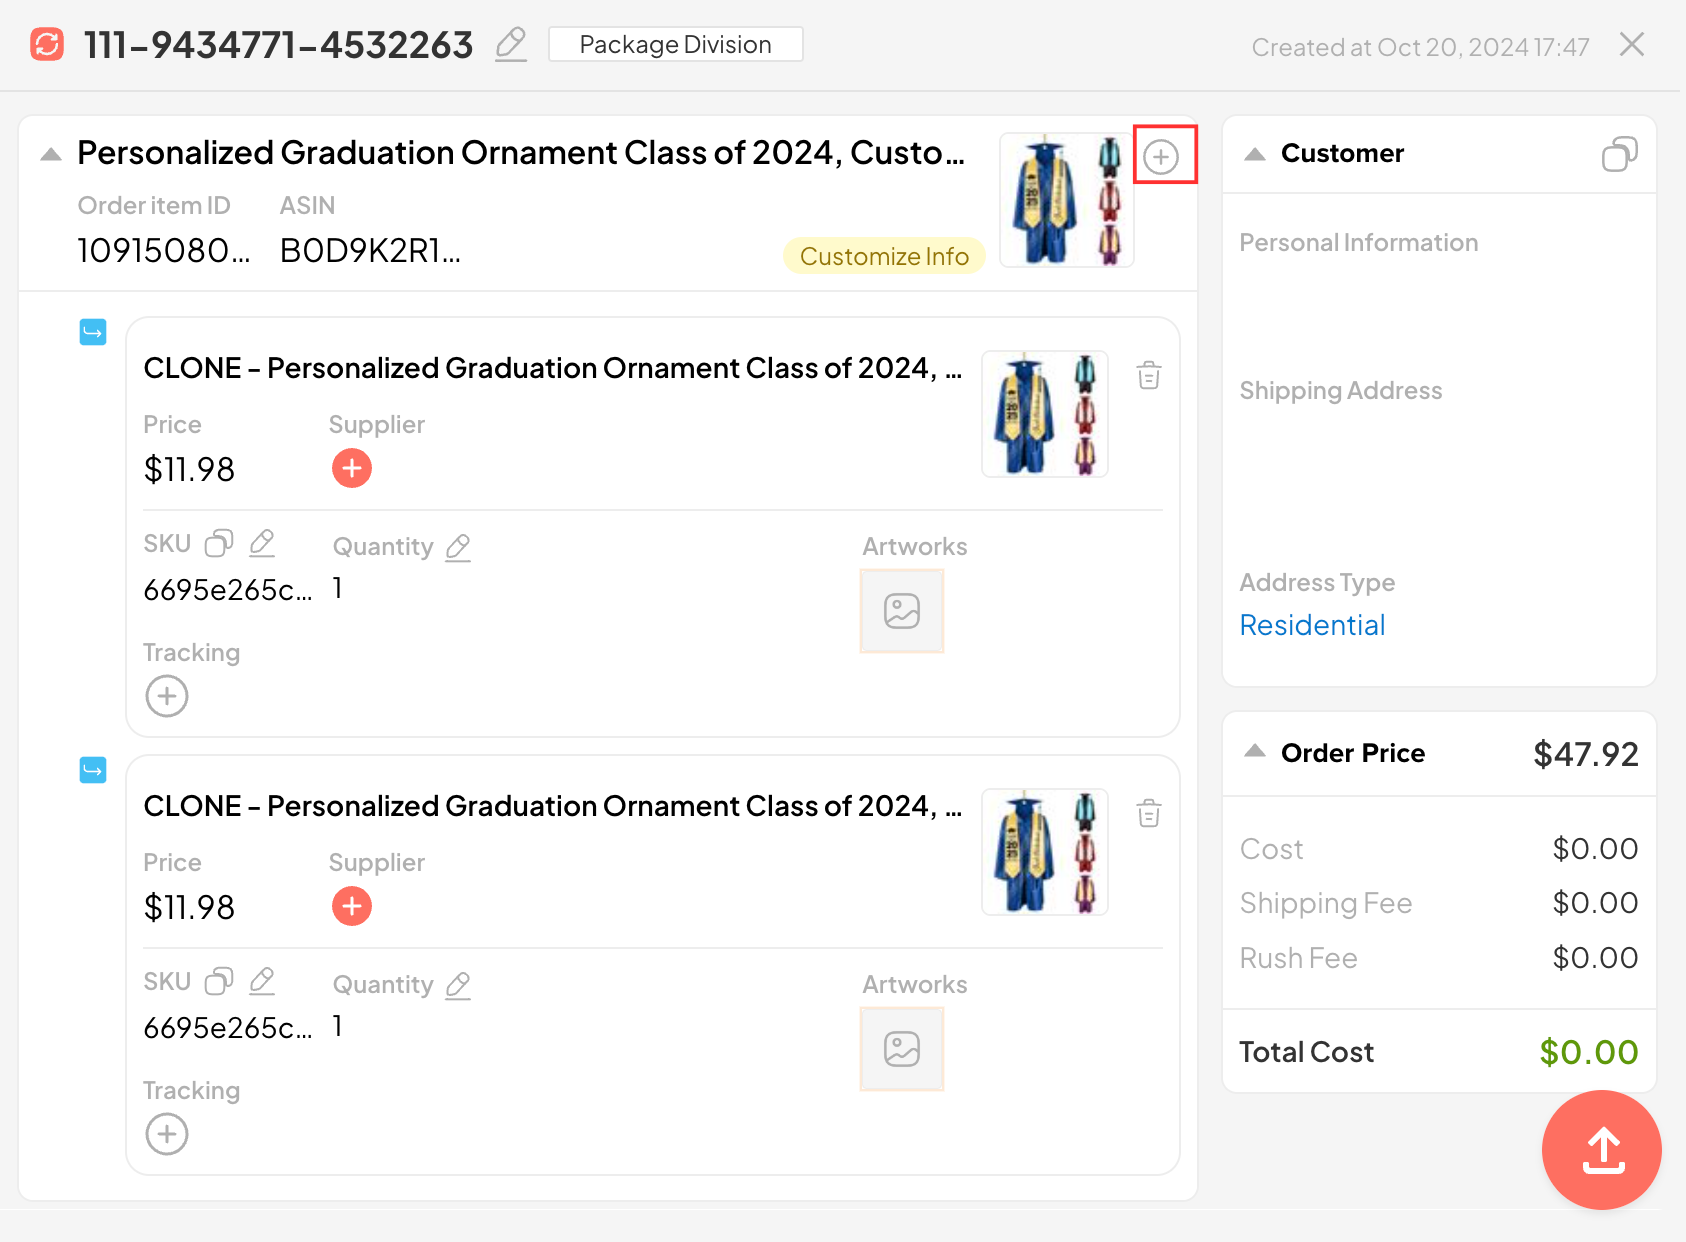
⚠️ Note: Each Parent Item must have at least one Child Item. You cannot delete all Child Items of a Parent Item.
4.13. Xoá Item trong một Order
- Step 1: Duplicate the order with the item to be deleted by clicking the Duplicate button in the Action column.
- Step 2: Click the Delete button to delete the items that need to be deleted.
⚠️ Note: To ensure the correct order information is retrieved from Stores or imported from a CSV file, the system only deletes order items from orders duplicated from the original order.
5. Tracking Order
1. Monitor and Manual Get Tracking
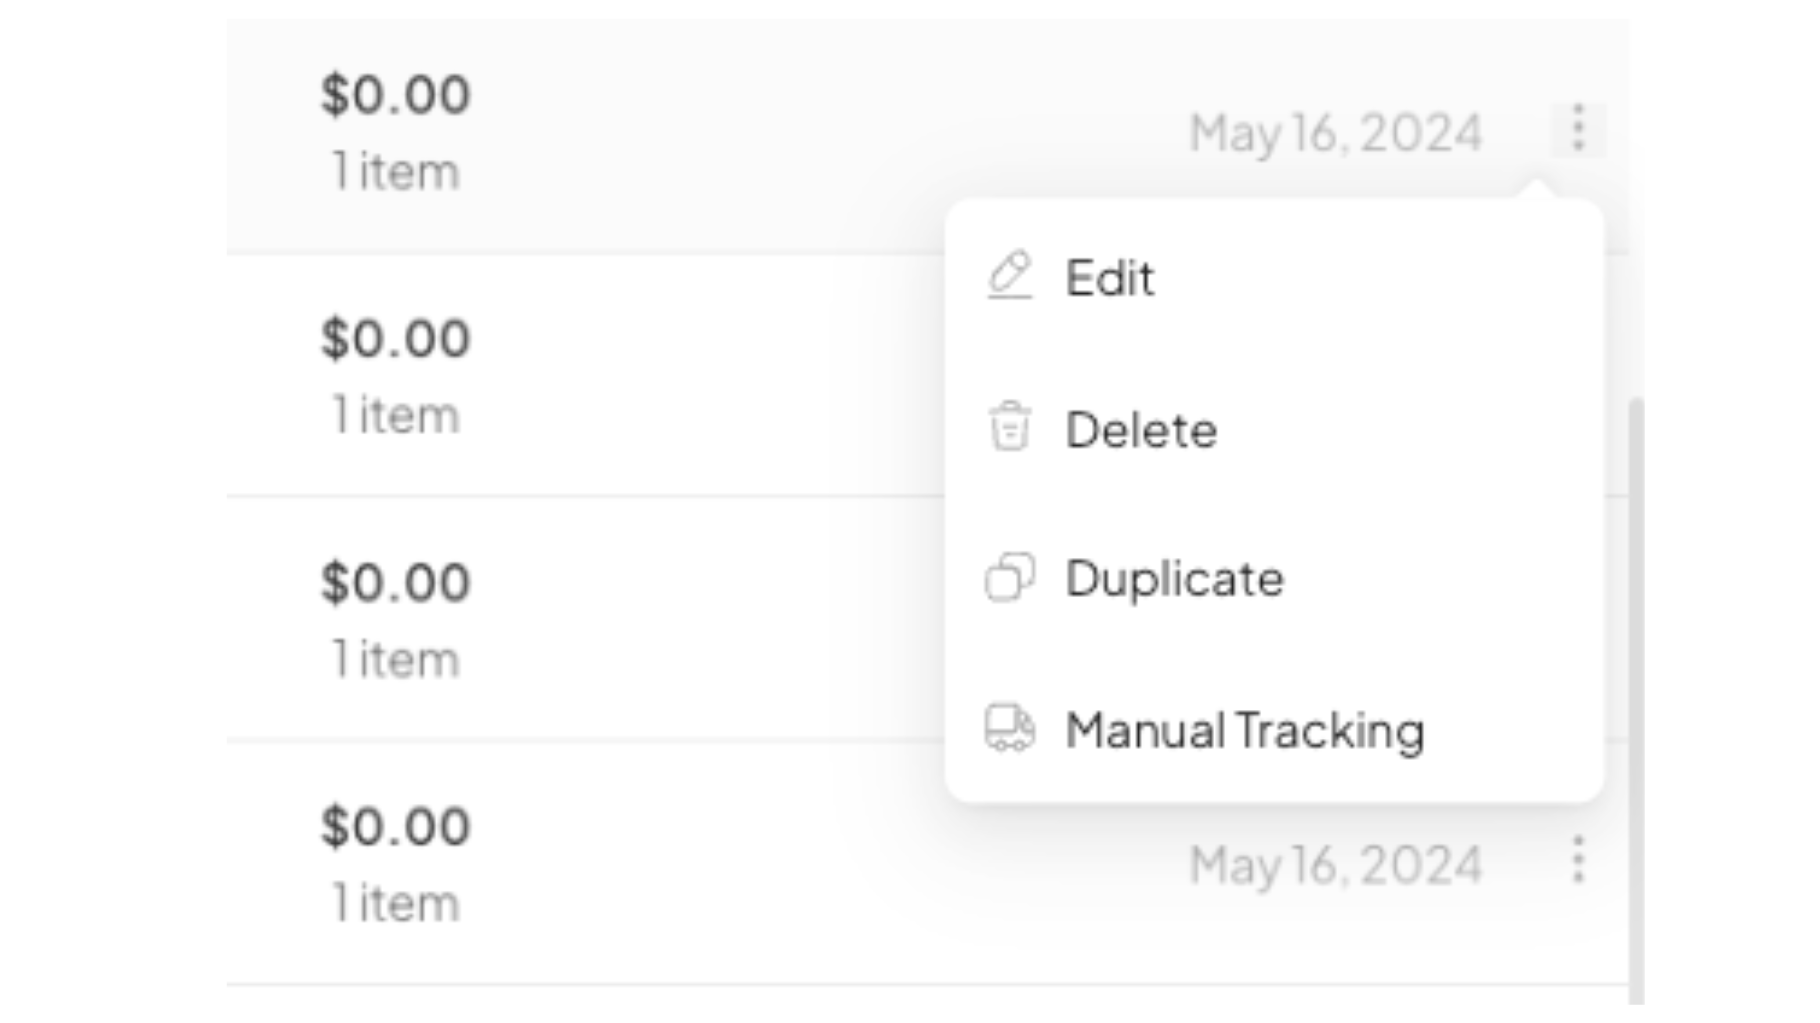
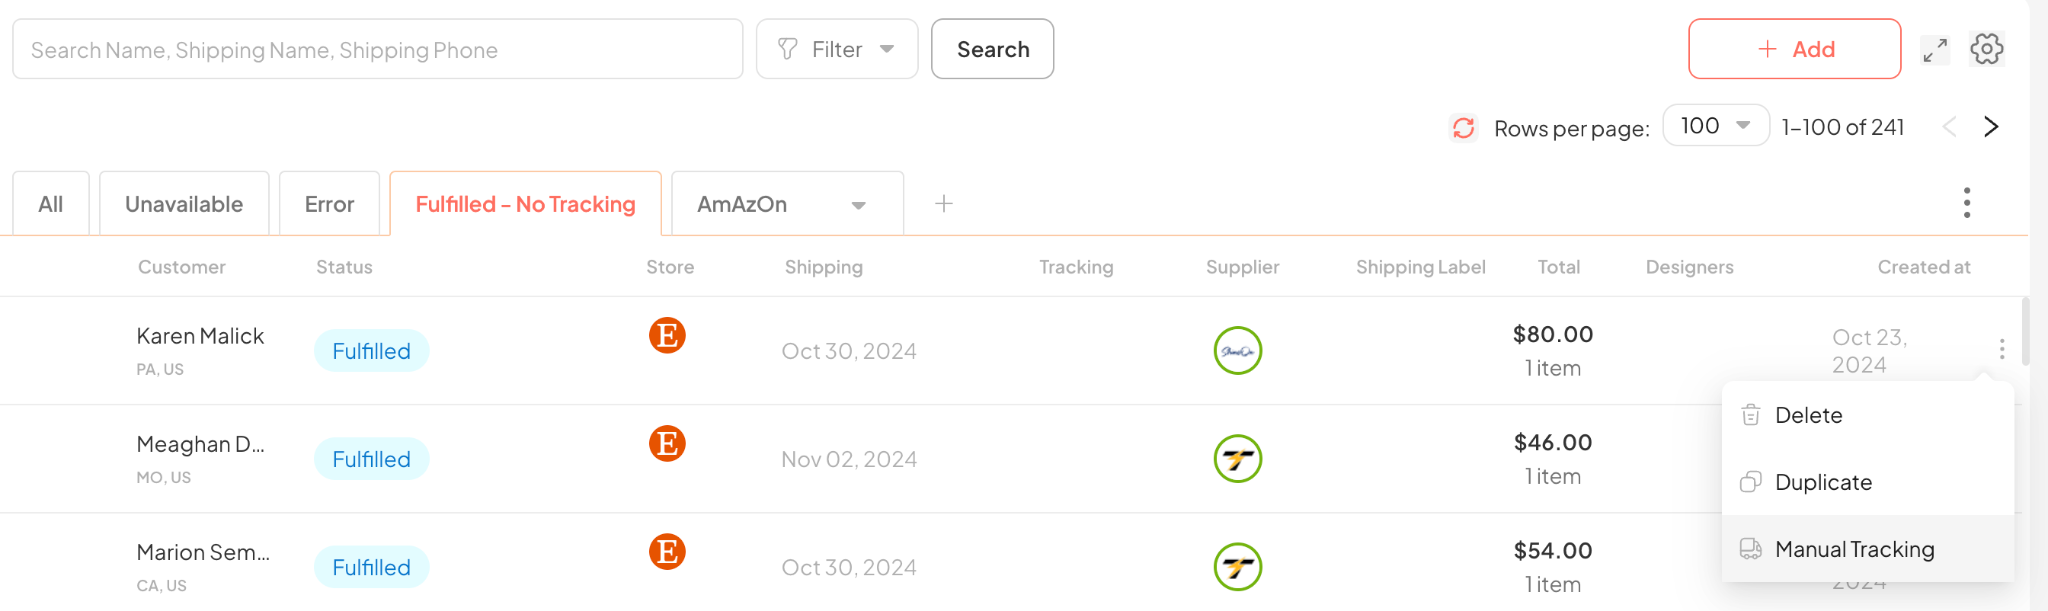
In cases where an order has new Tracking that the Supplier has not yet updated, or the user wants to add tracking for an order fulfilled by an external Supplier, the Manual Tracking feature can be used.
- Step 1: Click the Manual Tracking icon:

2. Manual Tracking
In cases where an order has new Tracking that the Supplier has not yet updated, or the user wants to add tracking for an order fulfilled by an external Supplier, the Manual Tracking feature can be used.
- Step 1: Click the Manual Tracking icon:
- Step 2: Update the Tracking information for the order.

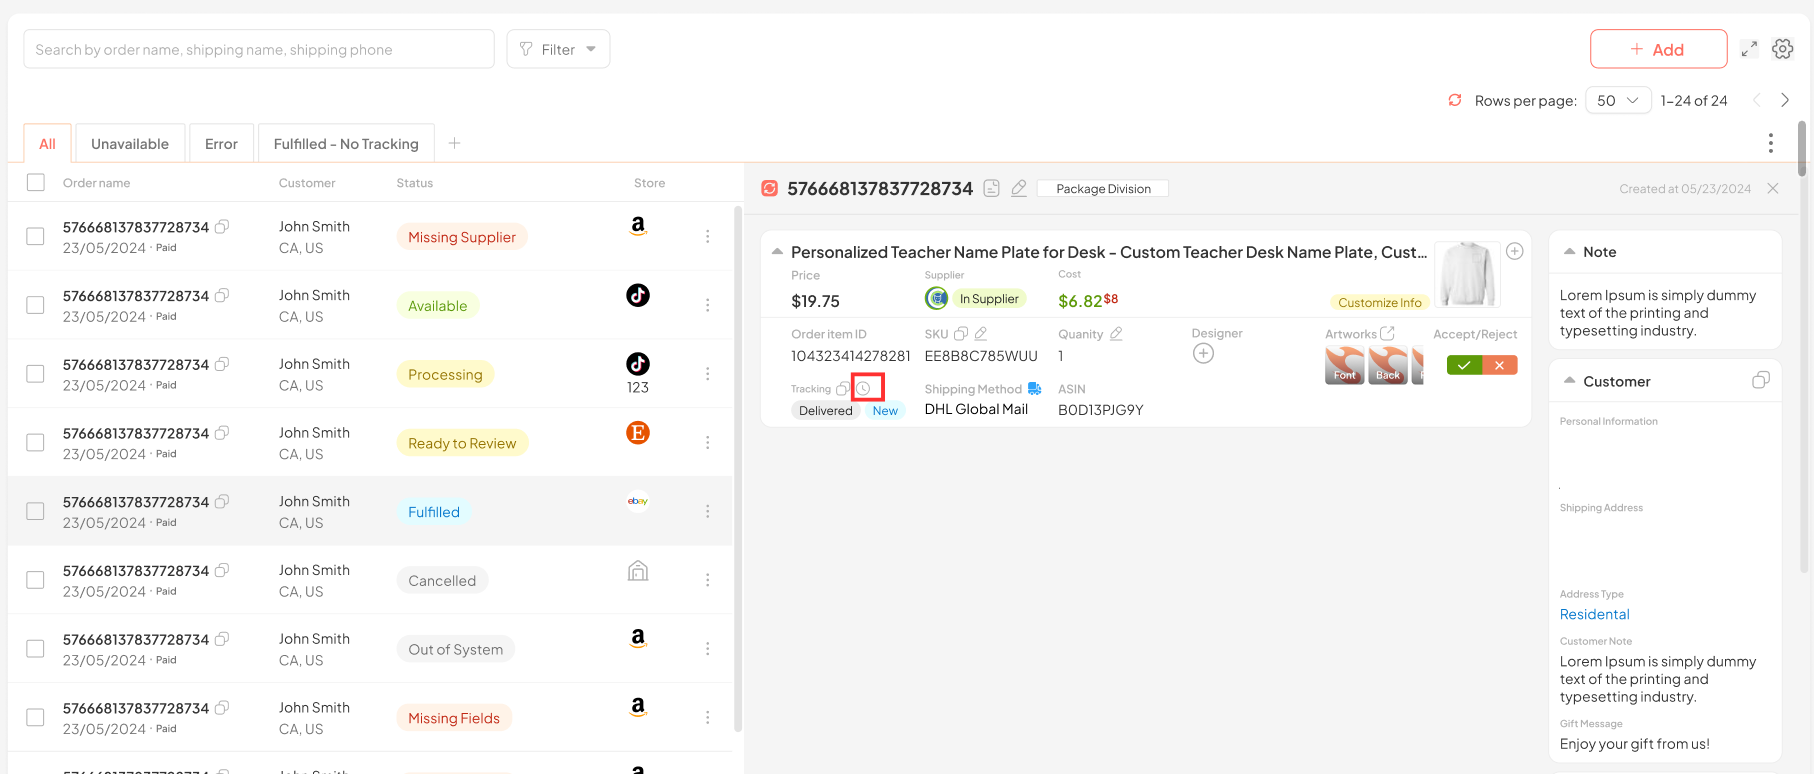
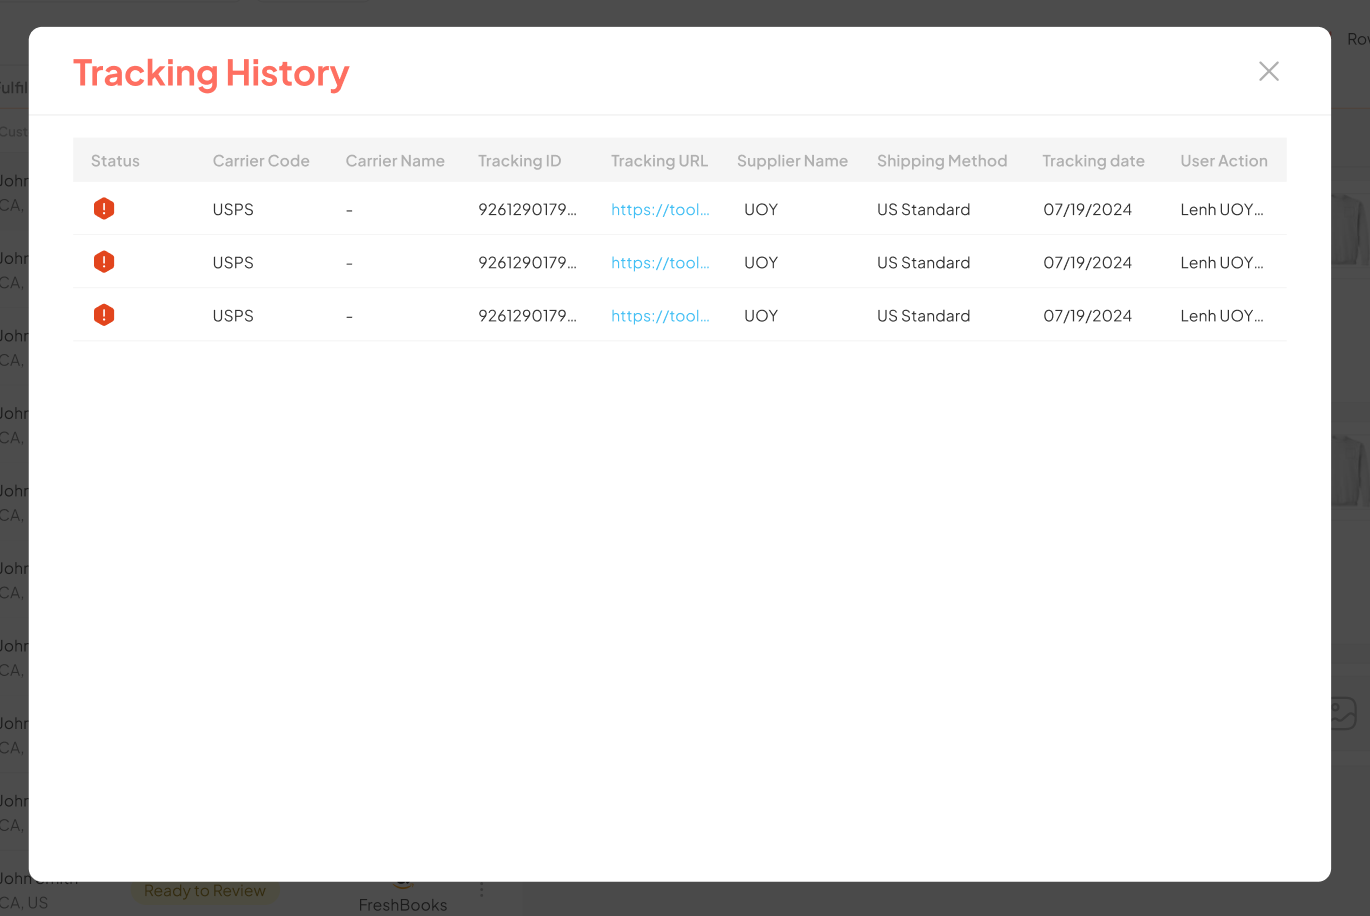
3. Highlight New Tracking And View Tracking History
You can review changes to an order’s Tracking with the Tracking History feature.
6. Check Design on Print Area
1. Steps to Check Design on Print Area
Step 1: Click the + icon of the supplier
- Step 2: Select Supplier, Category, Product, Color, Size and upload Design

- Step 3: After selecting the blank product information, there will be a blue Preview Design button below the blank product image.
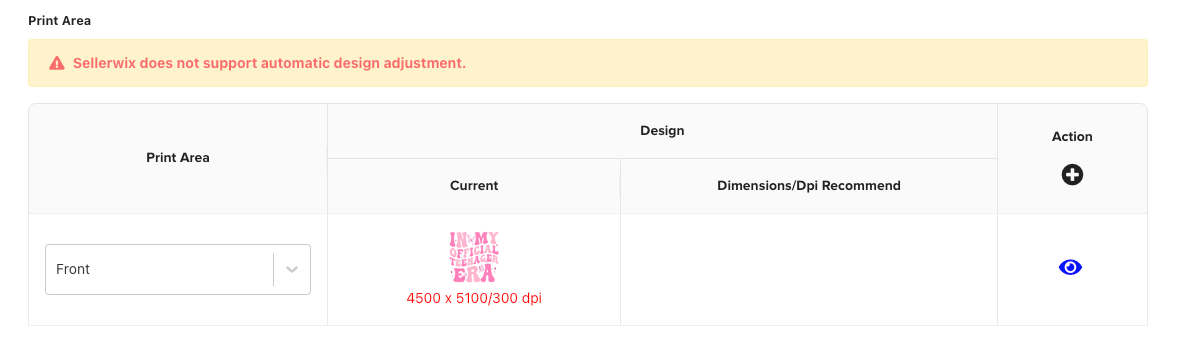
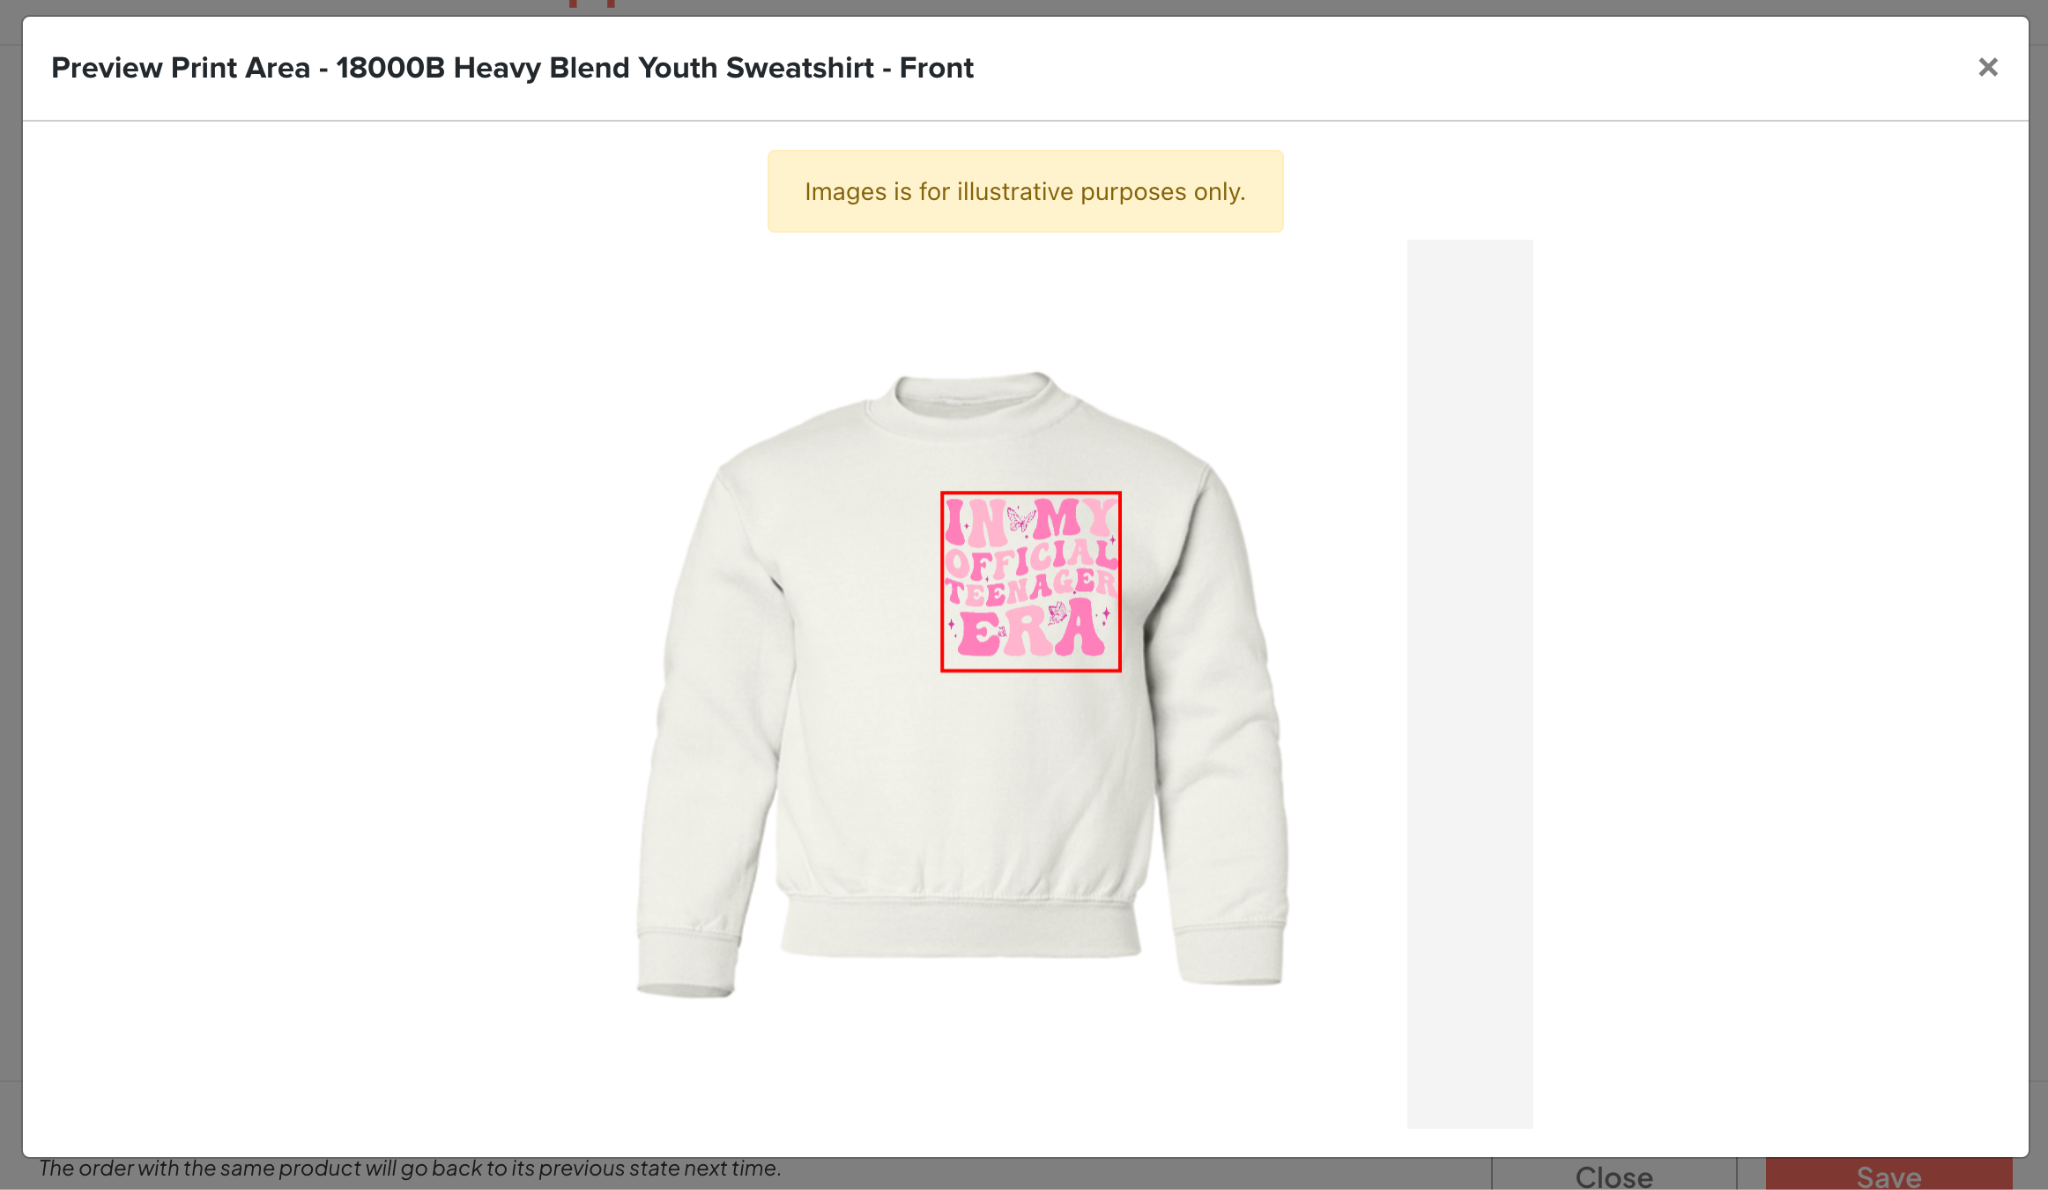
⚠️ Note: Currently, Bivasoul supports this function for the following suppliers: Gearment, CustomCat. For products with an official Template for Design, the system will support Preview Design. For products without a template from the Supplier, the Preview Design button will not be displayed.
You can contact Customer Support to add more products from Suppliers that do not yet have a template.
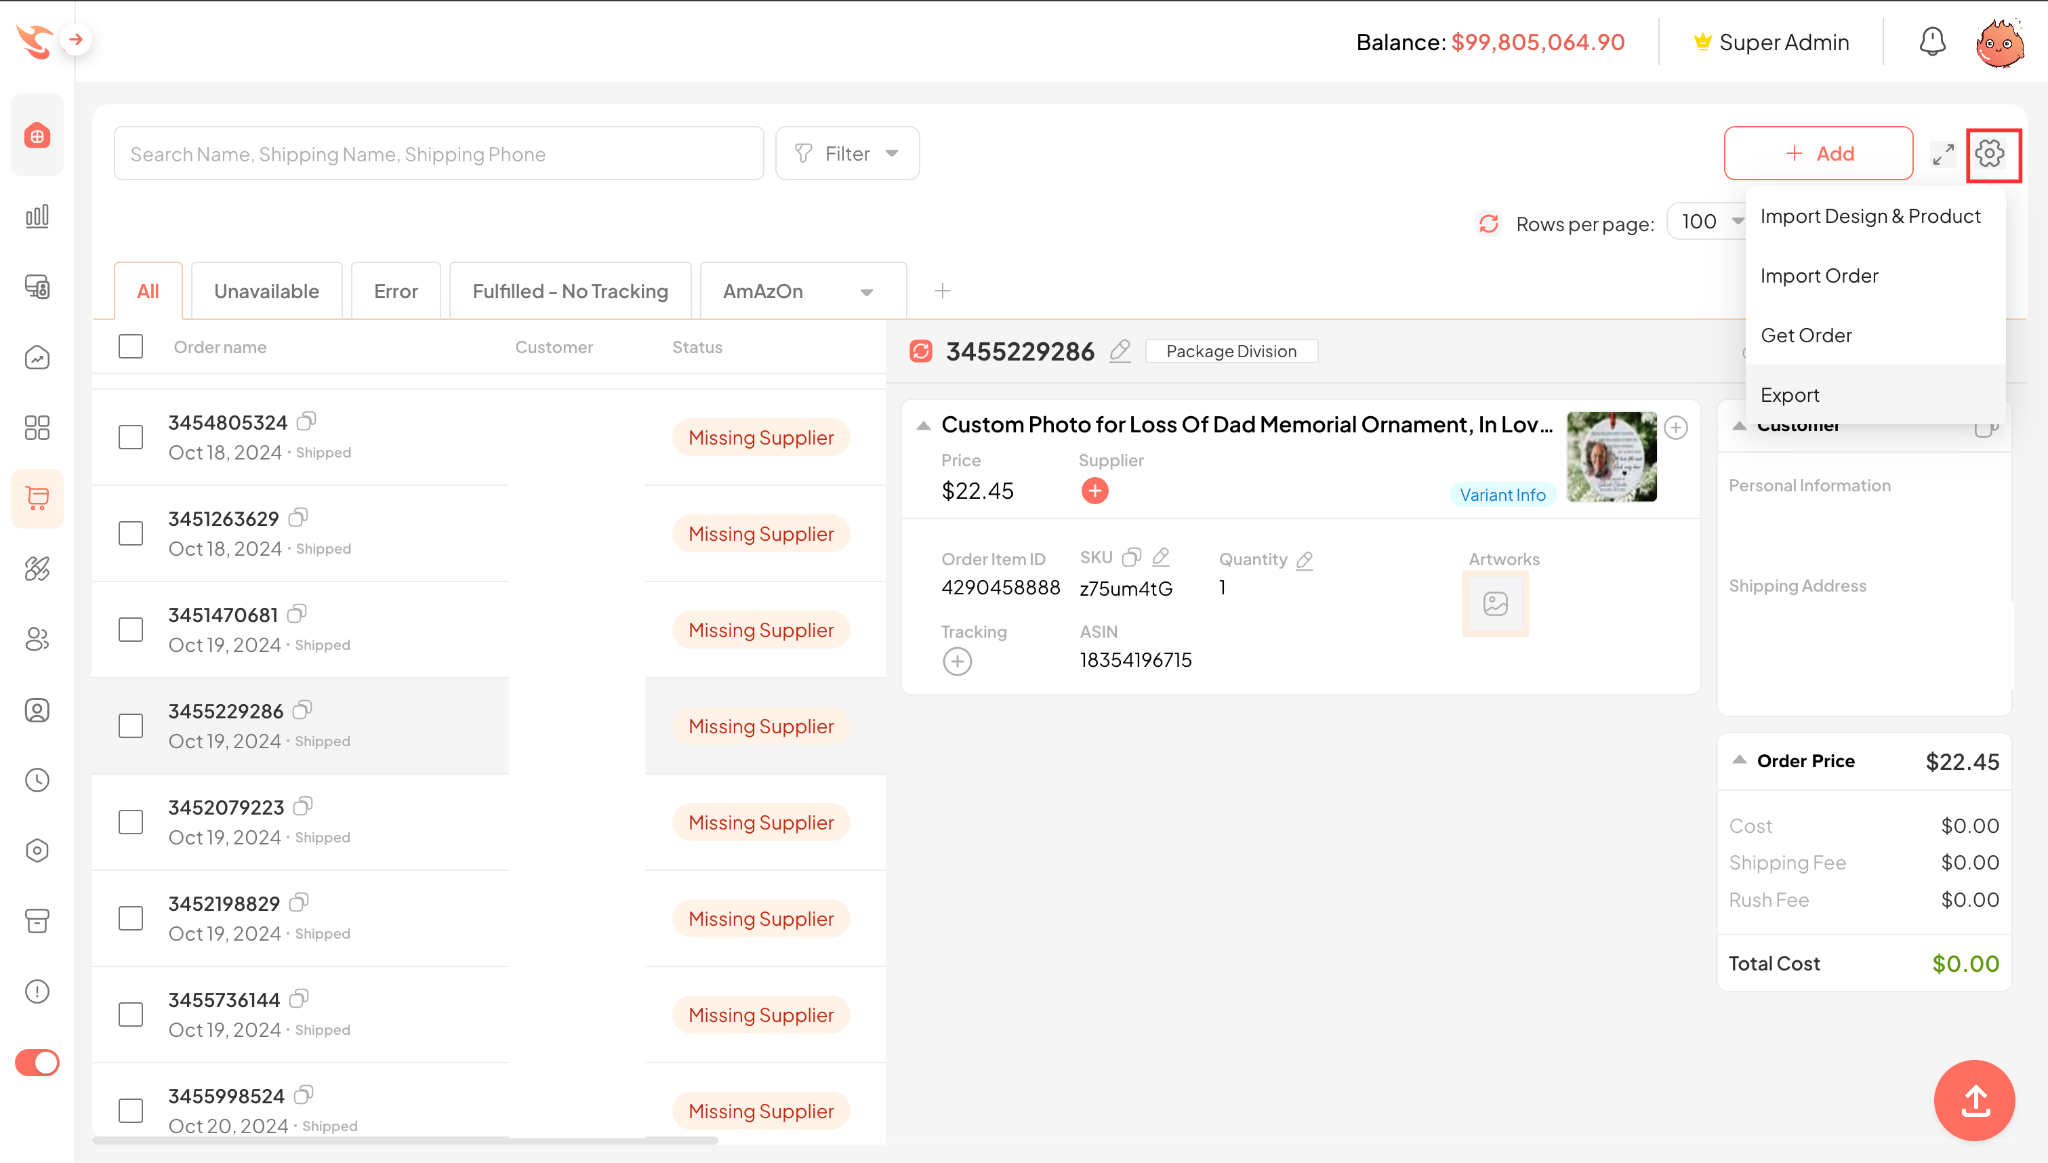
7. Export Order
The system will Export orders already in the system
- Step 1: In Order Management, click Icon
- Step 2: Select Export
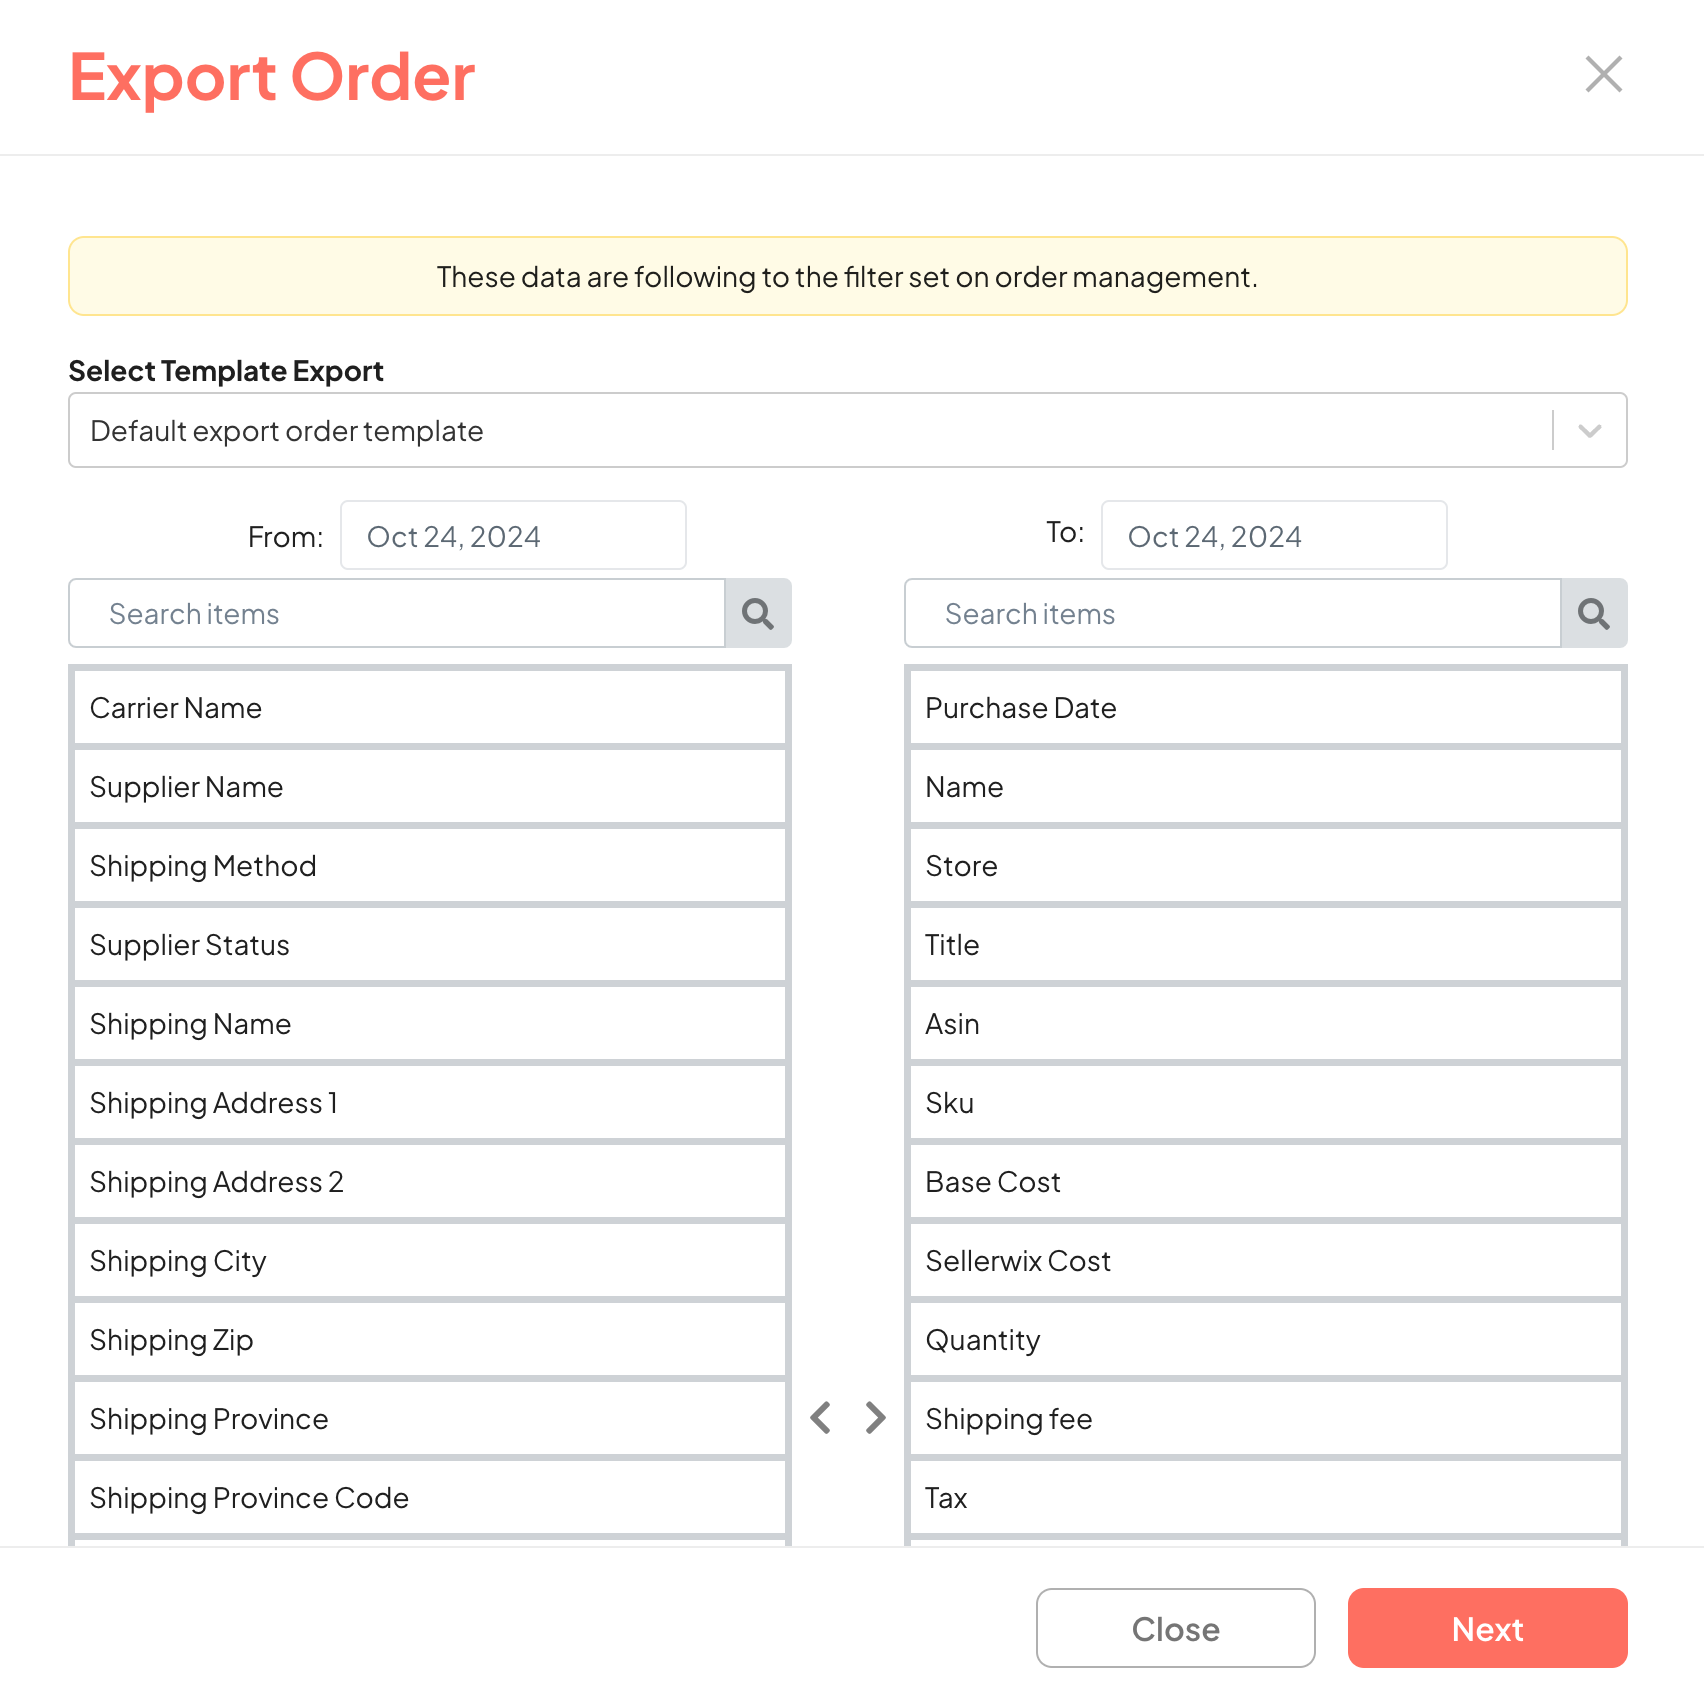
- Step 3: Here, select the time range you want to Export orders.
- The fields on the right are the fields that will be Exported.
- The fields in the left column will be the fields that are not exported.
- If you don’t want to export a field, you can drag it to the left column (and vice versa).
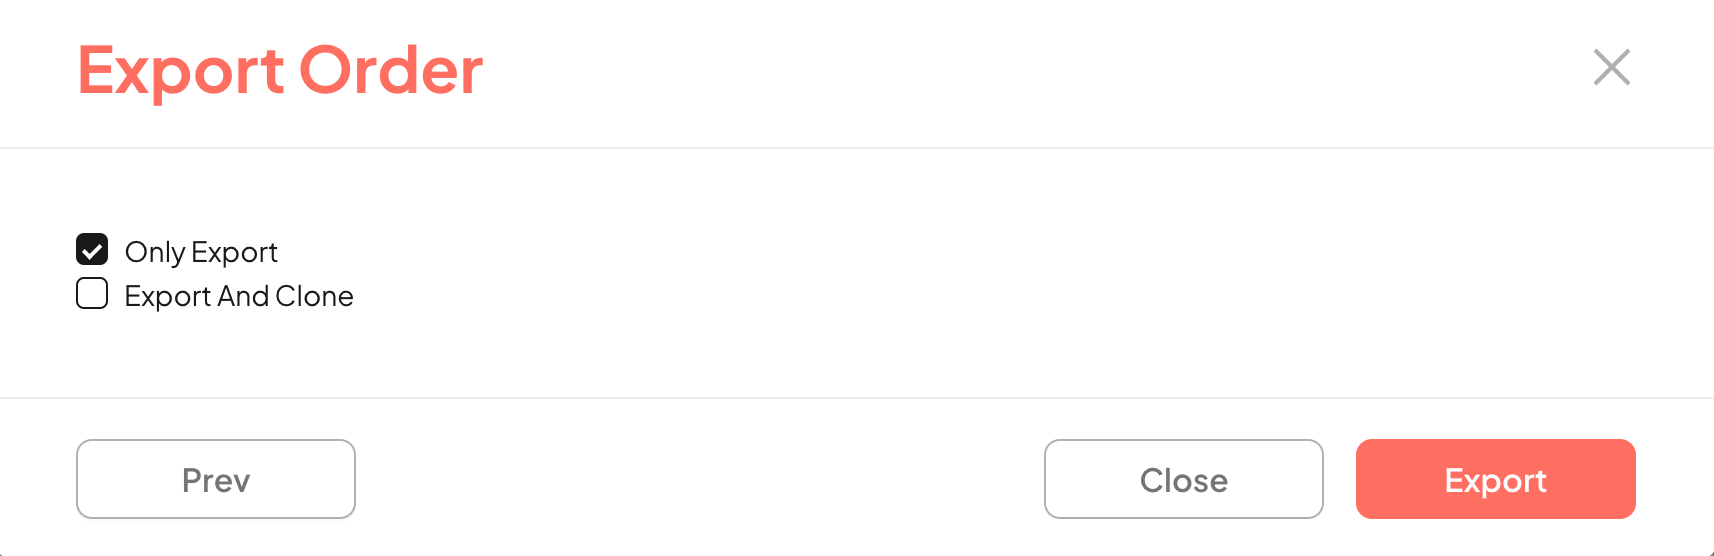
Step 4: Select Export
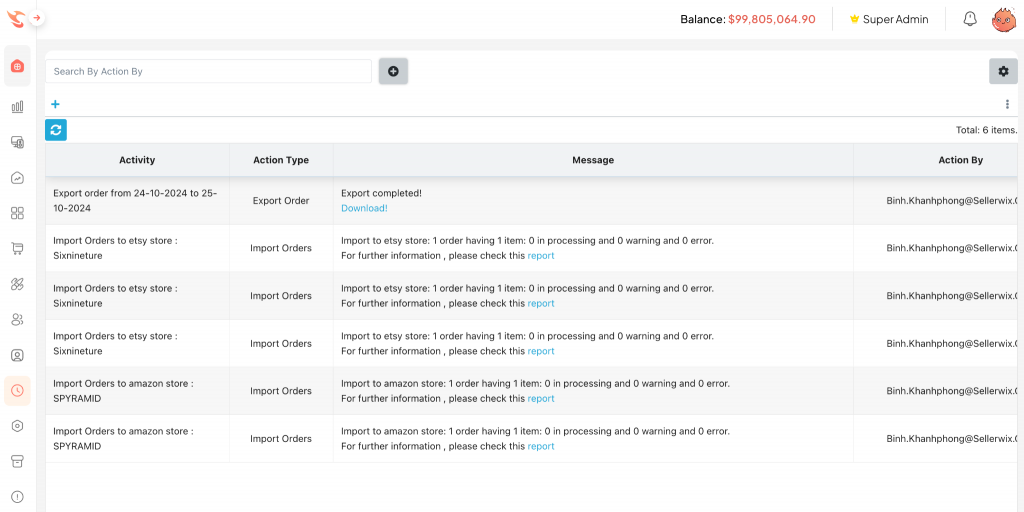
- Step 5: Click History, select Import/Export.
- You just need to select Download to download the Export file.
⚠️ Note: When importing orders, Purchase date should be included, otherwise that order cannot be Exported.
8. Upload Design
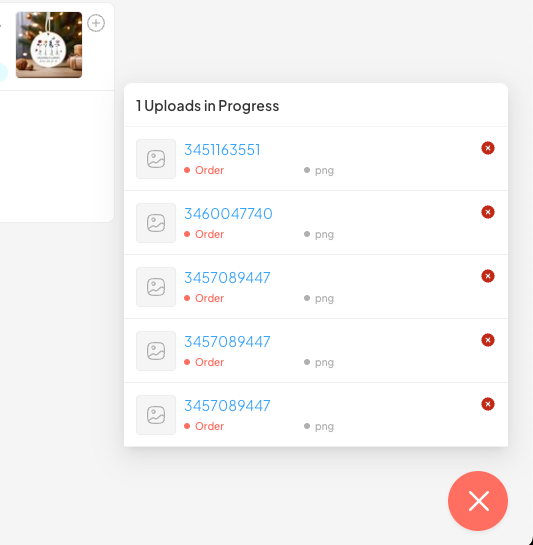
The system has a Floating Upload Icon
1/ Description: This function allows users to upload and monitor file upload progress from any page on Bivasoul via a floating upload icon, always displayed on the screen.
2/ Purpose: Helps users easily manage file upload progress without having to leave the current page. Optimizes user experience by reducing the time to check upload progress.
3/ Benefits:
- Smooth experience: Users can easily manage upload progress without leaving the current page.
- Minimize errors: Detailed monitoring of upload status helps users quickly detect and handle errors.
- Optimize time: Save time by allowing bulk uploads and checking status directly on the main interface.
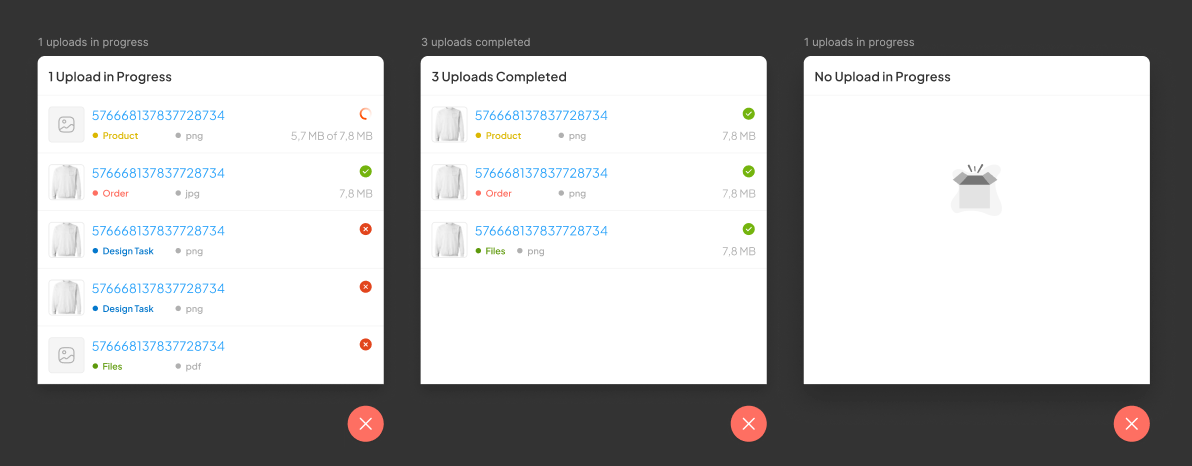
Key Features:
- Display upload progress: The floating icon will display the upload status of each file, including the number of files being uploaded, completed, or failed.
- Check upload status: Users can easily view details about the file being uploaded, file size, and completion status (completed, error, or processing).
- Manage files by group: Files are categorized into categories such as Product, Order, Design Task, and Files.
- Direct link: Click on the file name, the system will take the user back to the file’s previous upload location.
Try it out today and let us know what you think!
For our complete list of Bivasoul Features, check out our Bivasoul Feature Release blog.
With insightful experiences in the eCommerce market, Bivasoul will be the fully integrated solution to manage and grow your business effortlessly. Let’s meet at [email protected] or [email protected] if you need any help. Follow our blogs to stay on top of Print On Demand trends!
Level up your multi-channel print-on-demand business
Share this post